Cora Sew Along – Day 2
Hey friends! Welcome back for day two of the Cora sew-along. Today we are working on the optional wave pleated bodice. We will work our way through steps 1 through 10 of the tutorial. I also have a video tutorial that I will upload into the Facebook fan group to help guide you.
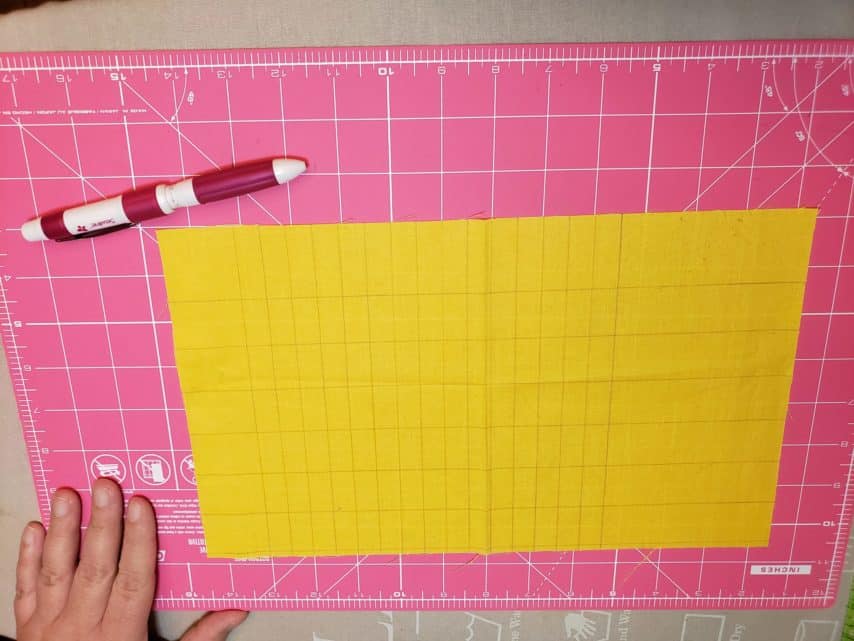
Creating Pleat Guidelines
The first thing we need to do is create guidelines on our fabric rectangle to create the pleats. With your rectangular piece of fabric laying in front of you in “landscape” position, begin by measuring 1.5″ from the left short side and draw a vertical line down your fabric piece. Move your ruler over 1/2″ from the first line and make another mark. Continue to move and mark 1/2″ lines until you have the amount of lines listed in the chart on page 7 of the tutorial. Note: there will be extra fabric beyond your lines on the right side of your fabric.
Now we need to draw horizontal lines. These will become the waves lines for our pleats. Measure down 1.5″ from the top of your rectangular fabric piece and draw a horizontal line across your fabric. Next, measure down 1″ from the line you just drew and draw another line. Continue moving down 1″ from the previous line and mark lines until you reach the bottom of your fabric piece.
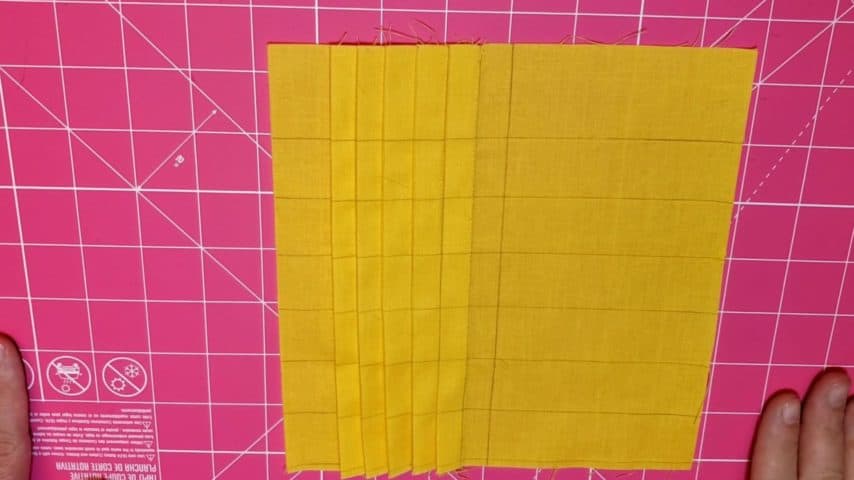
Creating Pleat Folds
Starting on the left side of your fabric piece fold the fabric so that lines 1 and 3 match up with line 2 becoming the crease. Press the fold making sure everything stays nice and straight. Topstitch the pleat 1/2″ from the fold (you can use line 1 or 3 as a guideline for your topstitching).
Next, take line 4 and match it with line 6. Line 5 will become the crease. Press the fold. Again, make certain that everything stays nice and straight. Topstitch the pleat 1/2″ from the fold (you can use line 4 or 6 as a guideline). Continue matching lines and creating pleats until you have the amount of pleats listed in the chart on page 7 according to the size you are making. Note: You will have an extra line at the end when you have finished making all of your pleats.
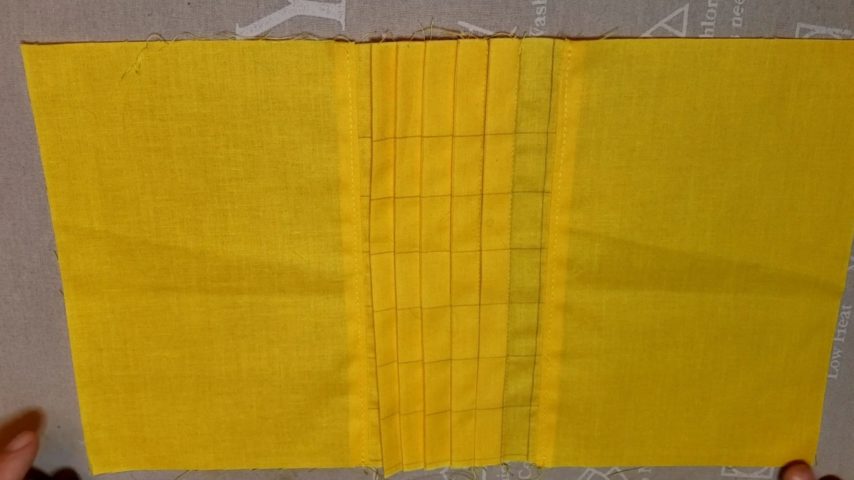
Adding Side Panels
Before we can sew the side panels to the pleated panel, we need to trim the pleated panel. Make sure all of your pleats are pressed to the left. Starting on the left side of your pleated panel, measure 1/2″ from the creased edge of the pleat and trim off the extra fabric. On the right side of your pleated panel measure from the last line over 1/2″ from that mark and trim off the excess fabric. Note: the right side will be 1″ from the last pleat stitch.

Next, take one of the side panels and place it right sides together with the pleated panel. Match up the raw edges and sew in place. Repeat with the other side panel.
Push your side seams that you just created toward the outward raw edges. Topstitch the seams down 1/8″ from the edge of your seam. Press your piece until it lays flat.
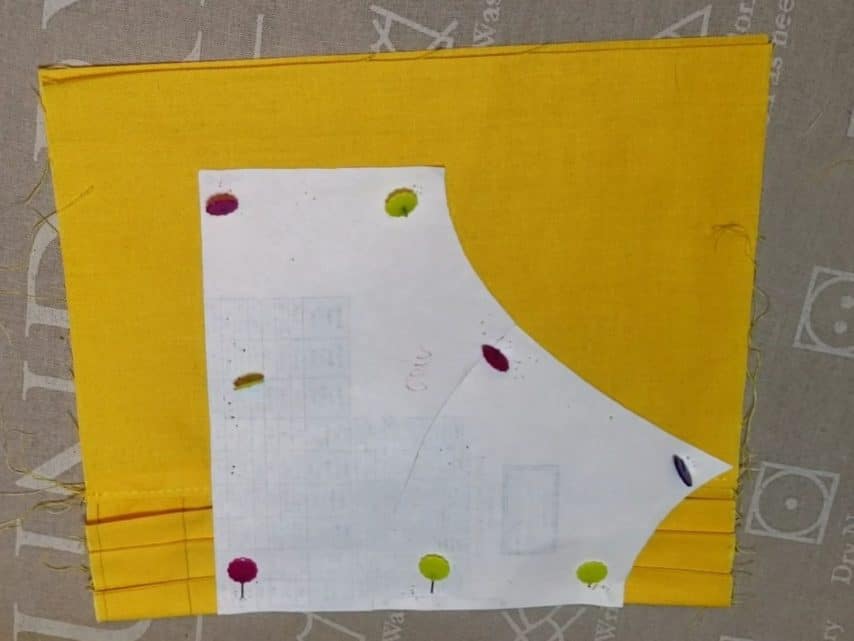
Cutting The Bodice
Fold your wave panel piece in half so that wrong sides are together. Make sure to match up the side raw edges and the seams where you sewed the side panel pieces to the pleated panel. Lay your front bodice pattern piece on top of the panel. Match the fold on the pattern piece to the fold of the fabric. Note: the fold of your fabric should be centered on the wave panel. Place the pattern piece as close to the top as possible. Cut out the front main bodice piece.

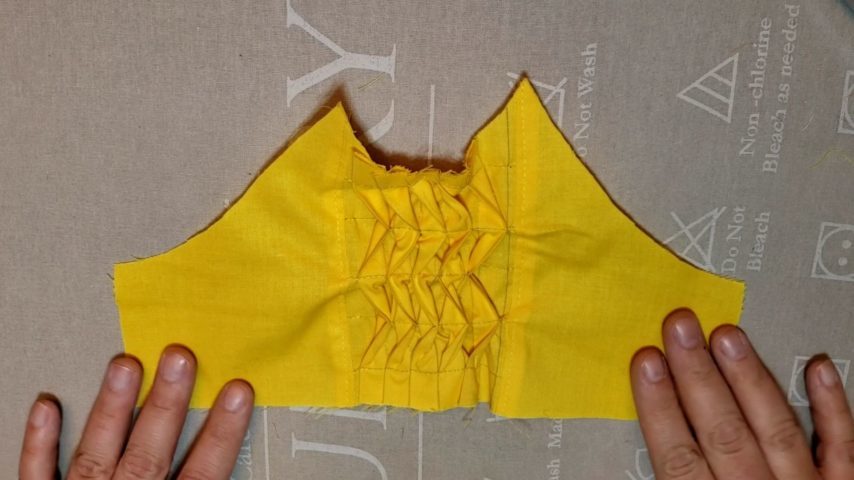
Making Waves
Now it’s time to sew the waves! Begin by sewing across the top horizontal lines on your bodice piece so that the pleats are sewn down flat. Next, push the pleats to the opposite side of the bodice. Sew along the second horizontal line to sew the pleats down flat. Note: it is easiest the full a few pleats back at a time and sew them during this step.
Continue to sew across your horizontal lines, making sure to switch directions of the pleats each time. Note: your bodice will not lay flat because of the pushing/pulling of the pleats. This is okay! Lastly, at the bottom of the bodice, push the pleats one more time and stitch 1/4″ from the raw edge so the pleats are waving all the way down the bodice.
Day 2 Progress
That’s it for day 2! If you get stuck or have any questions please feel free to reach out to me in the Facebook fan group. Also, don’t forget to upload your daily progress photo into the sew-along album for a chance to win FREE daily shop credit.

Happy sewing,
Chauncey