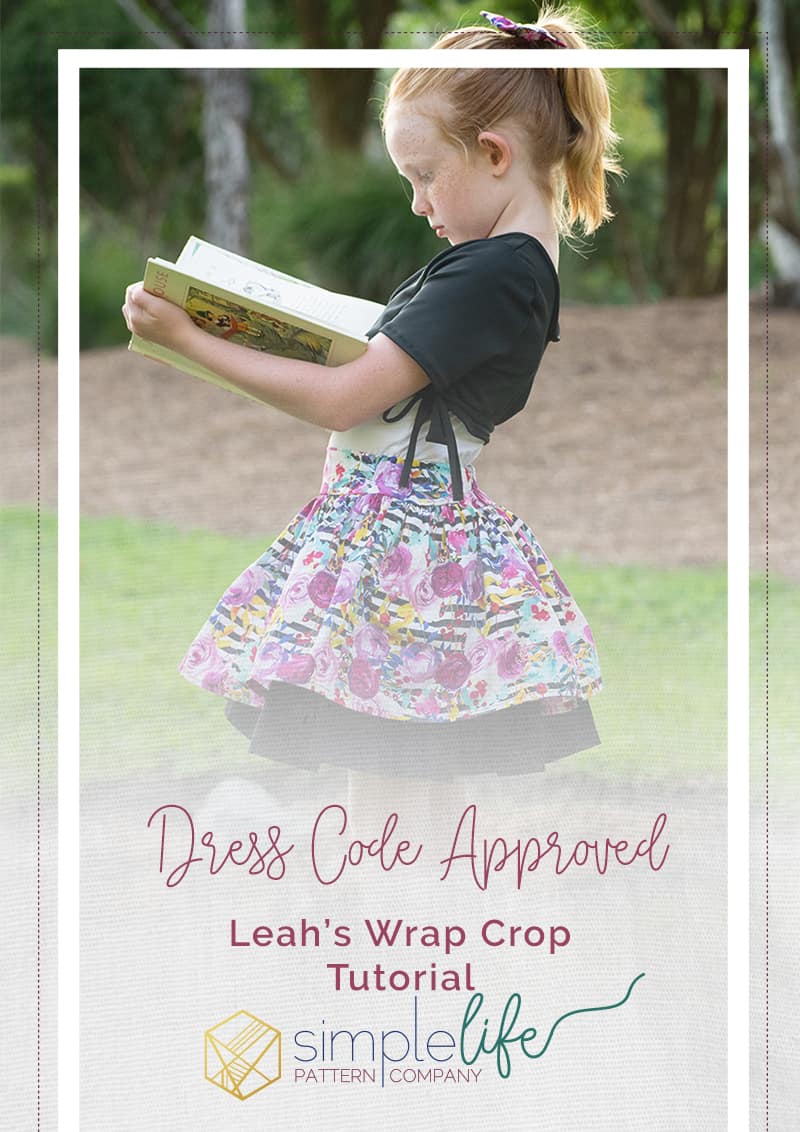
School Dress Code Approved-Leah’s Wrap Crop Tutorial
Hey all, Tara here! It’s already time to start thinking back-to-school and I have a SLPco. hack that will come in handy! Being in a warm weather climate my girlie has tons of tank-style and sleeveless dresses in her wardrobe. These dresses are fantastic for keeping her cool, but once school starts they go to the back of the closet, as they don’t fit the dress code and it’s just too hot for a zip-up to go over. I have been looking for a ballerina style top to cover those straps for ages, and while browsing the SLPco. site Leah’s Wrap Top jumped out as the perfect base! Leah is such a beautiful woven wrap top as is, but I couldn’t help but wonder if I could hack her to be crop length, banded, and knit for easy on/easy off. After a little toying with sizes and length I found a style that totally works, is cute (girlie approved!), cool enough for our warm months, and most importantly school dress code friendly! So grab your Leah pattern, and let’s get started on the Leah’s Wrap Crop tutorial!
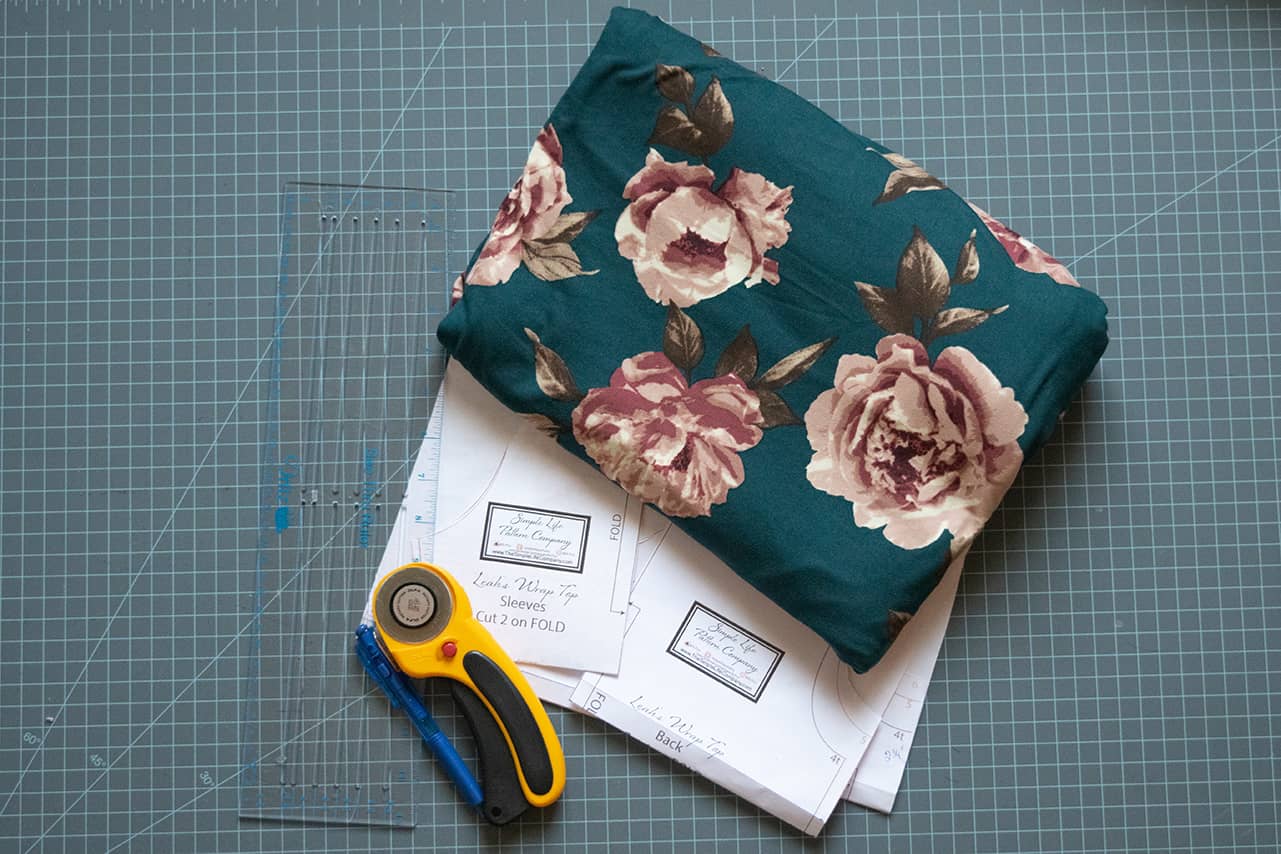
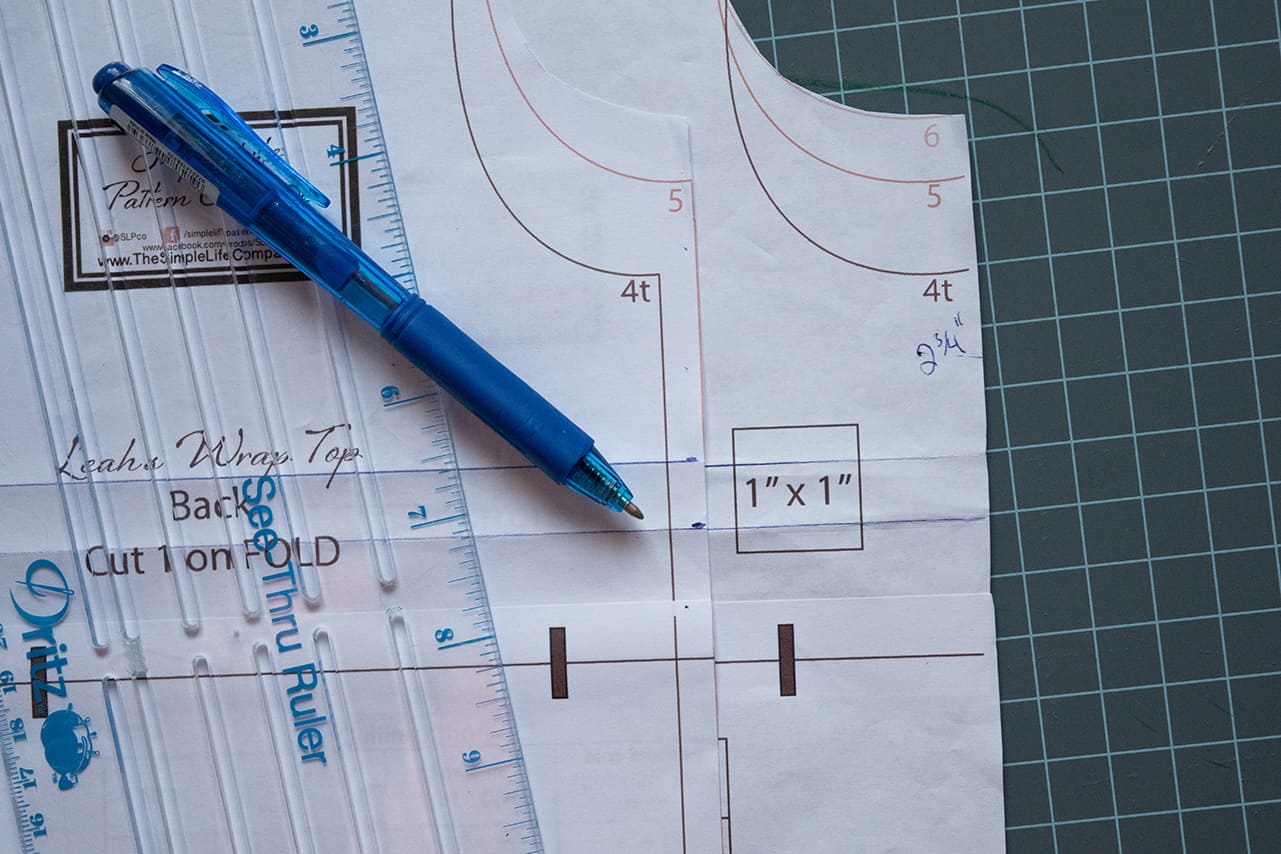
First, gather supplies. This includes your pattern, fabric, a straight edge, cutting tool, clips, etc. So far I have used cotton lycra, double brushed poly, and a poly lycra blend. All of these fabrics worked great! Leah has great ease in the arms, so I believe any stable knit will work well! When printing I would suggest sizing down in width 1-2 sizes than measured. As you’ll note in my next picture, I have sizes 4, 5, & 6 printed. I ended up using a size 5 width with the 6 height. My daughter measures a 6 for Leah, but for knit I sized down width one size (as to leave growing room through the fall).
Before cutting fabric, we will want to mark our cropped line on the pattern. The length of your crop is personal preference, but I measured about 3/8″ from the wrap edge of the front bodice, then brought that line straight across to the opposite edge under the armscye. As shown this measured down 2 3/4″ from my armscye. Once the front piece is marked, grab your back bodice piece and mark down the same amount from your armscye (the 2 3/4″ shown on my pattern piece), draw a straight line across.
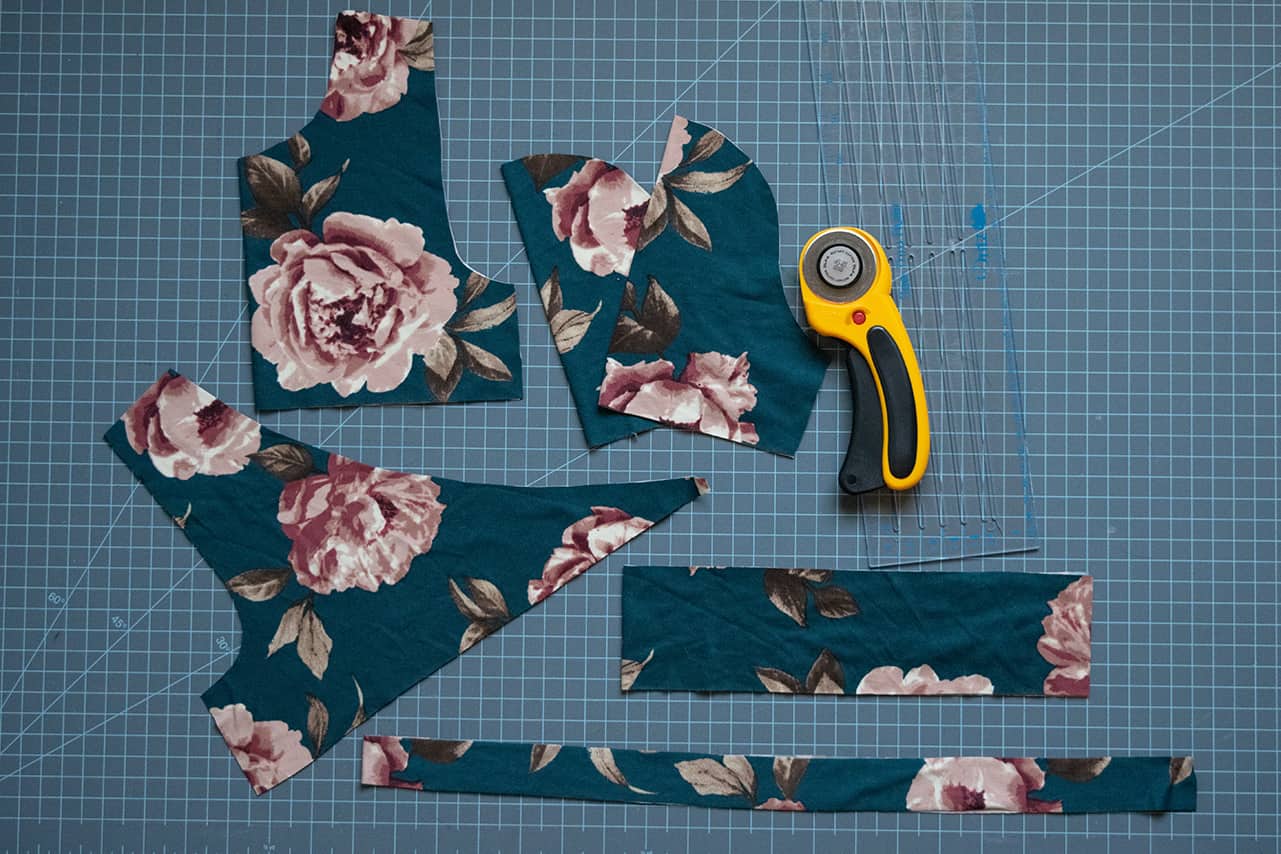
Next we will cut our pattern pieces. I found that the traditional short sleeve worked better in knit than the pleated, but that is totally up to your preference! In this picture you will notice the two extra strips cut. One is the binding, the other the bottom band. We will get to these measurements later.
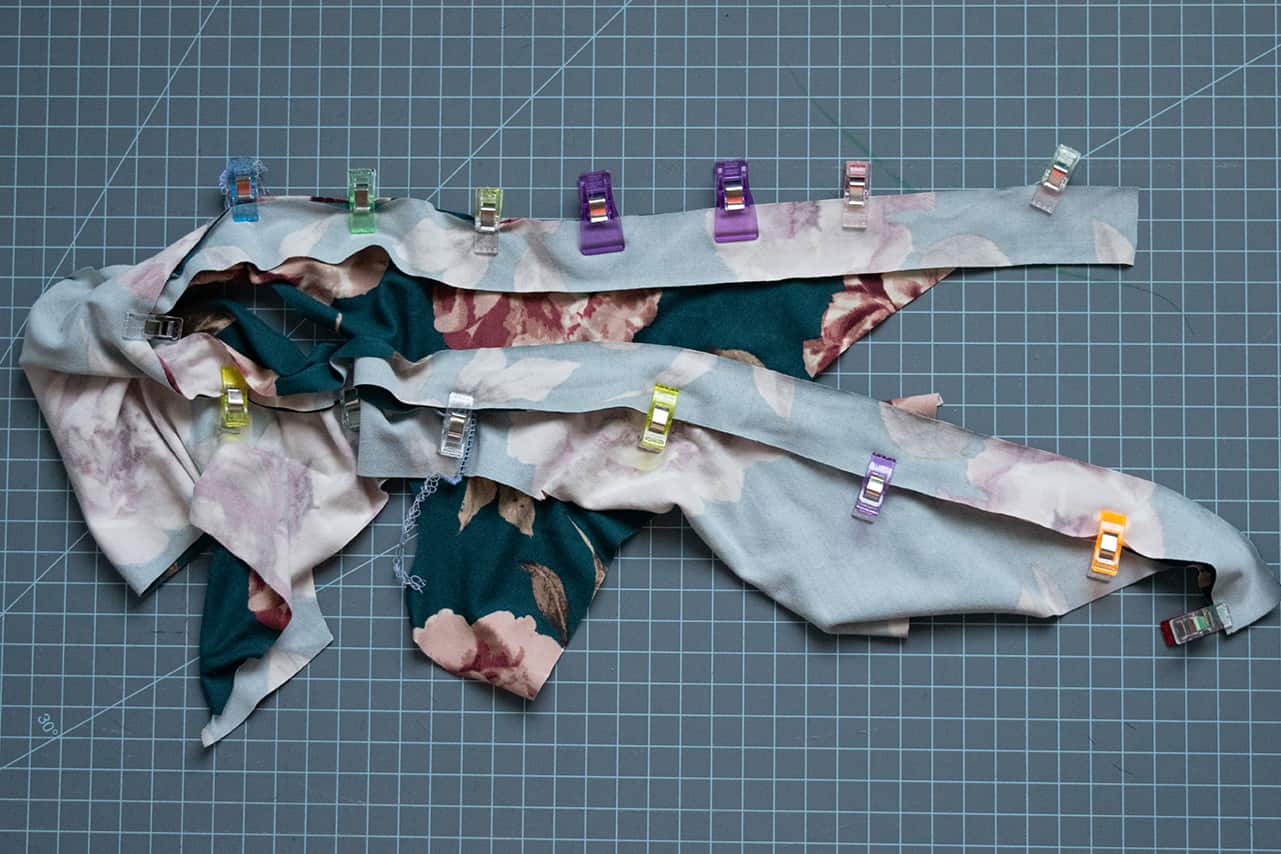
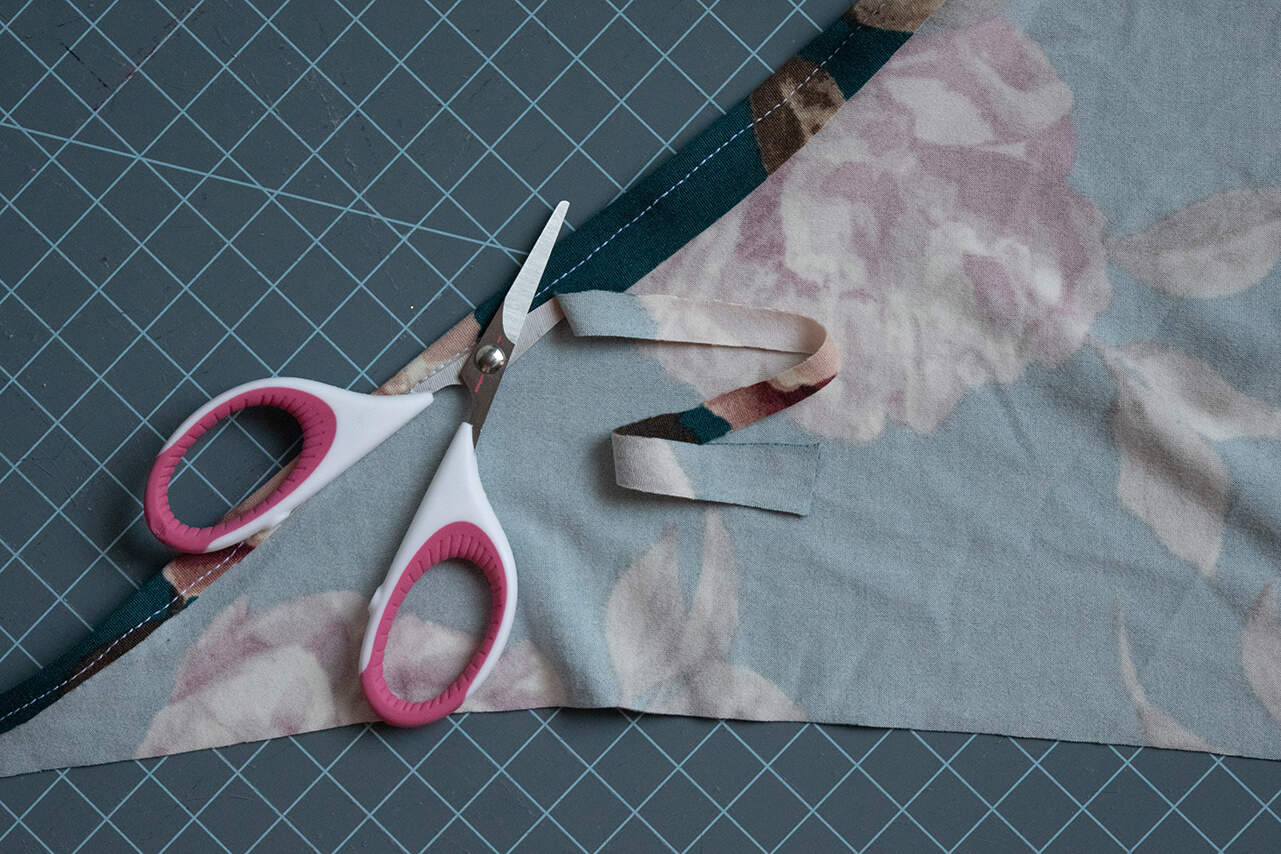
Follow the pattern seam allowance to sew your shoulder seams, then fold the bodice in half from the center back. Lay your bodice, in half, flat and straight. Measure the width from the center back to one front bodice edge. Multiply this measurement by two. This will be the width we use to cut our binding piece. I used the length (short end) of bias noted in the pattern, by the width measured on my neckline. Add an extra inch to the end when you cut just to give yourself a little wiggle room.

Next, attach the binding to your bodice. You may follow the Leah pattern instructions for doing so or, as we are using knit, do a single fold binding. I chose the latter, but either would look great (difference being single fold will show on the front, the binding in the pattern will not)! To do the single fold, clip or pin one side of your binding to the bodice right sides togehter (making sure not to stretch either! This is a 1:1 ratio). Sew or serge. (Note, serging is definitely not necessary, but I do like the firm edge it gives me to wrap my binding around)
After sewing your binding to the right side of your bodice gently pull the raw edge of your binding to the wrong side of the bodice. Clip or pin. Sew the binding down, close to the seam, using a stretch stitch or looser straight stitch.
To finish your single fold binding trim the excess fabric, clipping very close to, but not through your topstitch.
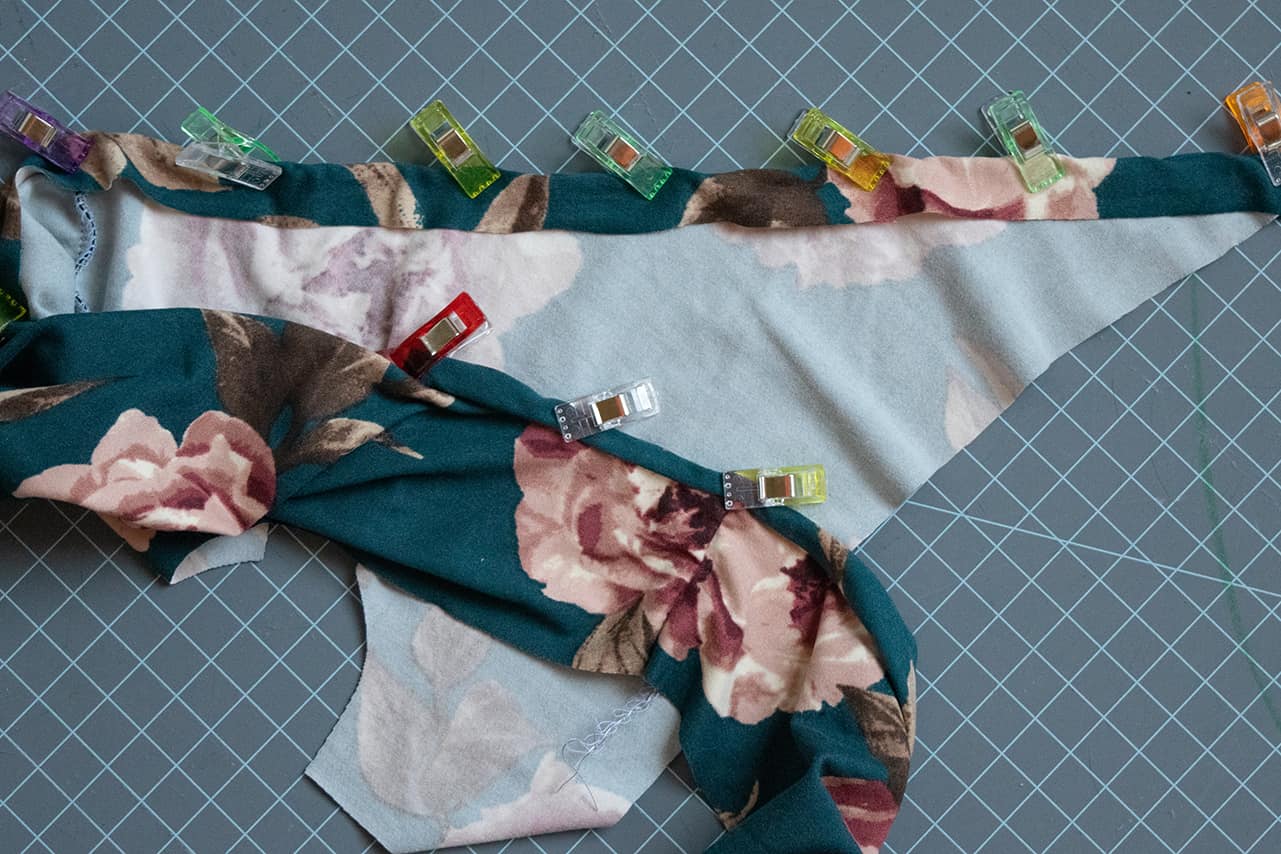
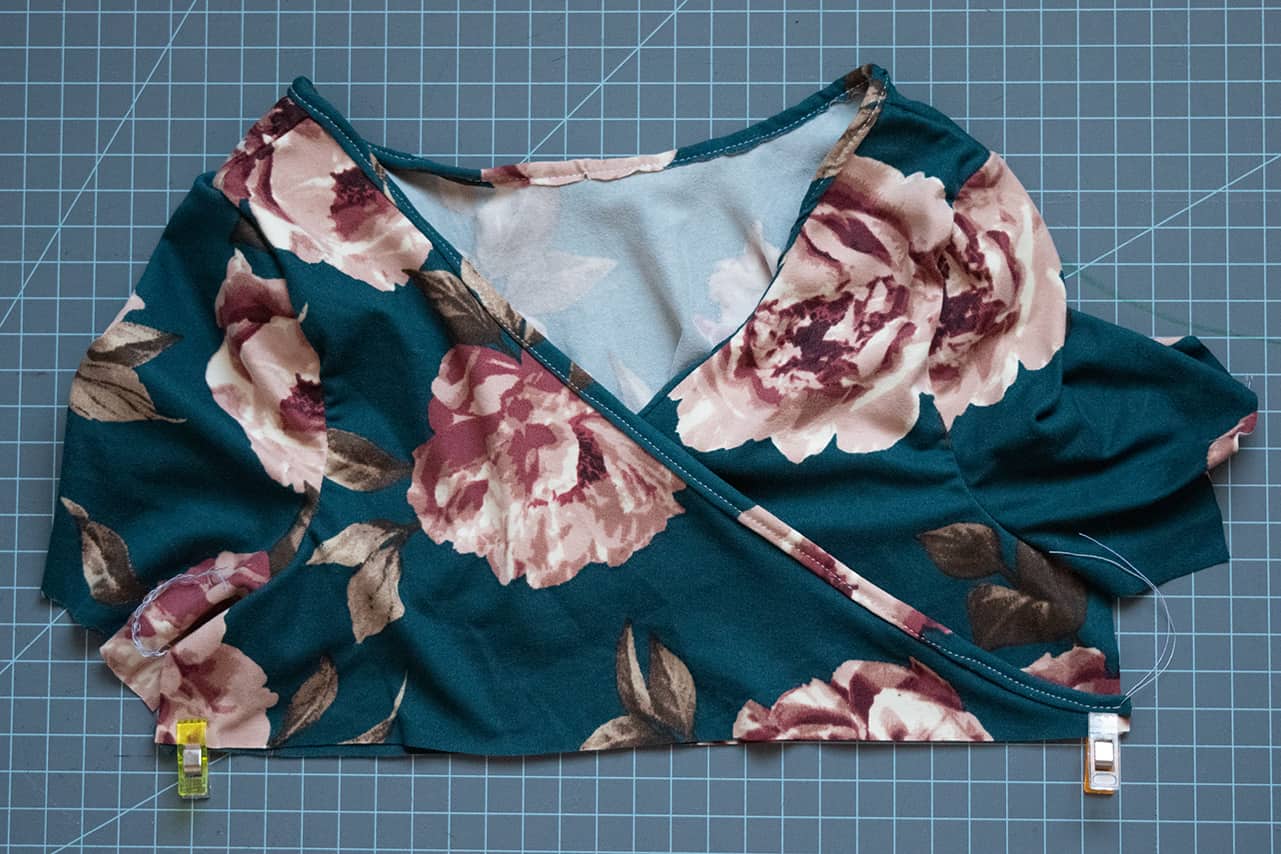
Now we will work on making our bodice look like a bodice! Lay your bodice flat. Choose which side of your front bodice you want on top. Clip each faux-wrap edge in place with the raw edge of the side seam. Baste in place. After the side edges have been basted together, baste the bottom raw edges together, as well. This will stabilize your bodice as you attach your band later on. Sew or serge your side seams, and finish sleeves as noted in your Leah pattern.
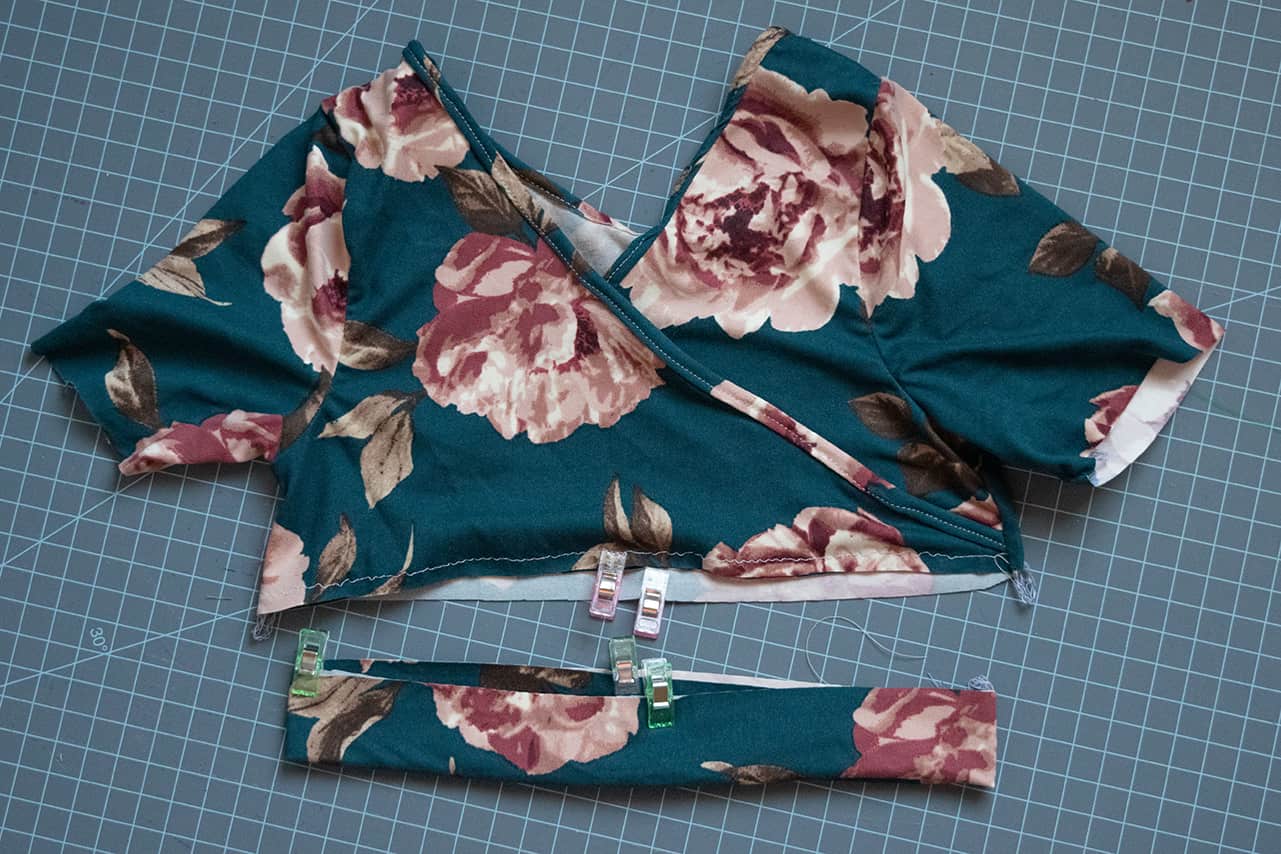
Once again, lay your bodice flat. Measure the width of either the front or back of your bodice. Multiply this by 2. This will become the base for our band measurement. Typically for a band you would cut it at 80% or 85%. My girlie felt comfortable in a band cut at 85% and the bodice looked clean without bunching, so that is what I stuck with. If you’d like more ease, I would go with closer to 90%, or tighter, go with about 80%. (*remember to also include seam allowance in your measurement! I used 1/4″ seam allowance to sew the band sides together, so in total added 1/2″). My band measurement came to 3.5″x22.5″. Fold your band in half, so short sides are together, and sew. With wrong sides together fold in half again so raw edges are together. Now our band is ready to be attached! Before clipping in place, find and mark your quarter points of the band and bodice (like shown in pic below). Match these points, and clip your band in place, band laying on top of bodice. Sew or serge (I used 3/8″ seam allowance when attaching band to bodice) making sure to stretch your band only, do not stretch your bodice!
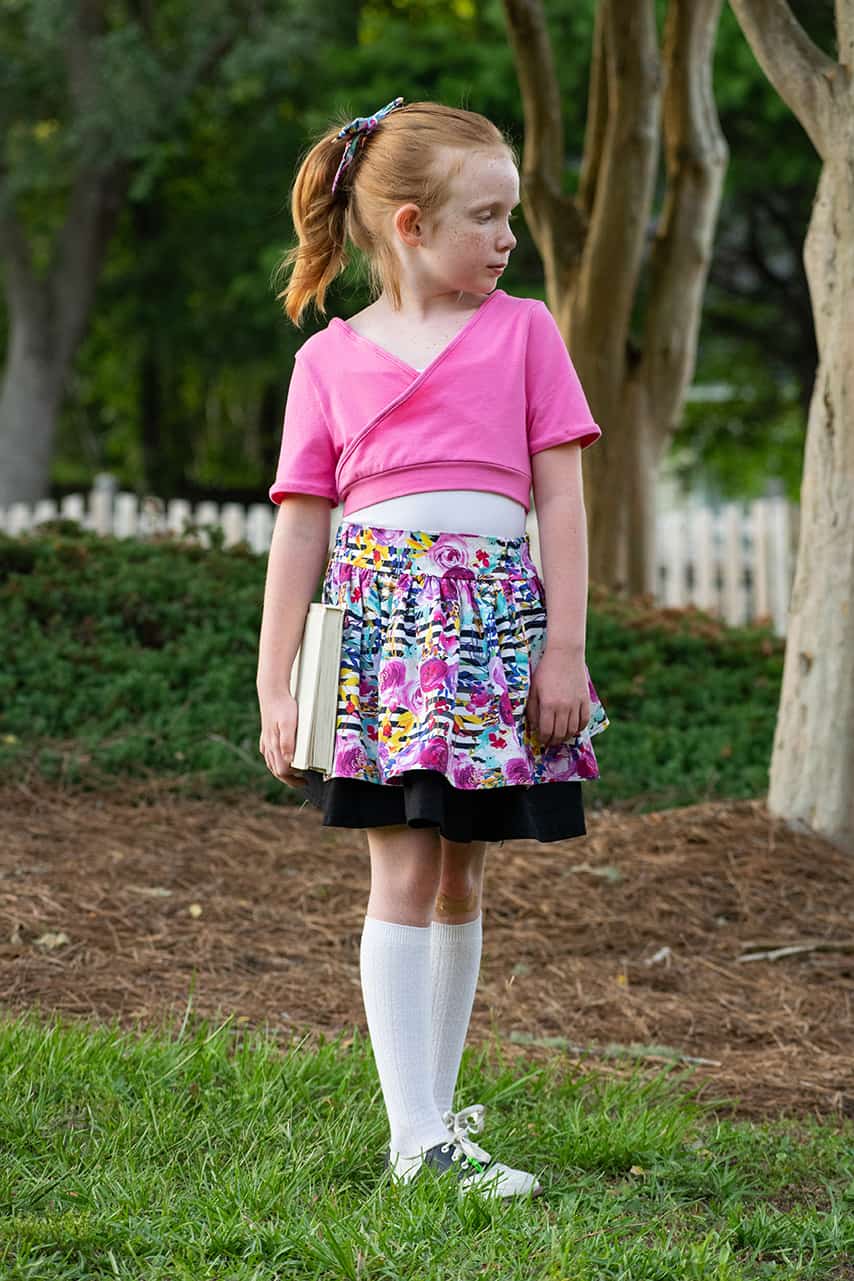
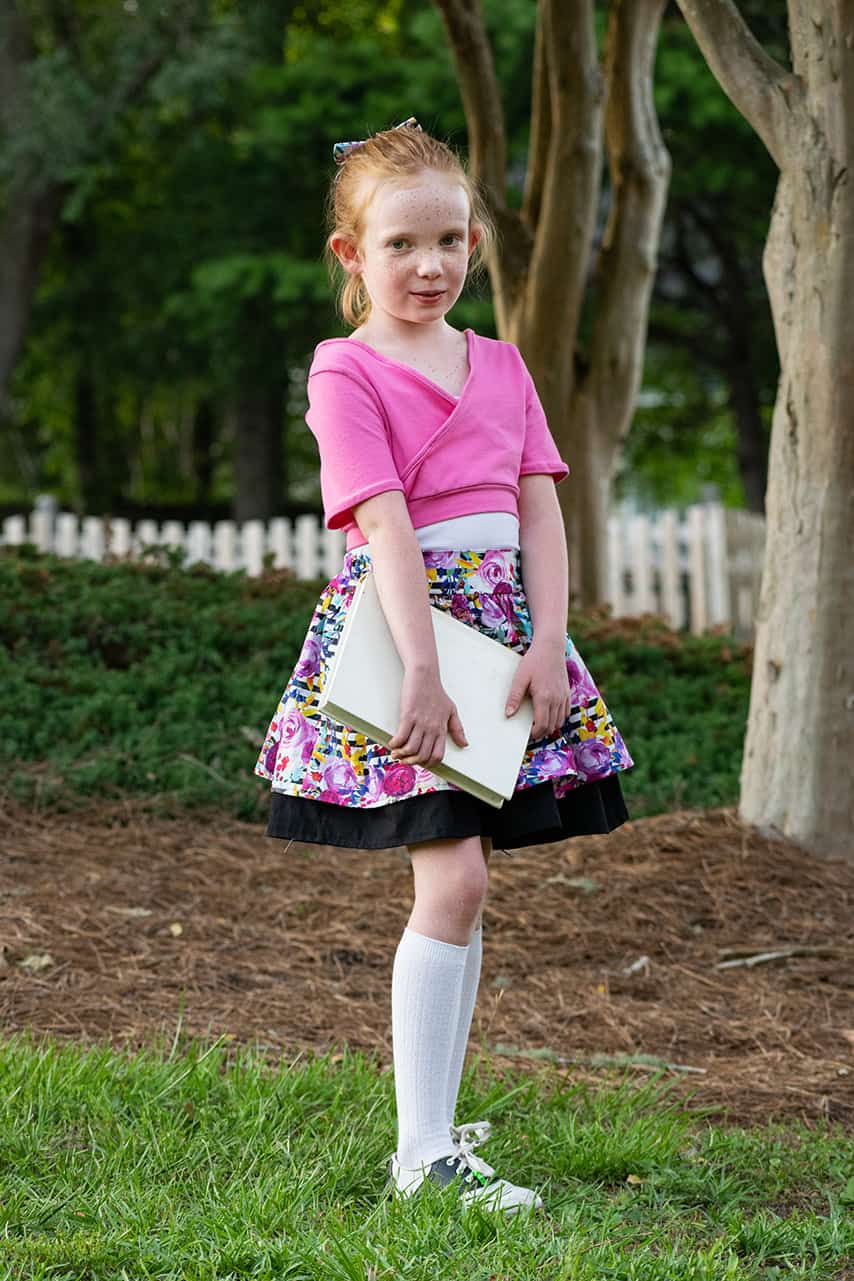
Finally, flip the band down, press the seam up, if preferred, and add any embellishments to the bodice. Your cropped faux-wrap top is complete! Now your girlie can wear all of the tanks and sleeveless dresses in her summer wardrobe to school, too!

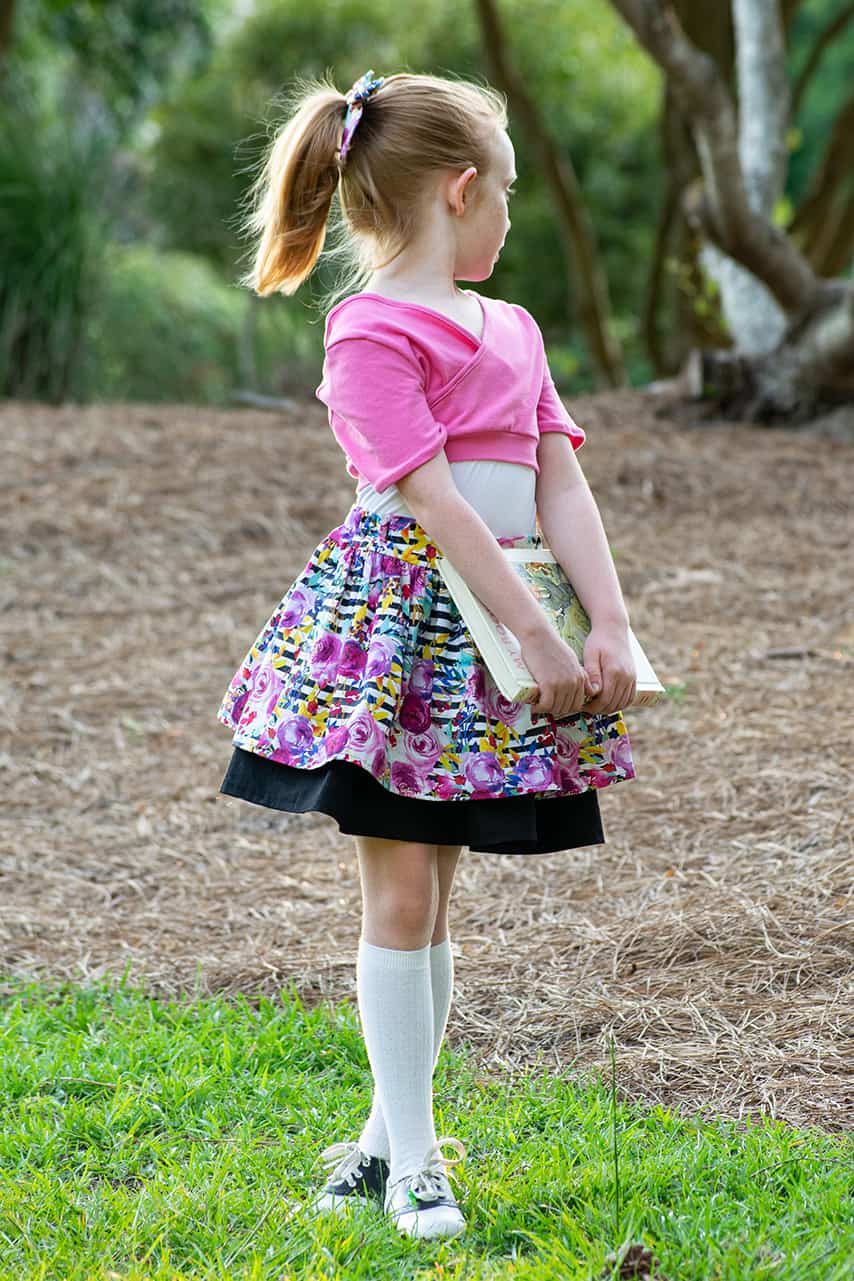
Thanks for following along with me! I hope this hacked Leah will be as much of a back-to-school staple for you as it has already become for me! We love how it looks with sleeveless SLPco. dresses like Patricia, Riley, and Kyra, but how cute is it paired with Daphne’s layer skirt and a tank?! So many ways to style a cropped knit Leah!
Thank you all, again!
Tara
Fabric for tutorial is Double Brushed Poly from So Sew English Fabrics.
Finished back to school outfit is a Cropped Leah in Cotton Lycra from The Purple Seamstress and a Daphne’s Layer Skirt with Luxury Cotton from The Styled Magnolia