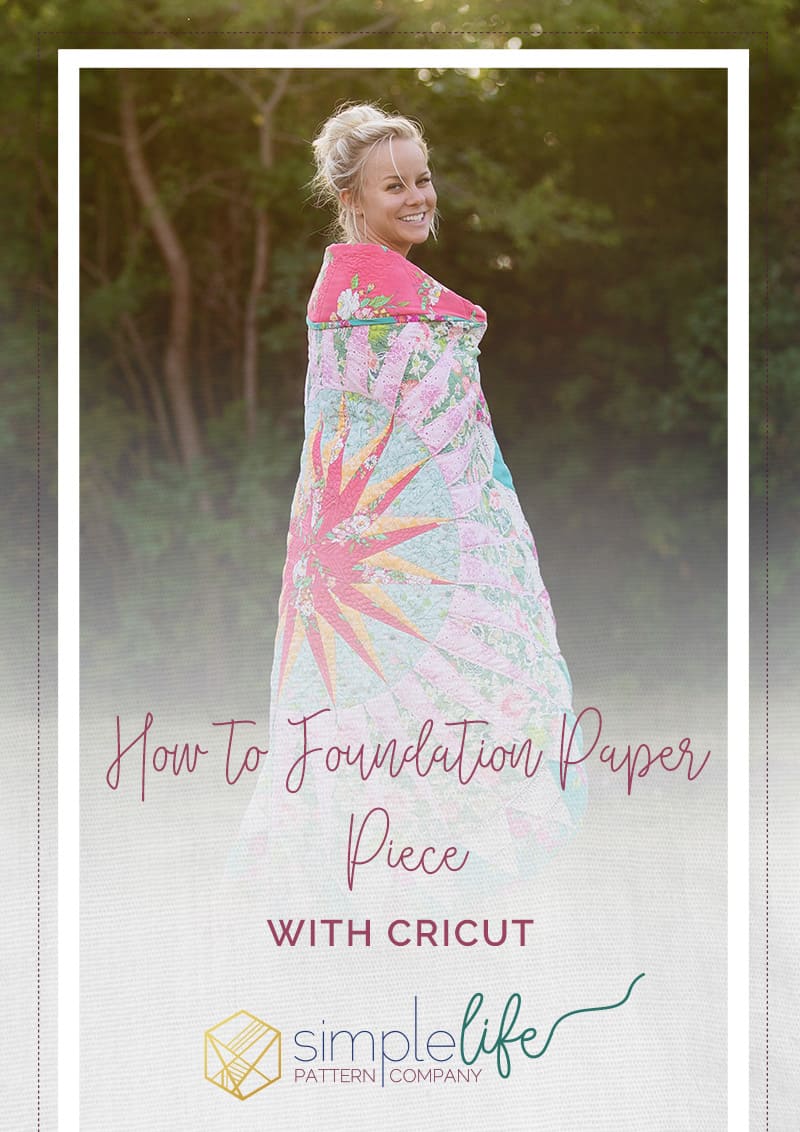
Foundation paper piecing made easy with Cricut
Oh boy do I have an amazing freebie for you today. I hope you all love this because this was a labor of love – but you all are worth it! <3 Foundation paper piecing has been my favorite form of quilting since the first time I ever tried it. You get extreme precision and the sharpest points by using this method. There is something so relaxing about it. Once you start, you get in your grove and you just cant stop. Its that much fun. Paper piecing patterns can get pretty expensive, especially if you want one that has templates. So I decided to share with you a super amazing (and did I mention free) “Seafarer’s Quilt” pattern that includes so many different options. The one thing that really excites me is that I have included a project already set up in Cricut’s Design Space. Here you can cut all your pieces out using your Cricut Maker! I cut out this whole quilt one morning while I cleaned the house! I just swapped mats when I walked by it. There is nothing better than perfectly cut pieces to start your quilt. 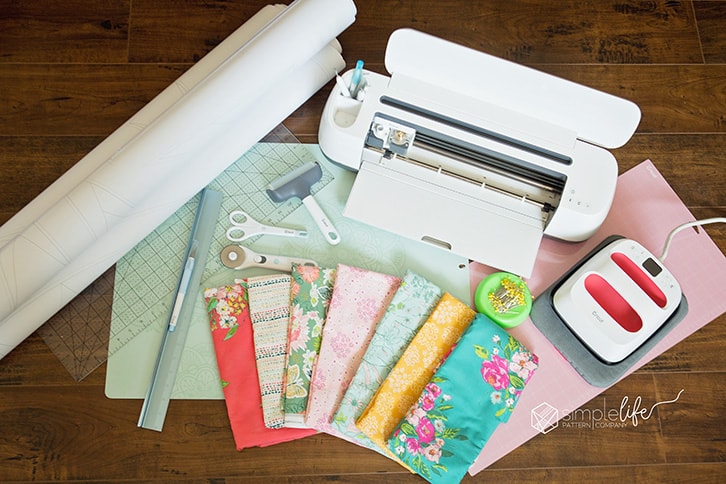
This was a pretty big project so I created a downloadable PDF for you – you can grab that HERE in our freebie section. I will go over the main points here on the blog for you too. Plus – I managed to sneak in a little video to show you step by step how to foundation paper piece. Trust me – this will not be my last paper piecing patterns. I am so addicted! After I finished up all the boring stuff, I went to my fabric stash and auditioned fabric collections for the quilt. I had Sharon Hollands newest collection “Signature” sitting on my table and I new that was going to be it. I use a lot of Sharon’s fabrics for my house – it just goes so nicely with my decor. So I played around for a long time with fabric placement until I came up with this.
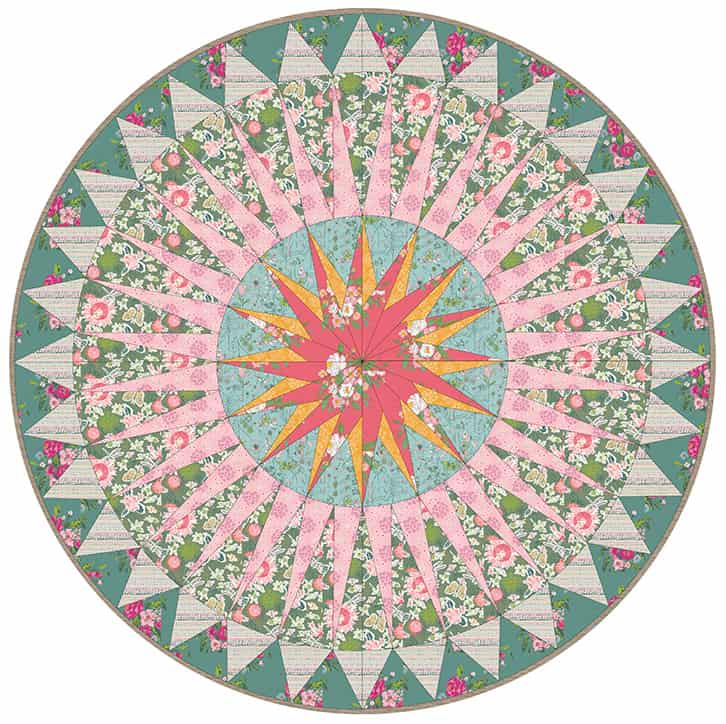
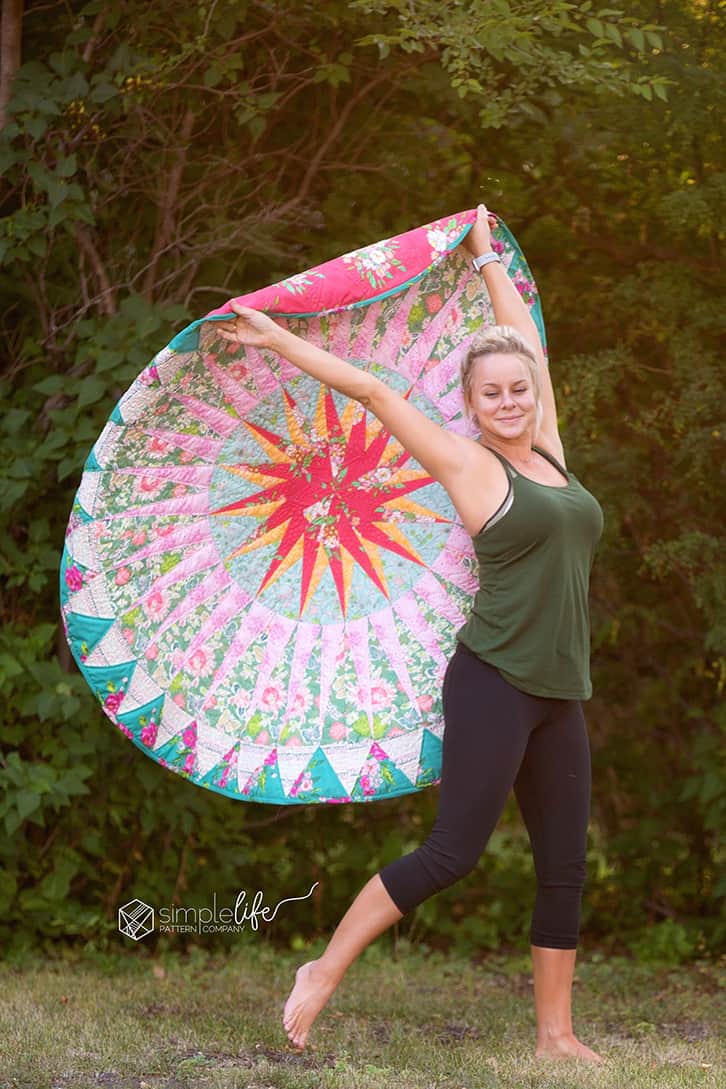
I started this whole project by drafting a New York Beauty block for another project and I started thinking – how fun would it be to make a circle quilt – forget the traditional square/ rectangle – I wanted to try something new. So here we are – The Seafarer Quilt that is 60″ wide (or square if you go that route). This is for sure the biggest block I have ever made now.
Lets just dive in – here is what you will need to make this:
Cricut Maker (to cut your fabric)
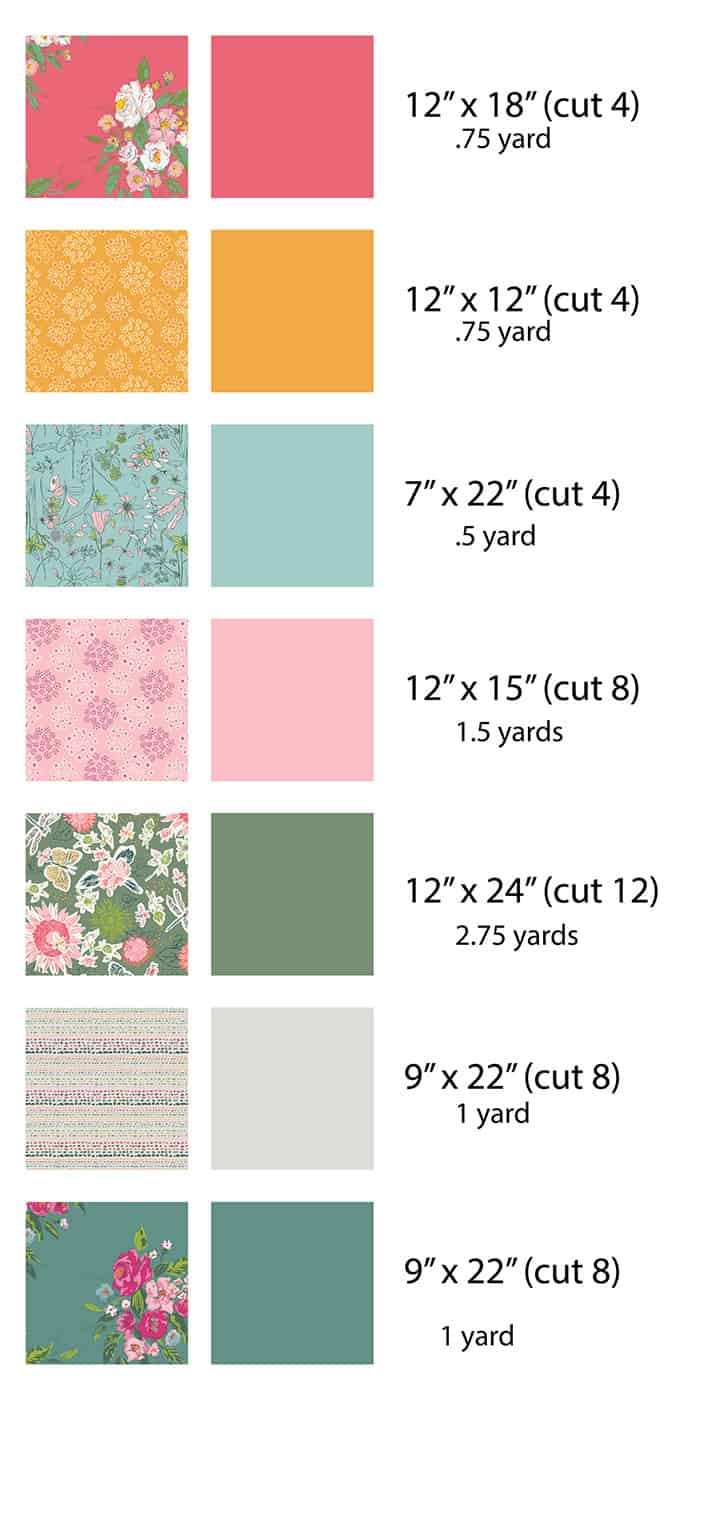
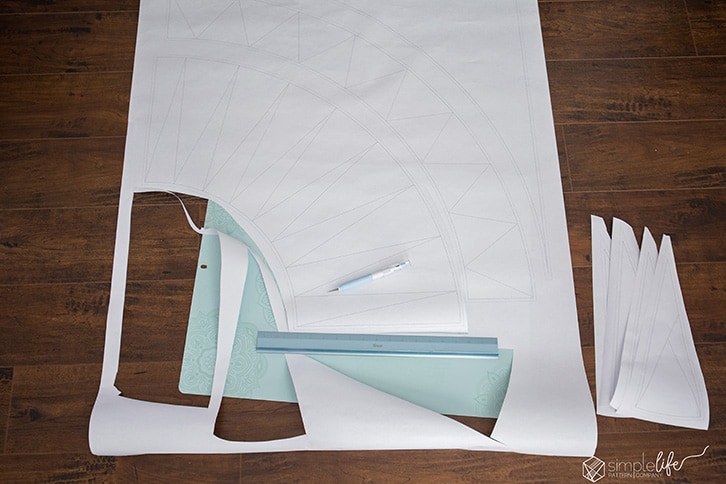
Foundation paper pieces (these might need to be ordered online since the file size is large – 36″x48″ so plan ahead – scroll down a little to find out about ordering online. For those that don’t mind taping their pieces together, I included letter/A4 file size as well at the end of the pattern tutorial).
Rotary cutter / mat / 12″x 24″ ruler
Ruler 3″ 16″ (optional – I like this size for trimming down your fabrics when sewing)
Cricut EasyPress 2 small (I am using the new EasyPress 2 – a regular household iron works too)
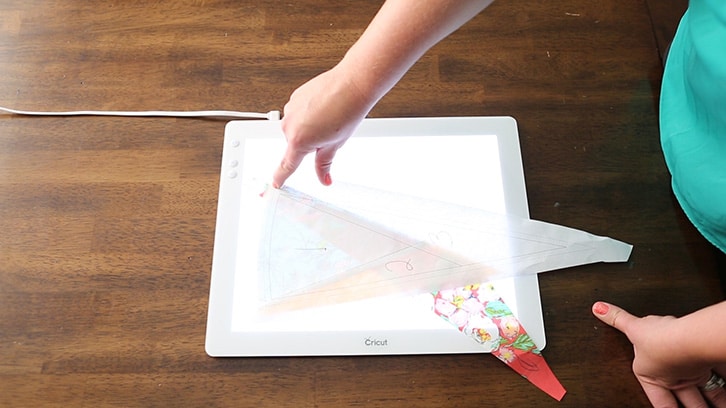
Cricut BrightPad (optional – but this is seriously very helpful)
True control knife & Ruler (this is great for cutting those huge paper pieces fast and easy)
Batting (I used Hobbs wool batting – if you are going for a lighter/ summer quilt, I highly recommend Hobbs Tuscany silk)
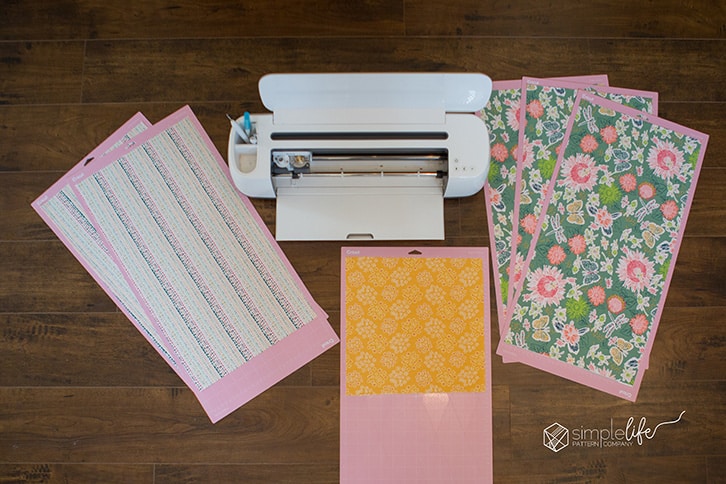
First – lets prep the fabric for the Cricut Maker. If you are making your own templates, you can go ahead and use those and cut all your pieces out.
This is where that 12″x24″ ruler comes in really handy. I can stack a bunch of fabrics up and cut them all at once.
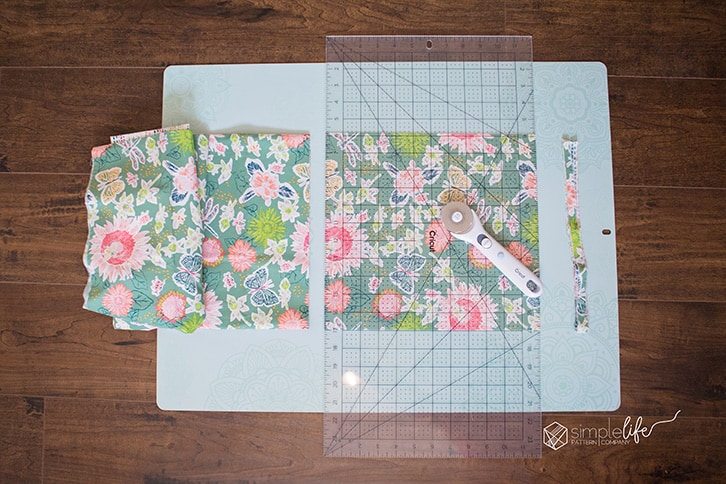
I like to starch my fabrics before I cut them out. This step is optional. I LOVE the Best Press starch in linen. My whole dining room smelled so pretty after pressing all these. I buy the super big bottles and transfer it to a smaller spray bottle.
Yay – fabric is cut and starched- time to prep my Fabric Grip mats and start cutting. I have 6 fabric grip mats so I could spend a few minutes – load them all up and go back to cleaning.
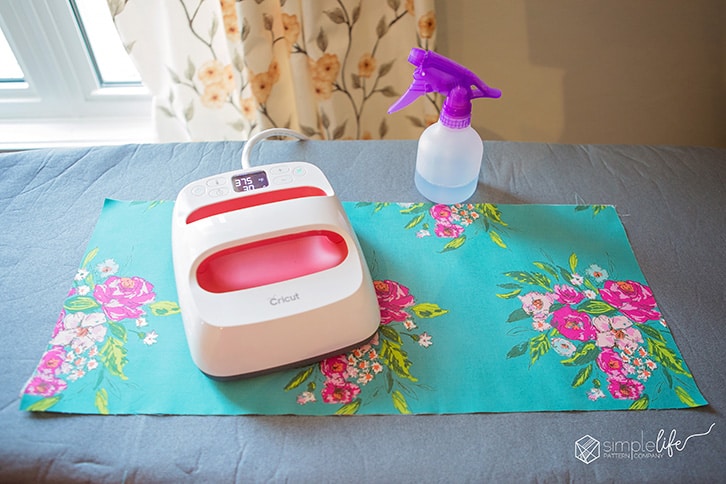
The Maker getting ready for some action. I love the adaptive tool system. I mainly use the rotary blade to cut tons of different types of fabrics from delicate to burlap) but I have been using the knife blade more and more as well. I love that I can do other things while it is cutting my whole quilt out for me.
and here is the reality of it all

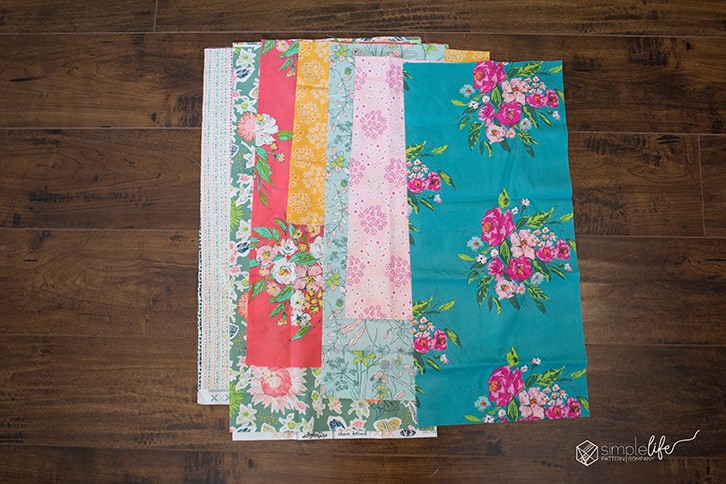
and this is what you get! Look at all those perfectly cut pieces!

I ordered my large foundation paper pieces from BluePrintsPrinting.com – I use them for all my large format needs (in case you didn’t know, tons of our patterns include an A0 file that you can take to your favorite copy shop – or order online). Blue Prints Printing has offered SLPco fans a 10% discount on order of $33 or more. Use code slp-intro10 You need to print 4 of these pages (or 4 copies of the letter/A4 files) Each page is only 1 quarter of the quilt. If you are printing at home, you will need to print 4 sets – its a bunch of pages but sometimes thats more convenient than waiting to have them shipped.
I used my True Control knife and Ruler to slice these out super fast. I don’t cut right now the lines – leave some room on the outside of your seam allowance. You will trim it all down nice and neat later.
Okay – lets get started on foundation paper piecing now! I made this fun video on how to do this and piecing the units together. Check it out and subscribe to my YouTube channel while you are there.
The one thing I really recommend is the BrightPad for a project like this. It makes everything so much easier – less seam ripping is always a good thing.
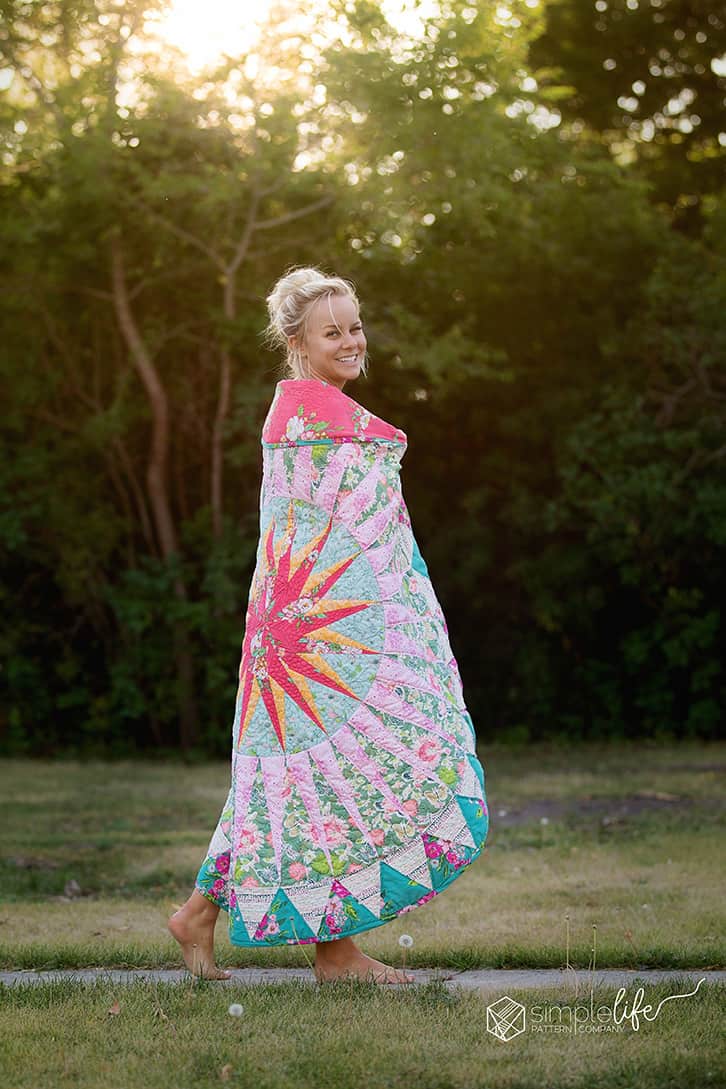
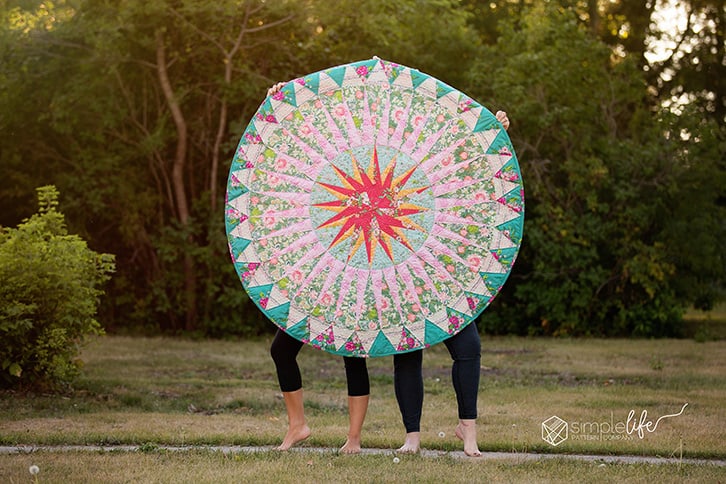
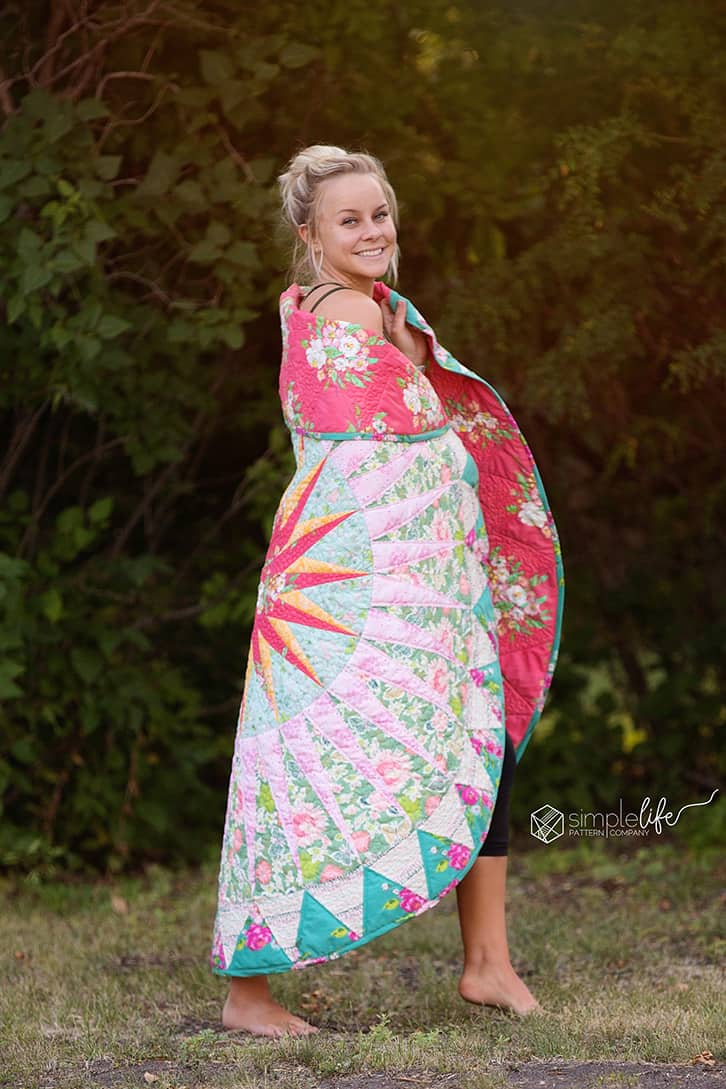
After your quilt top is all pieced, you can start ripping all those papers out and quilt and bind it as you desire. Super fun right! Thanks to my gorgeous sister Brenda for modeling for me – against her will… hehe.
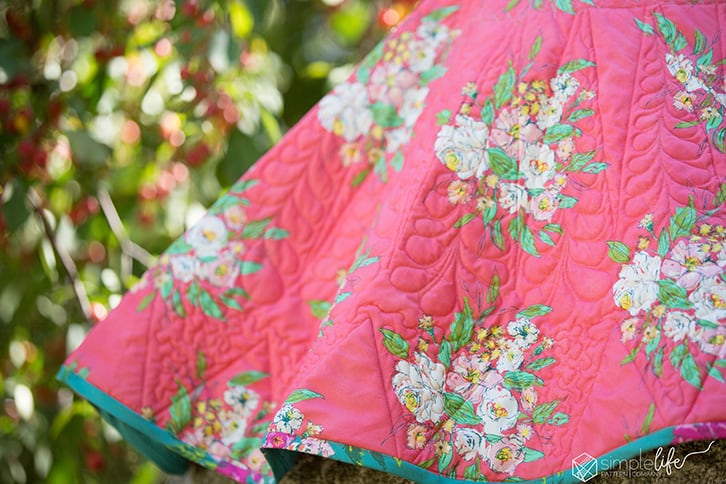
I did some super awesome custom quilting on this baby – I used my favorite thread – Aurifil thread in 50 weight for the top and back. I used my wonderful Baby Lock to do all this – I felt pretty cool considering I have never done cool quilting like this before (I used to use pantographs on an old long arm machine)
Its kinda hard to get good shots of the quilting but here is what I got. I loved the wool batting – had just enough loft to make the quilting stand out a little while still being so super soft. You can check out the fun little video I posted on our IG account of me doing some free motion quilting.
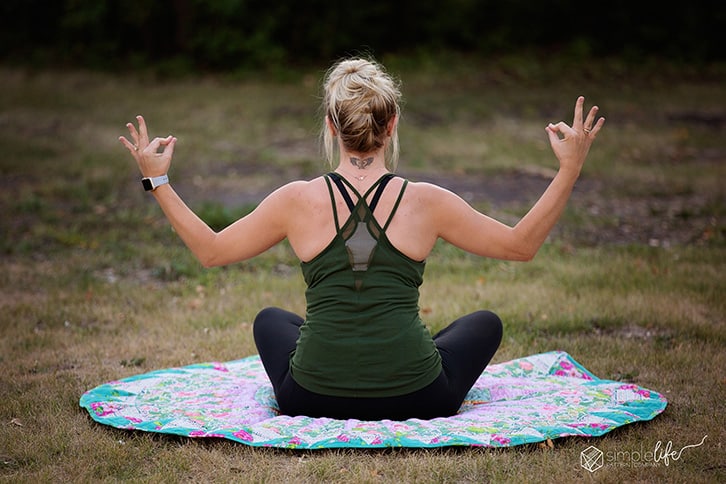
I wanted to photograph this at the beach for a summer beach blanket but it is pretty much fall now, no one would go with me to the beach, I used wool batting so everything was going against that thought. How about a fun little yoga blanket, or tummy time mat.
Happy Sewing!
Katie Skoog
This is a sponsored conversation written by me on behalf of Cricut. The opinions and text are all mine.