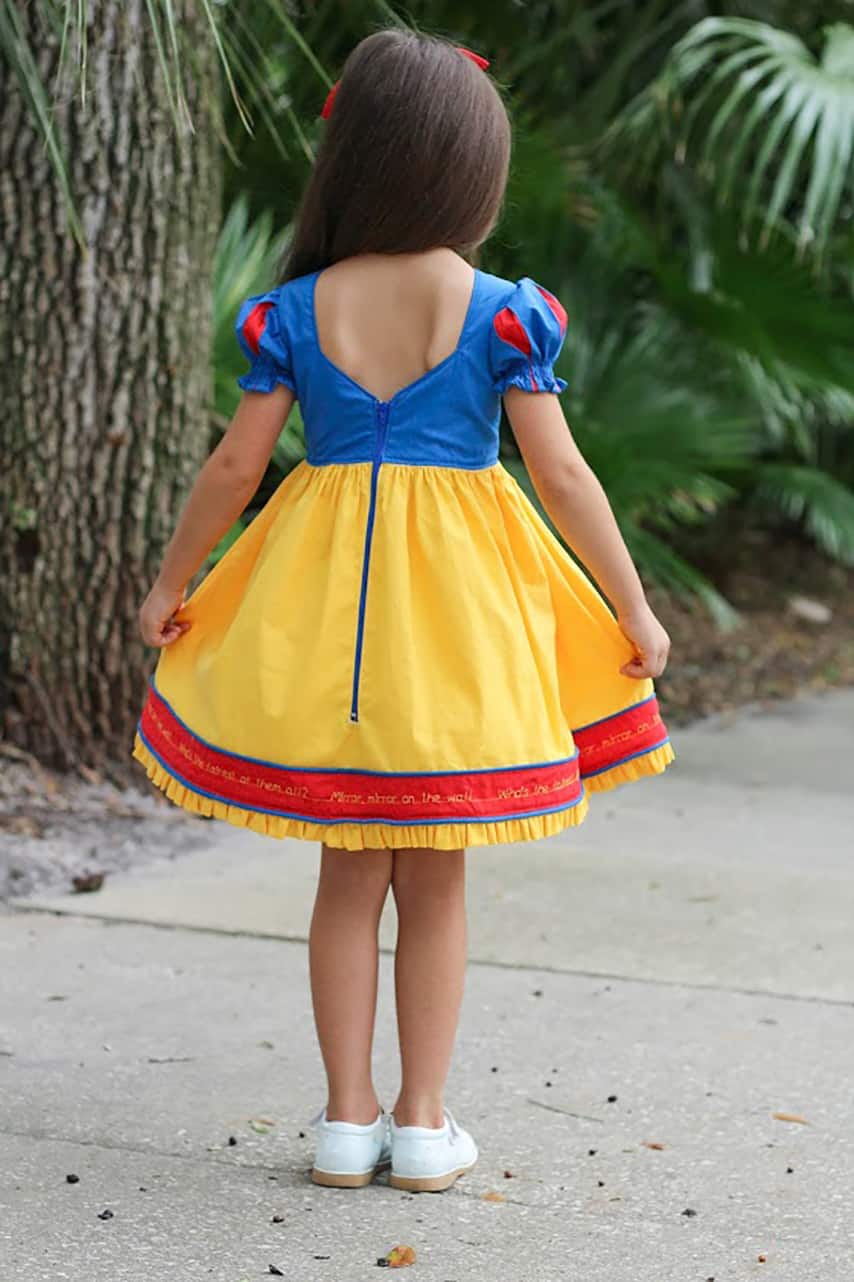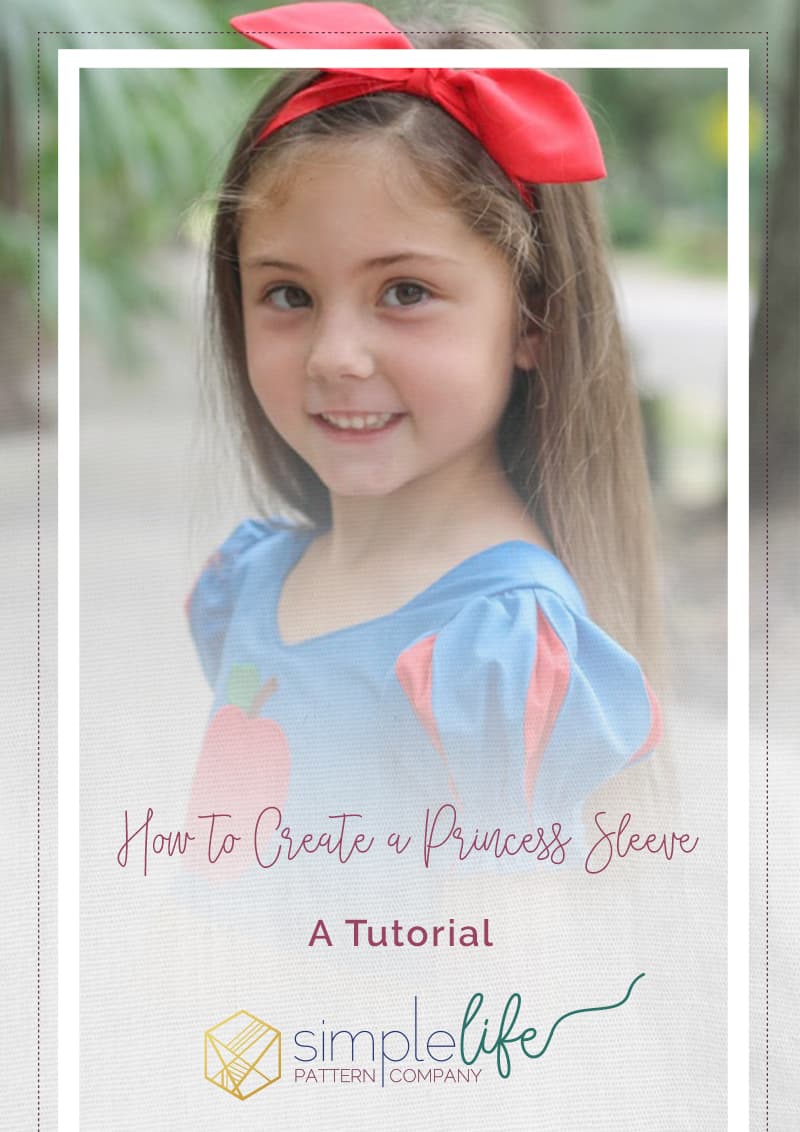
How to Create a Princess Sleeve {A Tutorial}
Hi! My name is Jenna and I’m excited to be a new contributor for SLPco. I have three kids with number four on the way and I love how SLPCo feels like one big family. Every one has been so friendly and welcoming and I love sharing my SLPCo sews with all of you in the group. With Halloween quickly approaching I wanted to share how I modified the Pearl short sleeves to make this princess inspired dress for my daughter.


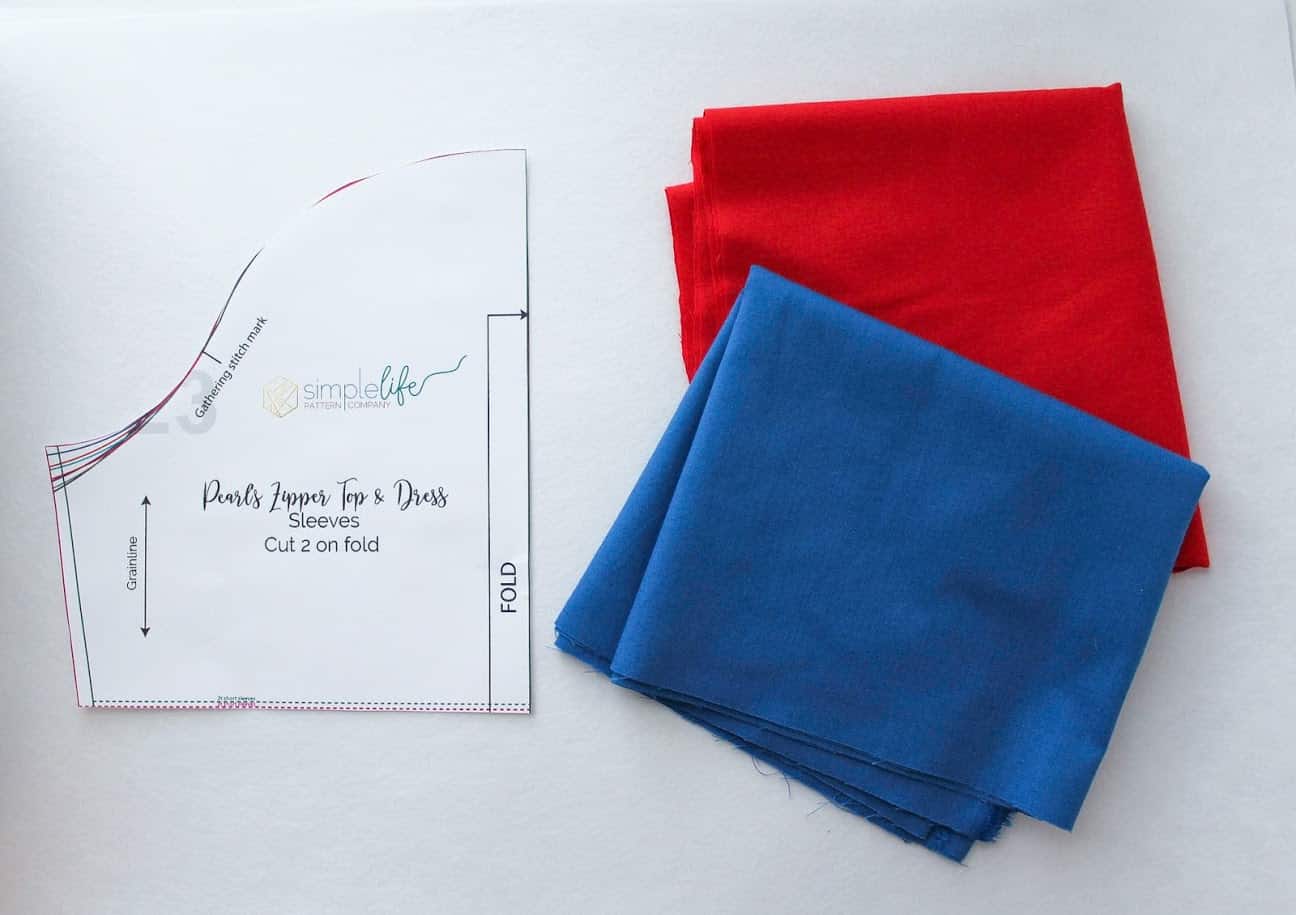
- First print your short sleeve pattern piece as normal but do not cut your fabric as instructed in the pattern.
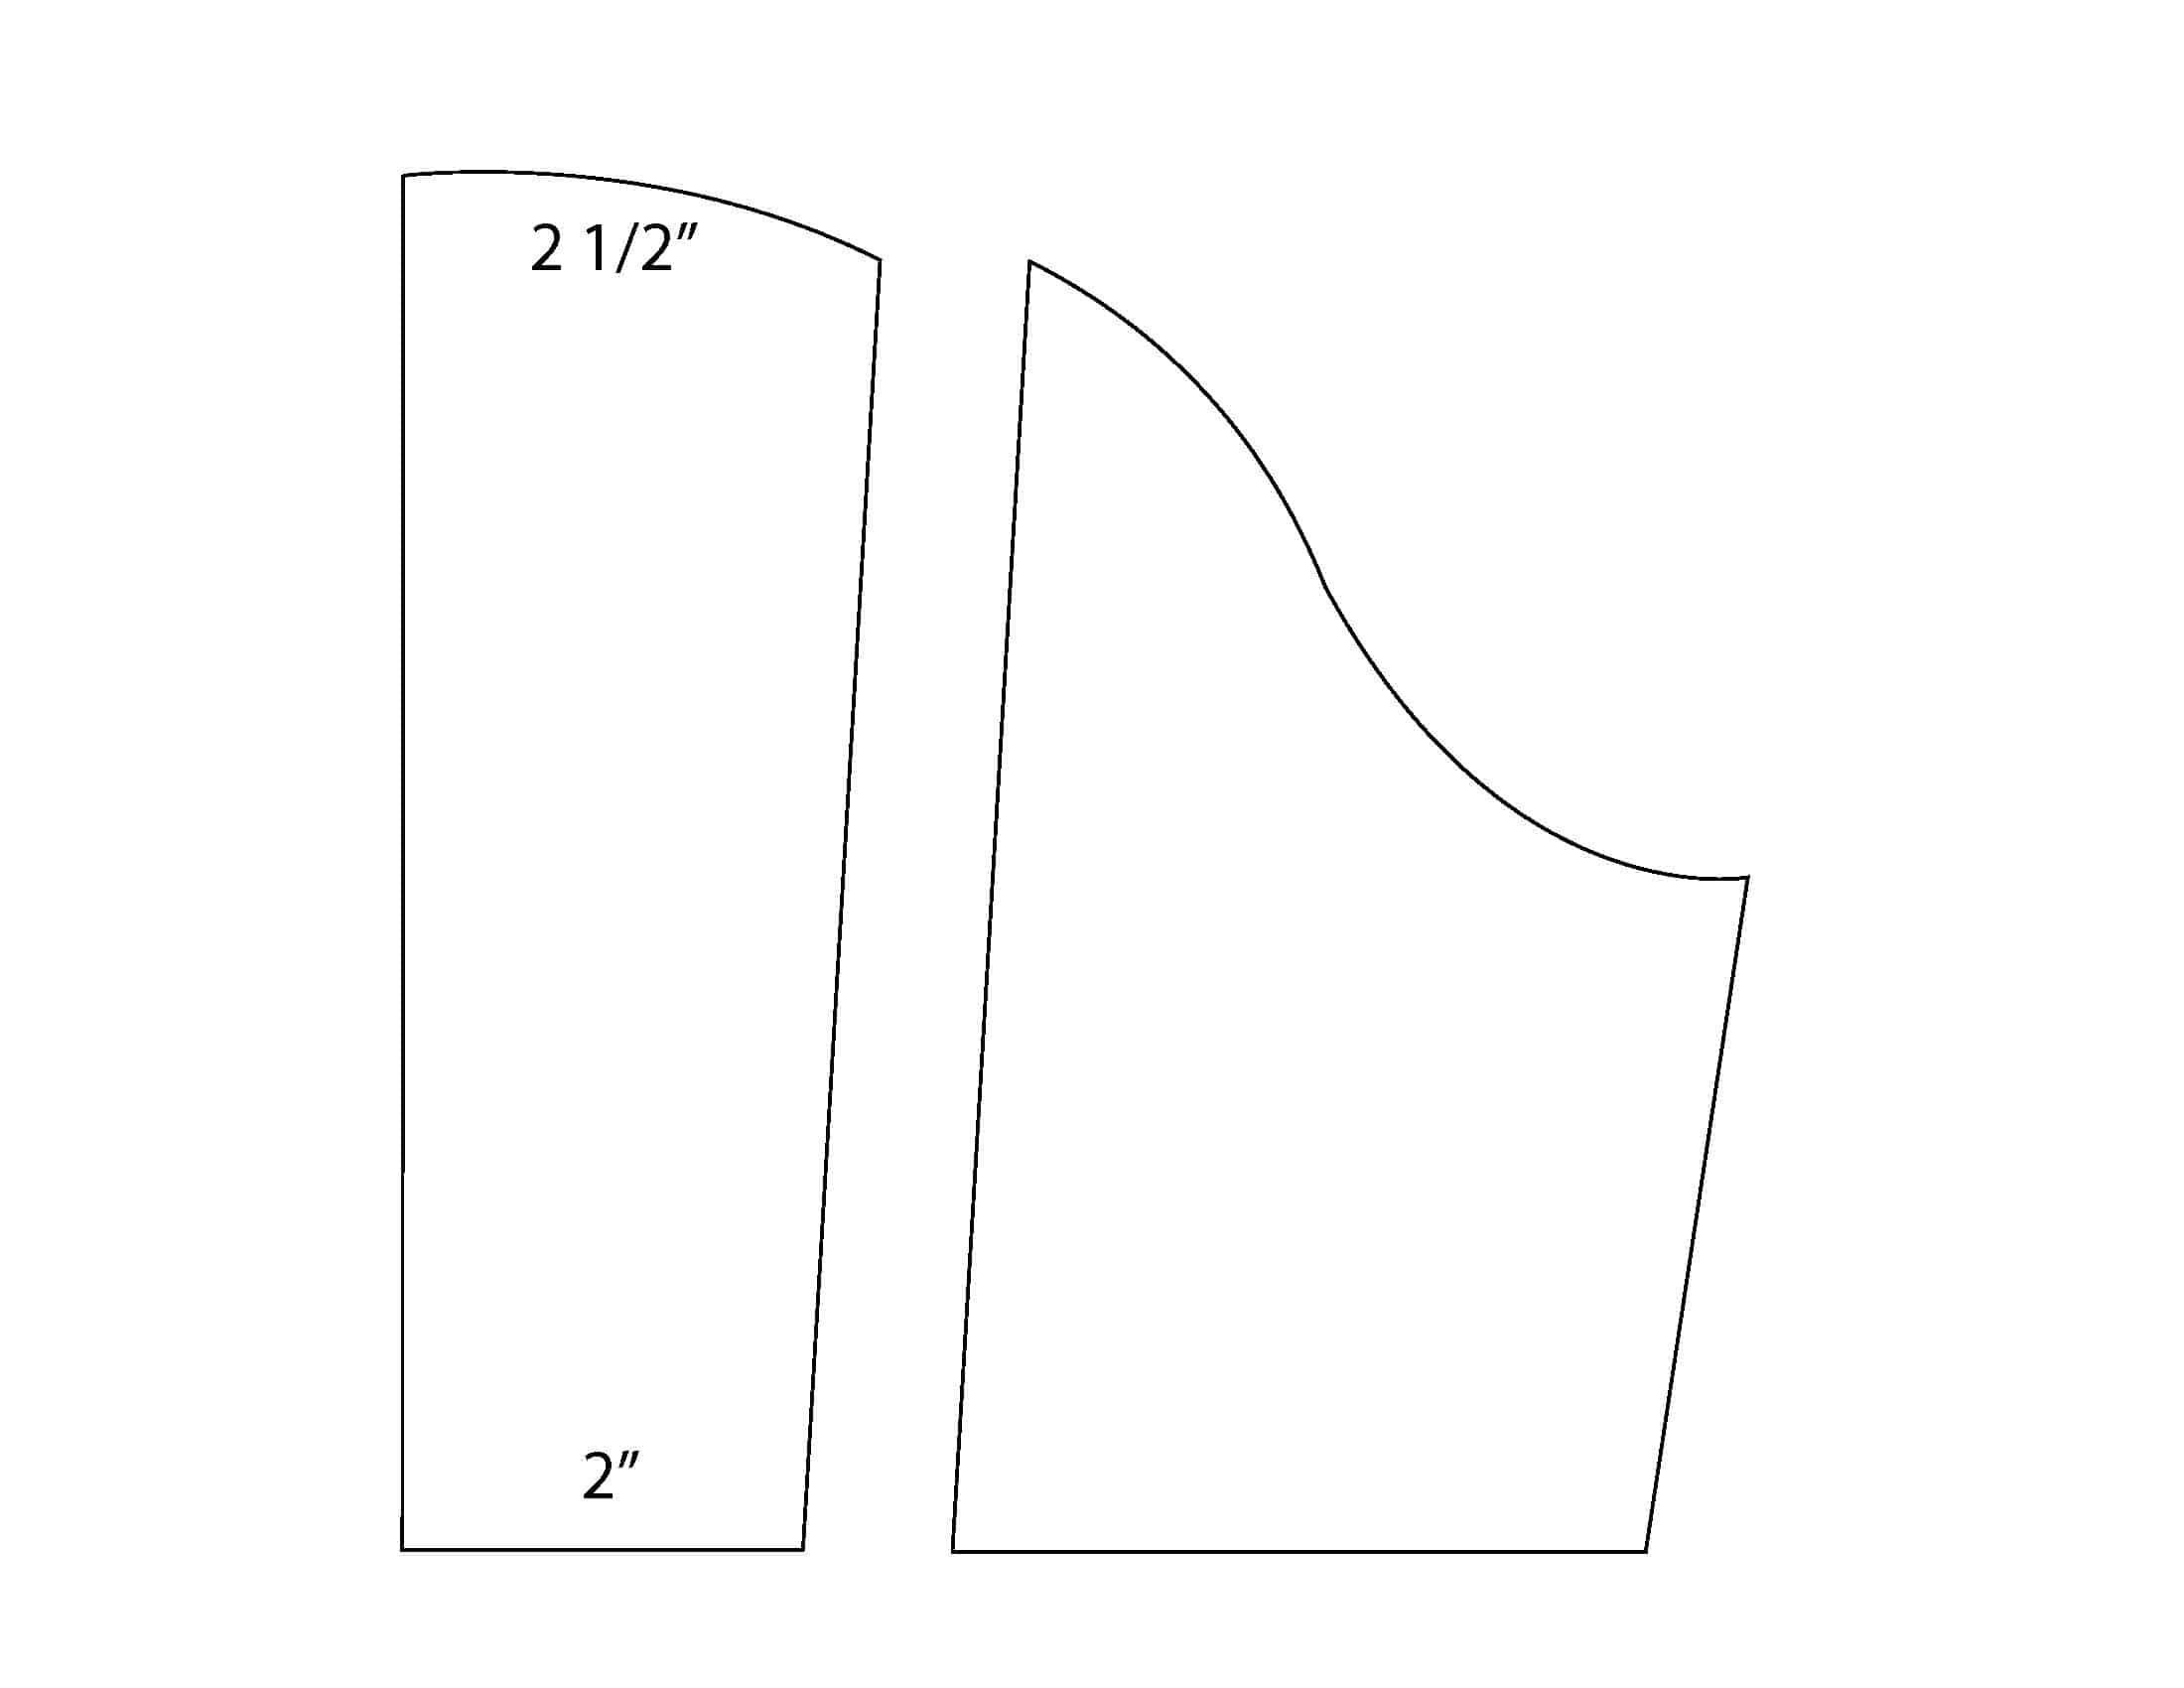
- From the center point at the top of the sleeve, measure over 2.5” and make a mark. From the bottom center, measure over 2” and make a mark. Draw a line connecting your two marks. Cut pattern piece on this line.
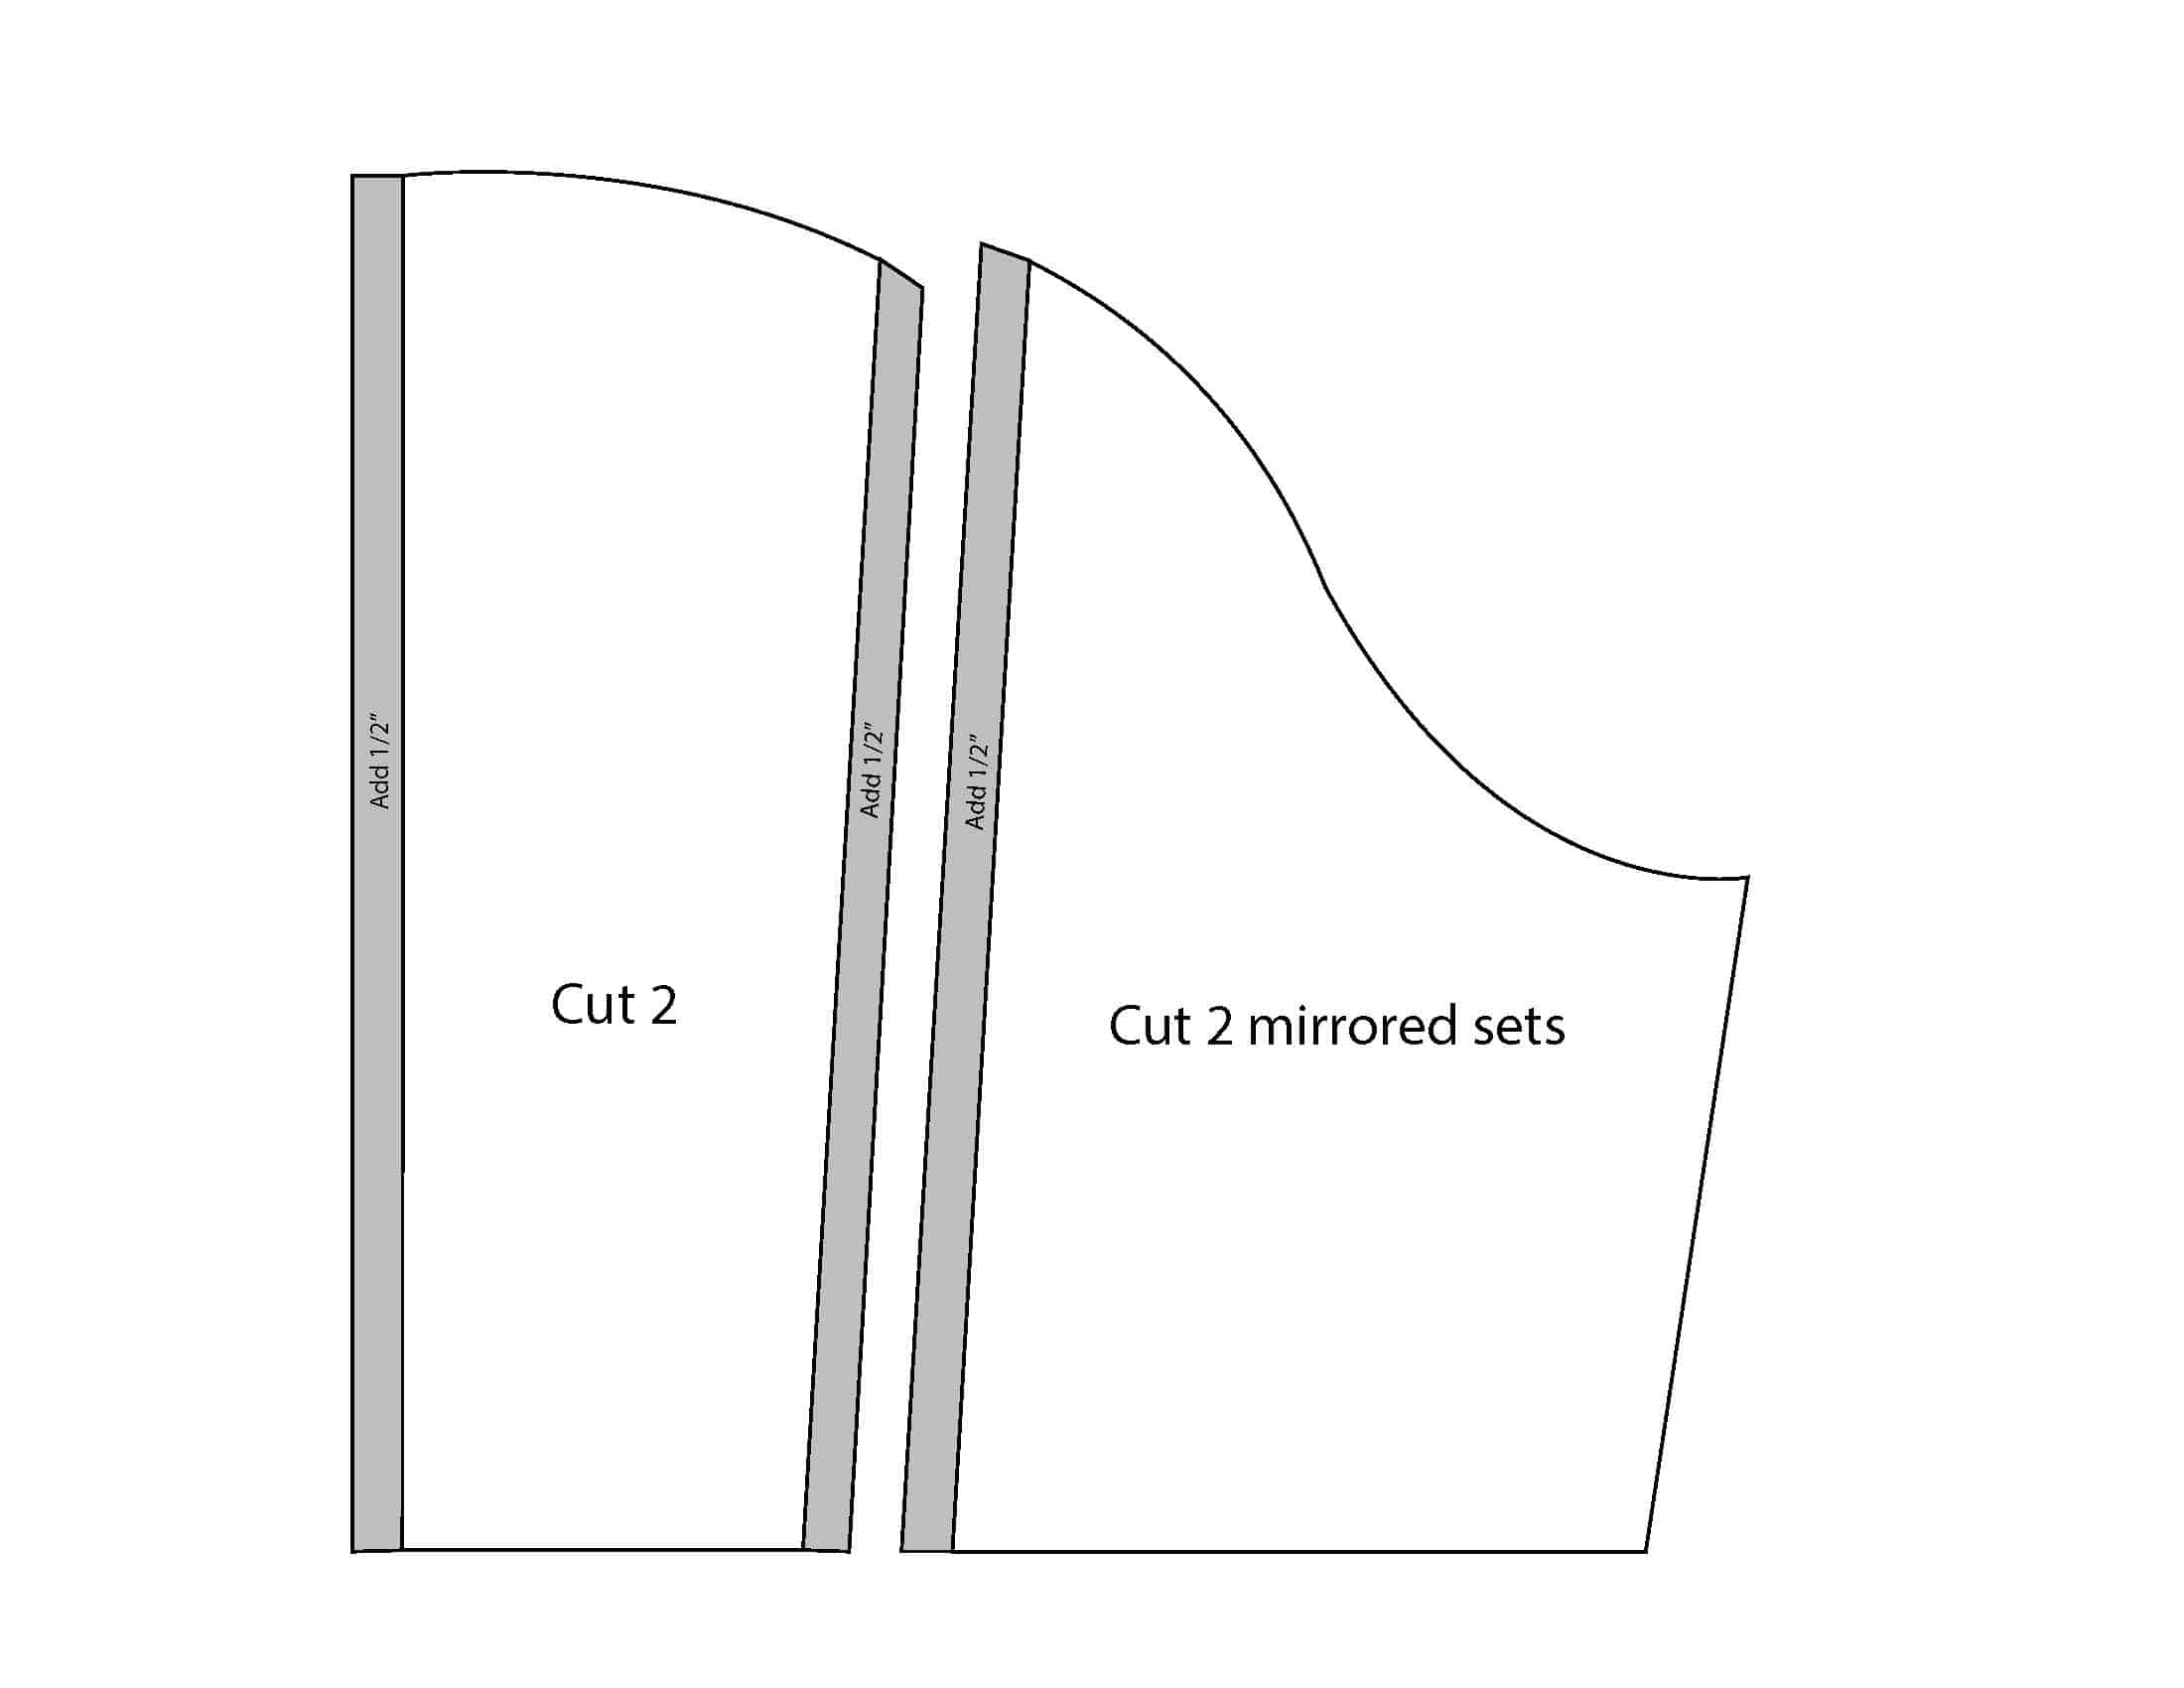
- Next you need to add 1/2” seam allowance to your new pieces you created. The center piece will need 1/2” SA on either long side. The outer piece will need 1/2” SA on the inside long edge. We will no longer be cutting on the fold as the original pattern suggests. Make sure to mark your gathering mark on your new piece.
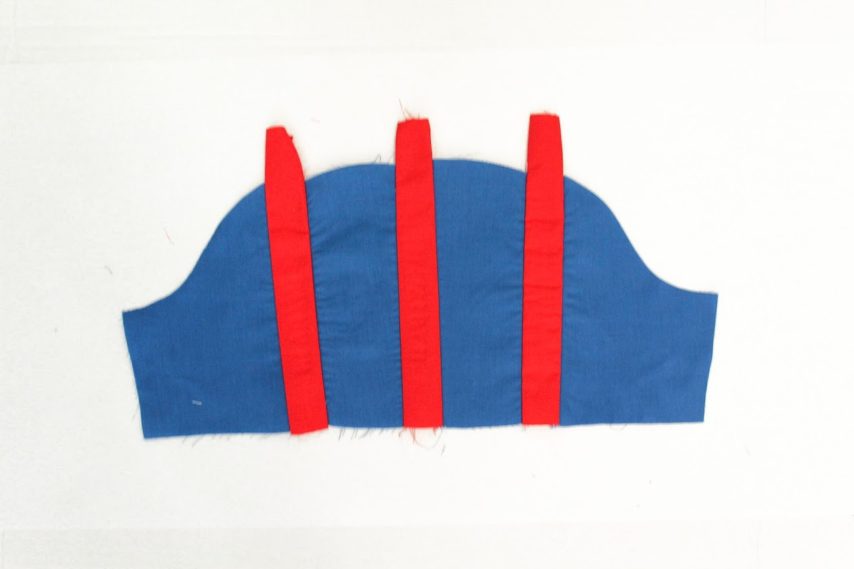
- Next cut your fabric. The color/fabric you want for your sleeve will be cut with the pattern pieces you just created. In my case, that is the blue. You will want to cut 2 sets of mirror images of both pieces and you will end up with 8 sleeve pieces. (2 Left outer sleeve, 2 left center sleeve, 2 right center sleeve, 2 right outer sleeve) Make sure to mark your gathering mark on your fabric for a later step.

- Next cut 6 rectangle strips. See chart for rectangle strip size measurements. These should be cut out of your inner box pleat fabric. In my case, that is the red.
Sizes 2-6 2″ x 8″
Sizes 7-12 2″ x 9″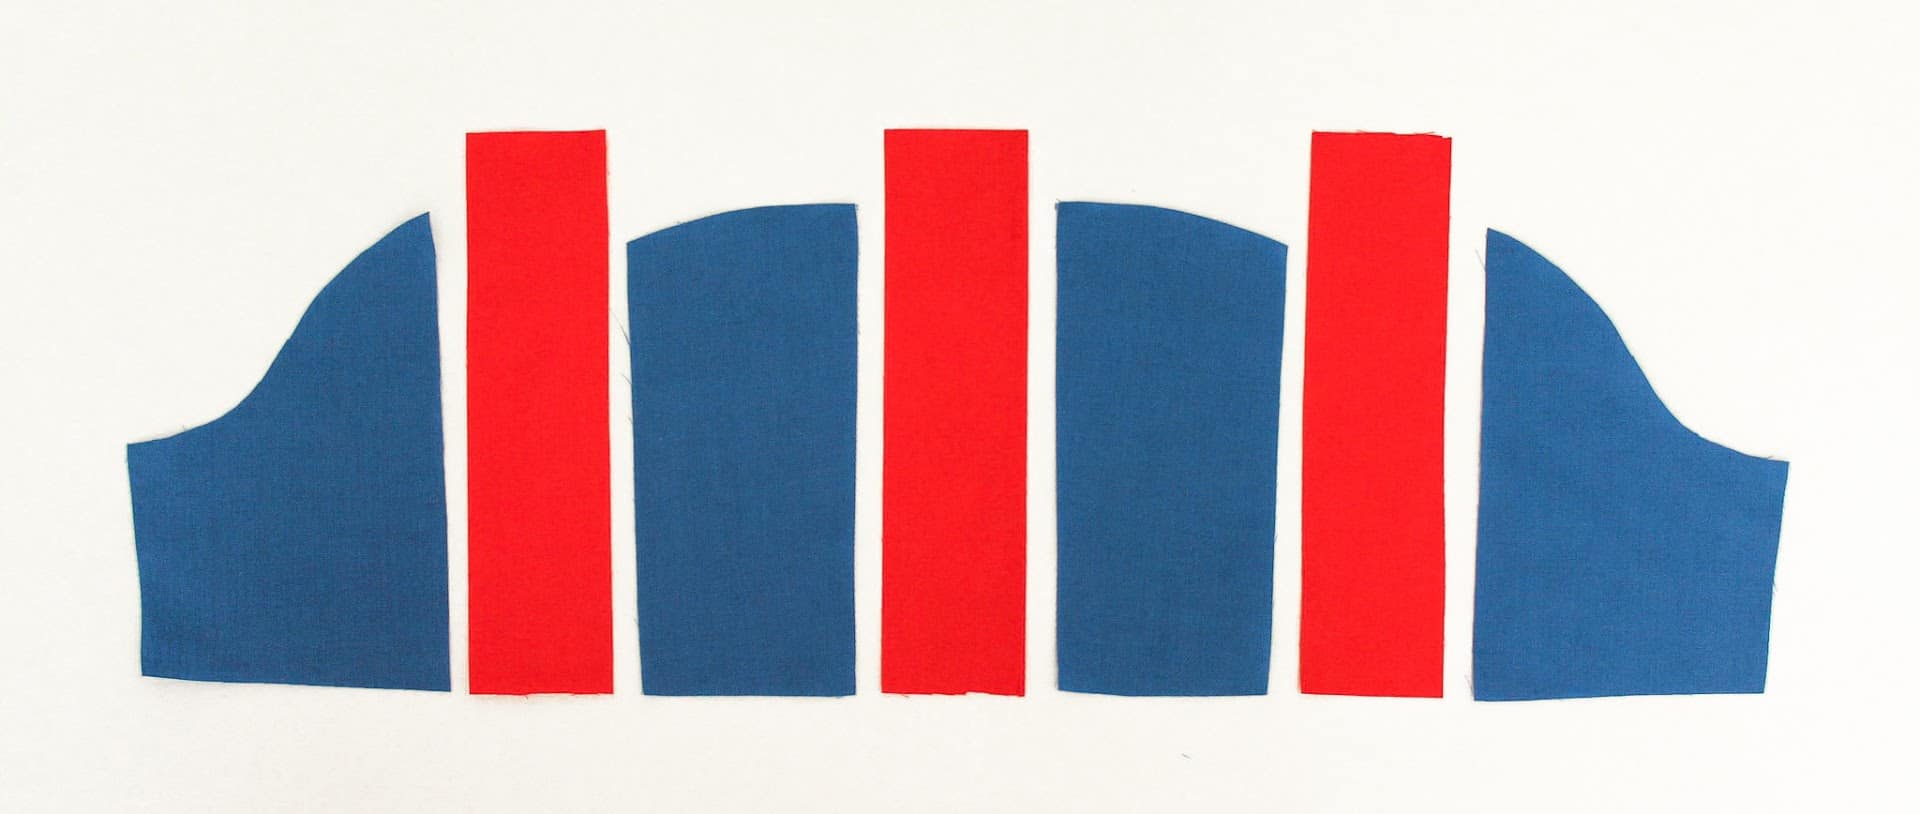
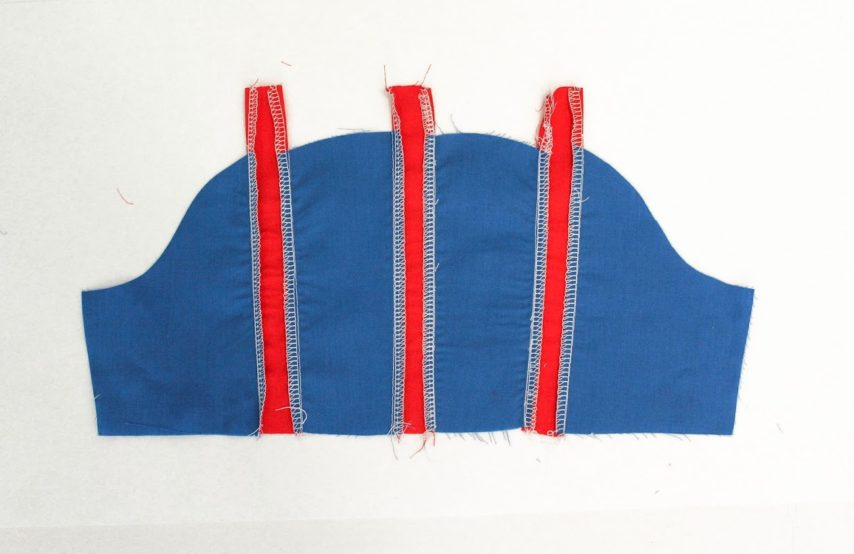
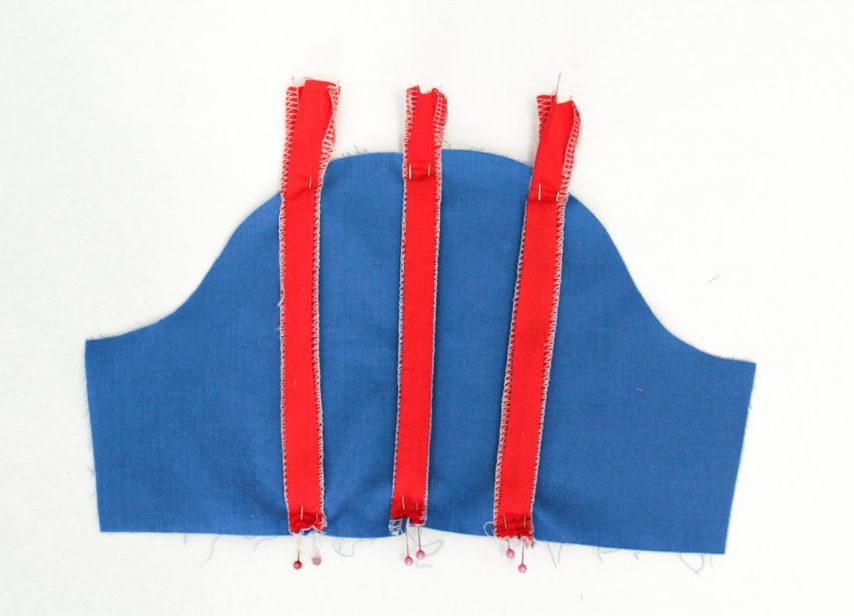
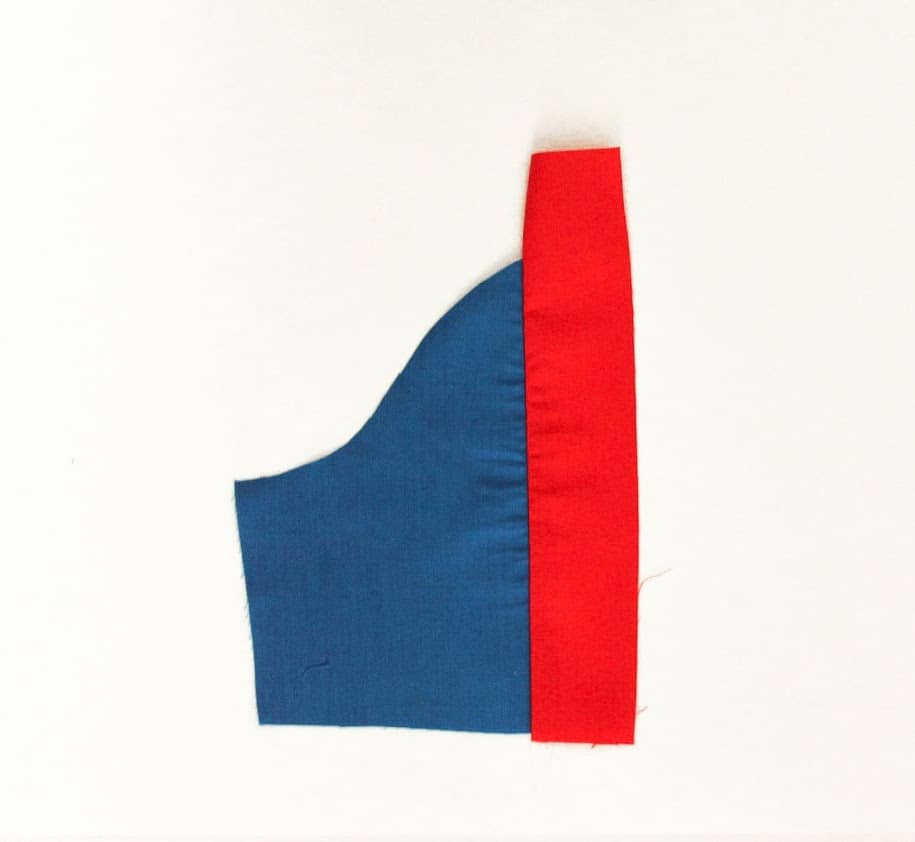
- Sew the left outer sleeve piece to the rectangle strip, long sides together and right sides together, making sure to line up the bottom edge. Trim 1/4” and finish using a serger or zig zag stitch. Depending on the size you are making the rectangle strip will extend past the top of the sleeve pattern differently. Shown is a size 3.
- Now take the left center piece and sew right sides together with the rectangle strip piece you just sewed to the left outer sleeve piece. Make sure to line up the bottom hem. Trim 1/4” and finish using a serger or zig zag stitch.
- Continue alternating between your two fabrics until all 7 pieces have been used for one sleeve. The order should be left outer sleeve, rectangle strip, left center sleeve, rectangle strip, right center sleeve, rectangle strip, right outer sleeve. Press all seams towards the rectangle strips and press very well.
-
- Repeat steps 6-8 with the remaining 7 pieces for the other sleeve.
- Next we will make the inverted box pleats. Start with the left outer sleeve piece and fold it until the seam matches the left center sleeve piece. Press to create a memory crease down the center of the rectangle strip. Repeat to make memory creases on each rectangle strip.
-
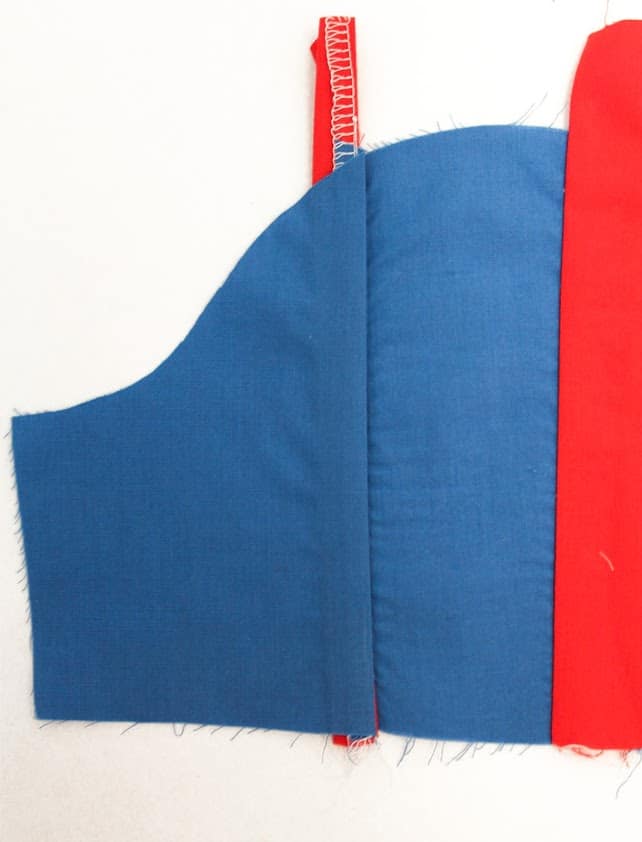
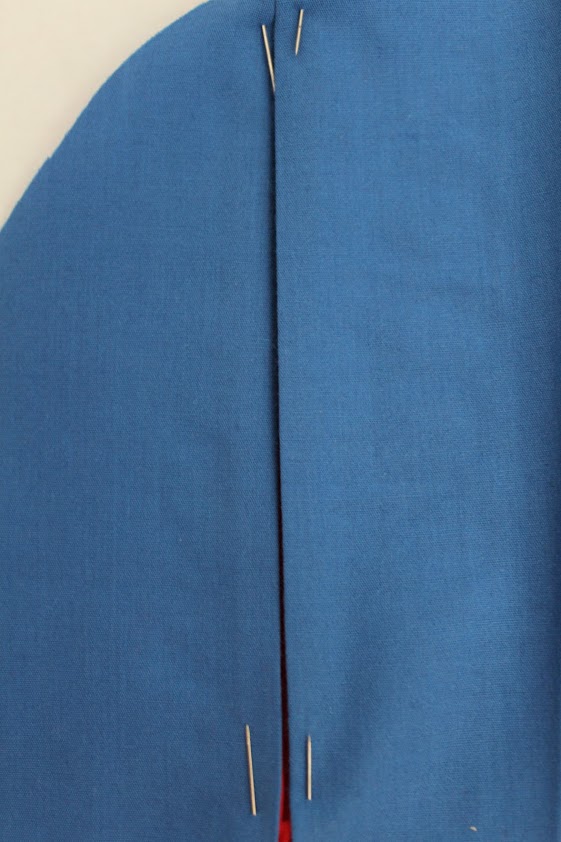
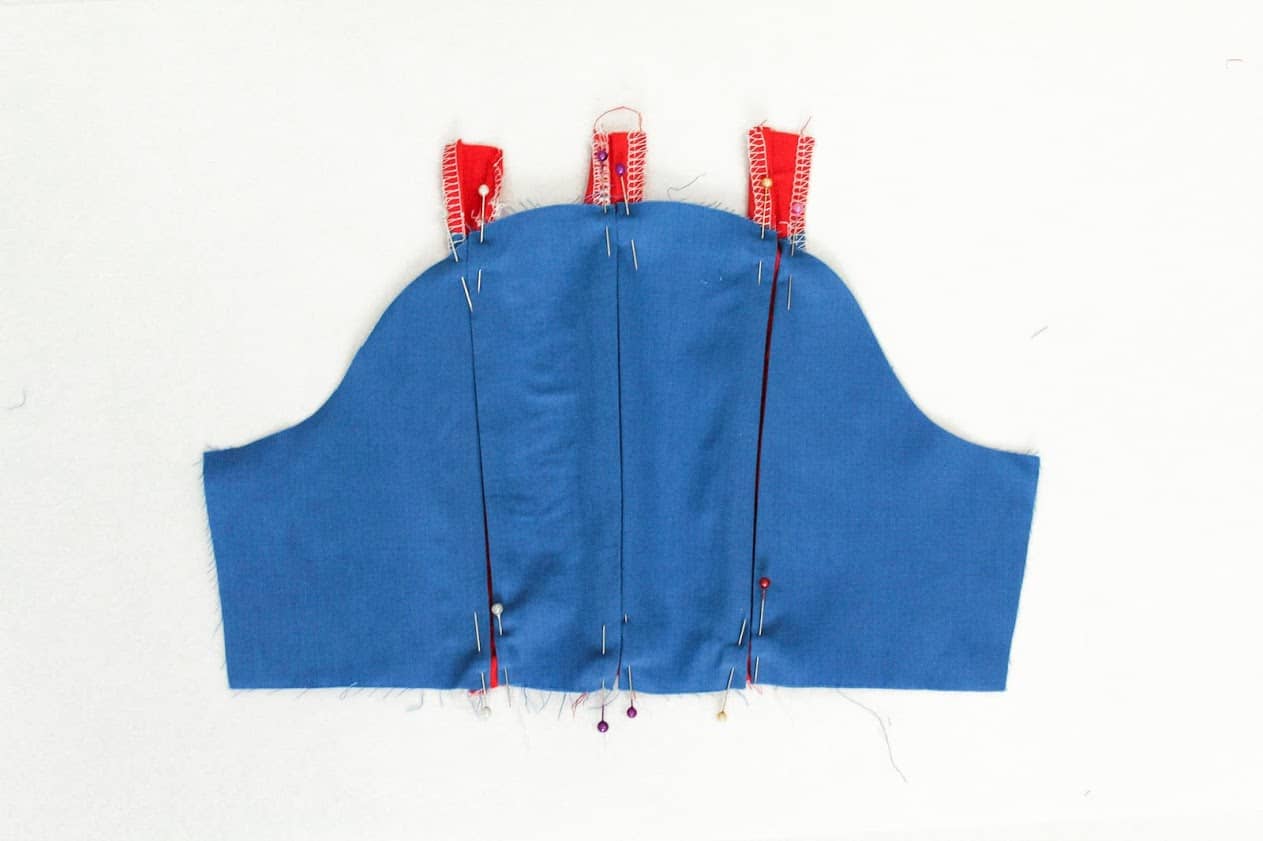
- Now take the left outer sleeve piece and fold it to meet the memory crease in the left rectangle strip. Take the left center piece and fold it to meet the same memory crease in the left rectangle strip. Press well and pin in place. Take care while pinning to make sure that the back of the pleat is flat (see photo). If done correctly, the left rectangle strip should not be visible.
-
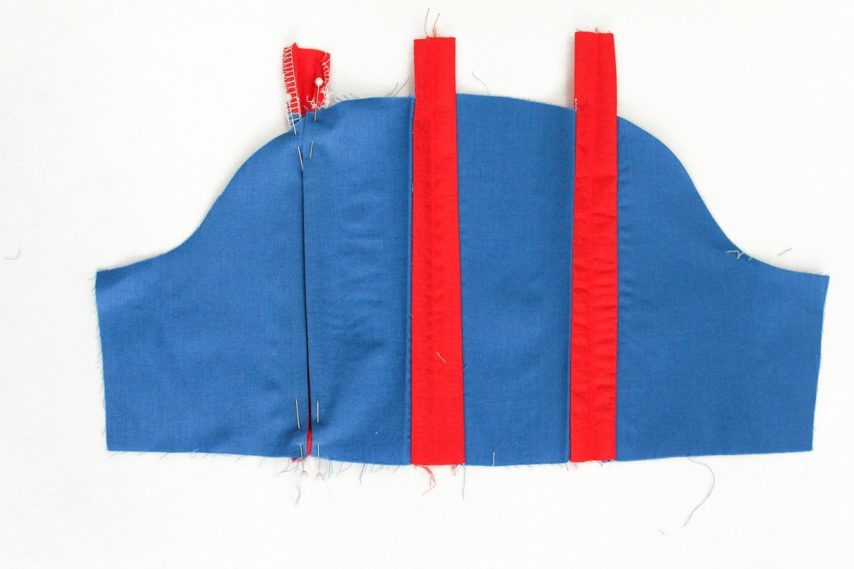
- Repeat with the remaining two rectangle strips. Baste all pleats into place with 1/4” SA.
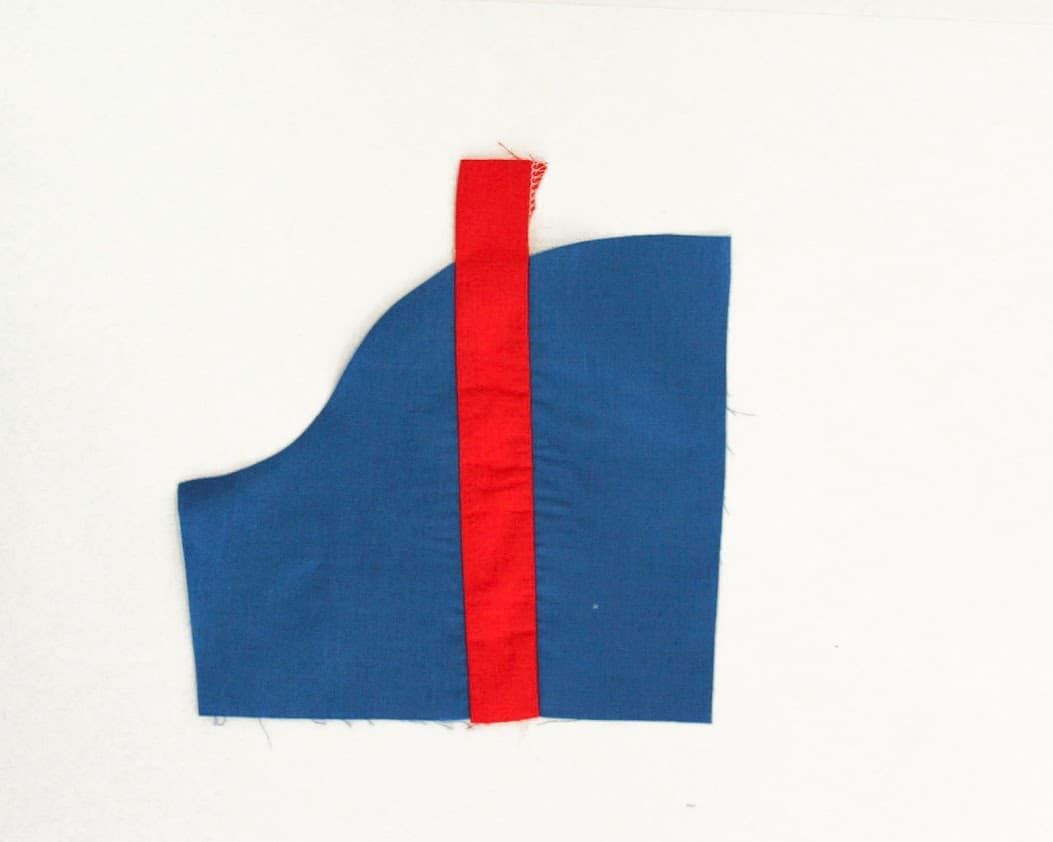
- Trim the excess rectangle strips on the top to follow the curve of the sleeve. To double check if you have done this correctly, the original unaltered pattern piece should be a perfect match for the piece you created.

- Repeat steps 10-13 for the other sleeve.
- Now continue the directions in the Pearl pattern starting on step 27 to finish the sleeve and attach to your bodice as instructed. I found it was easier to serge the bottom hem and fold up 1/2” versus trying to fold 1/4” and 1/4” as the pattern suggests due to the bulk of the fabric. Alternatively, you could choose to finish the hem with bias tape.