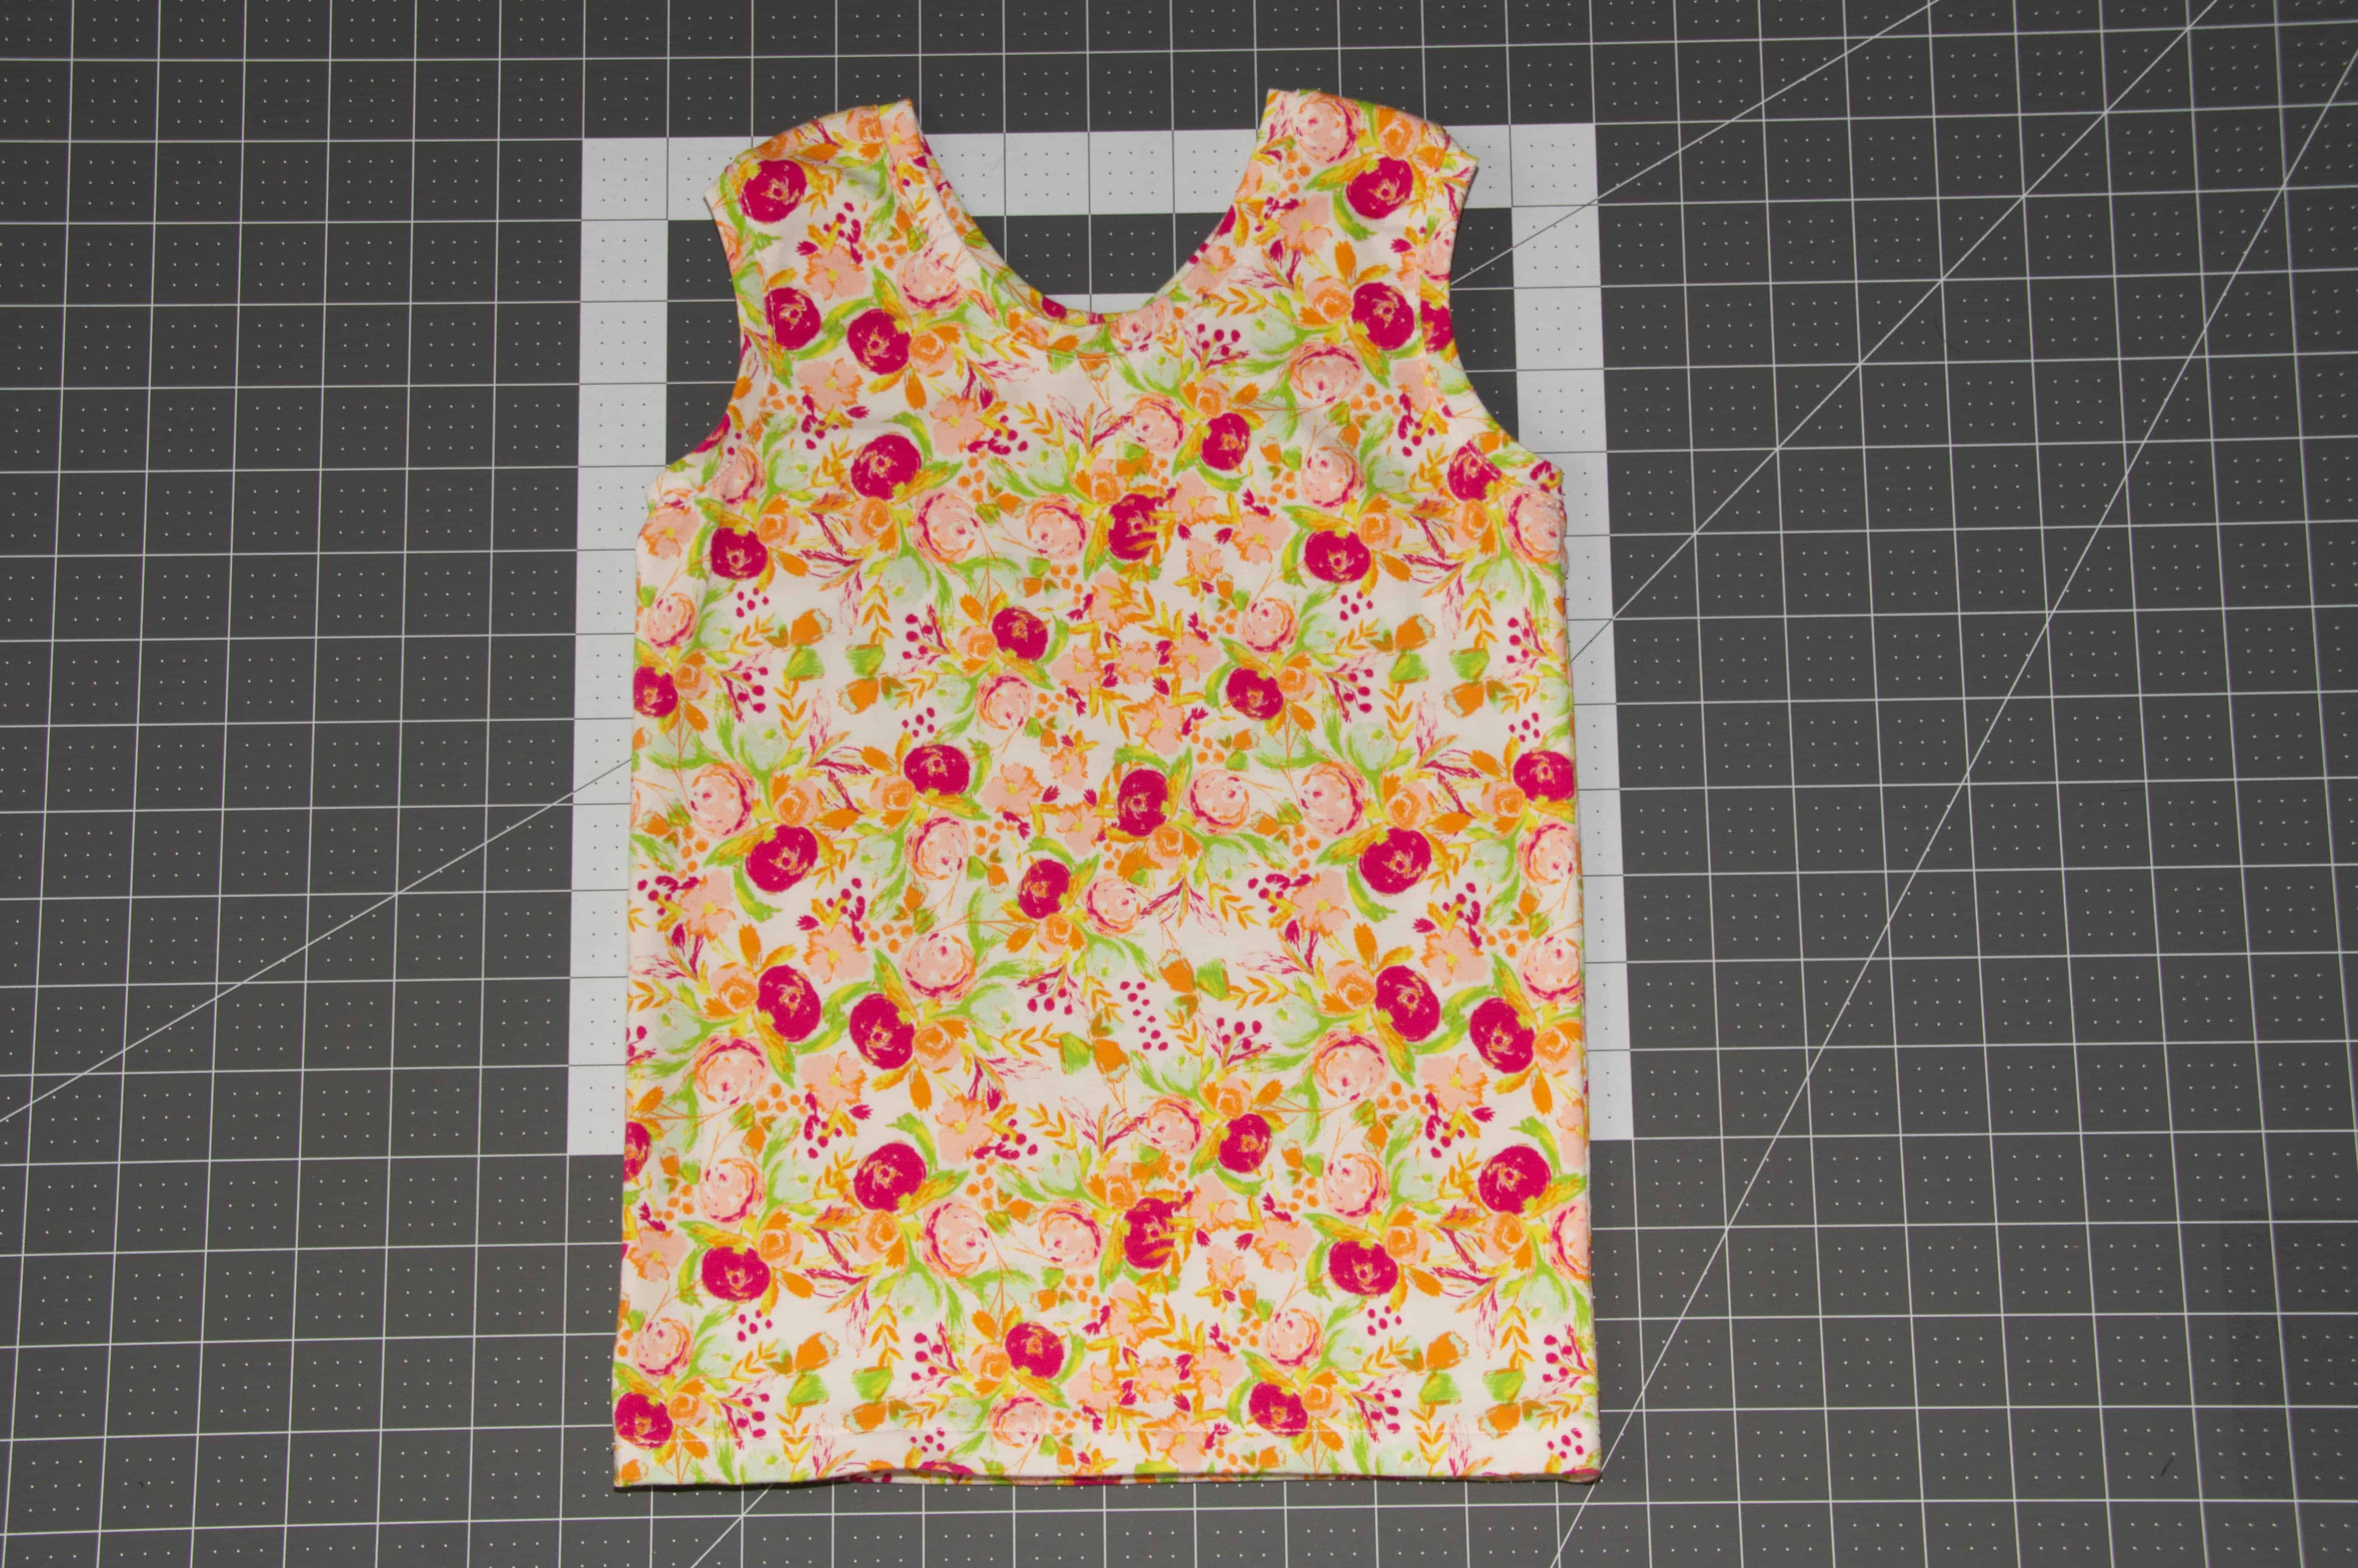
How to Make a Racerback Tank using the Knit Lucy Add-On
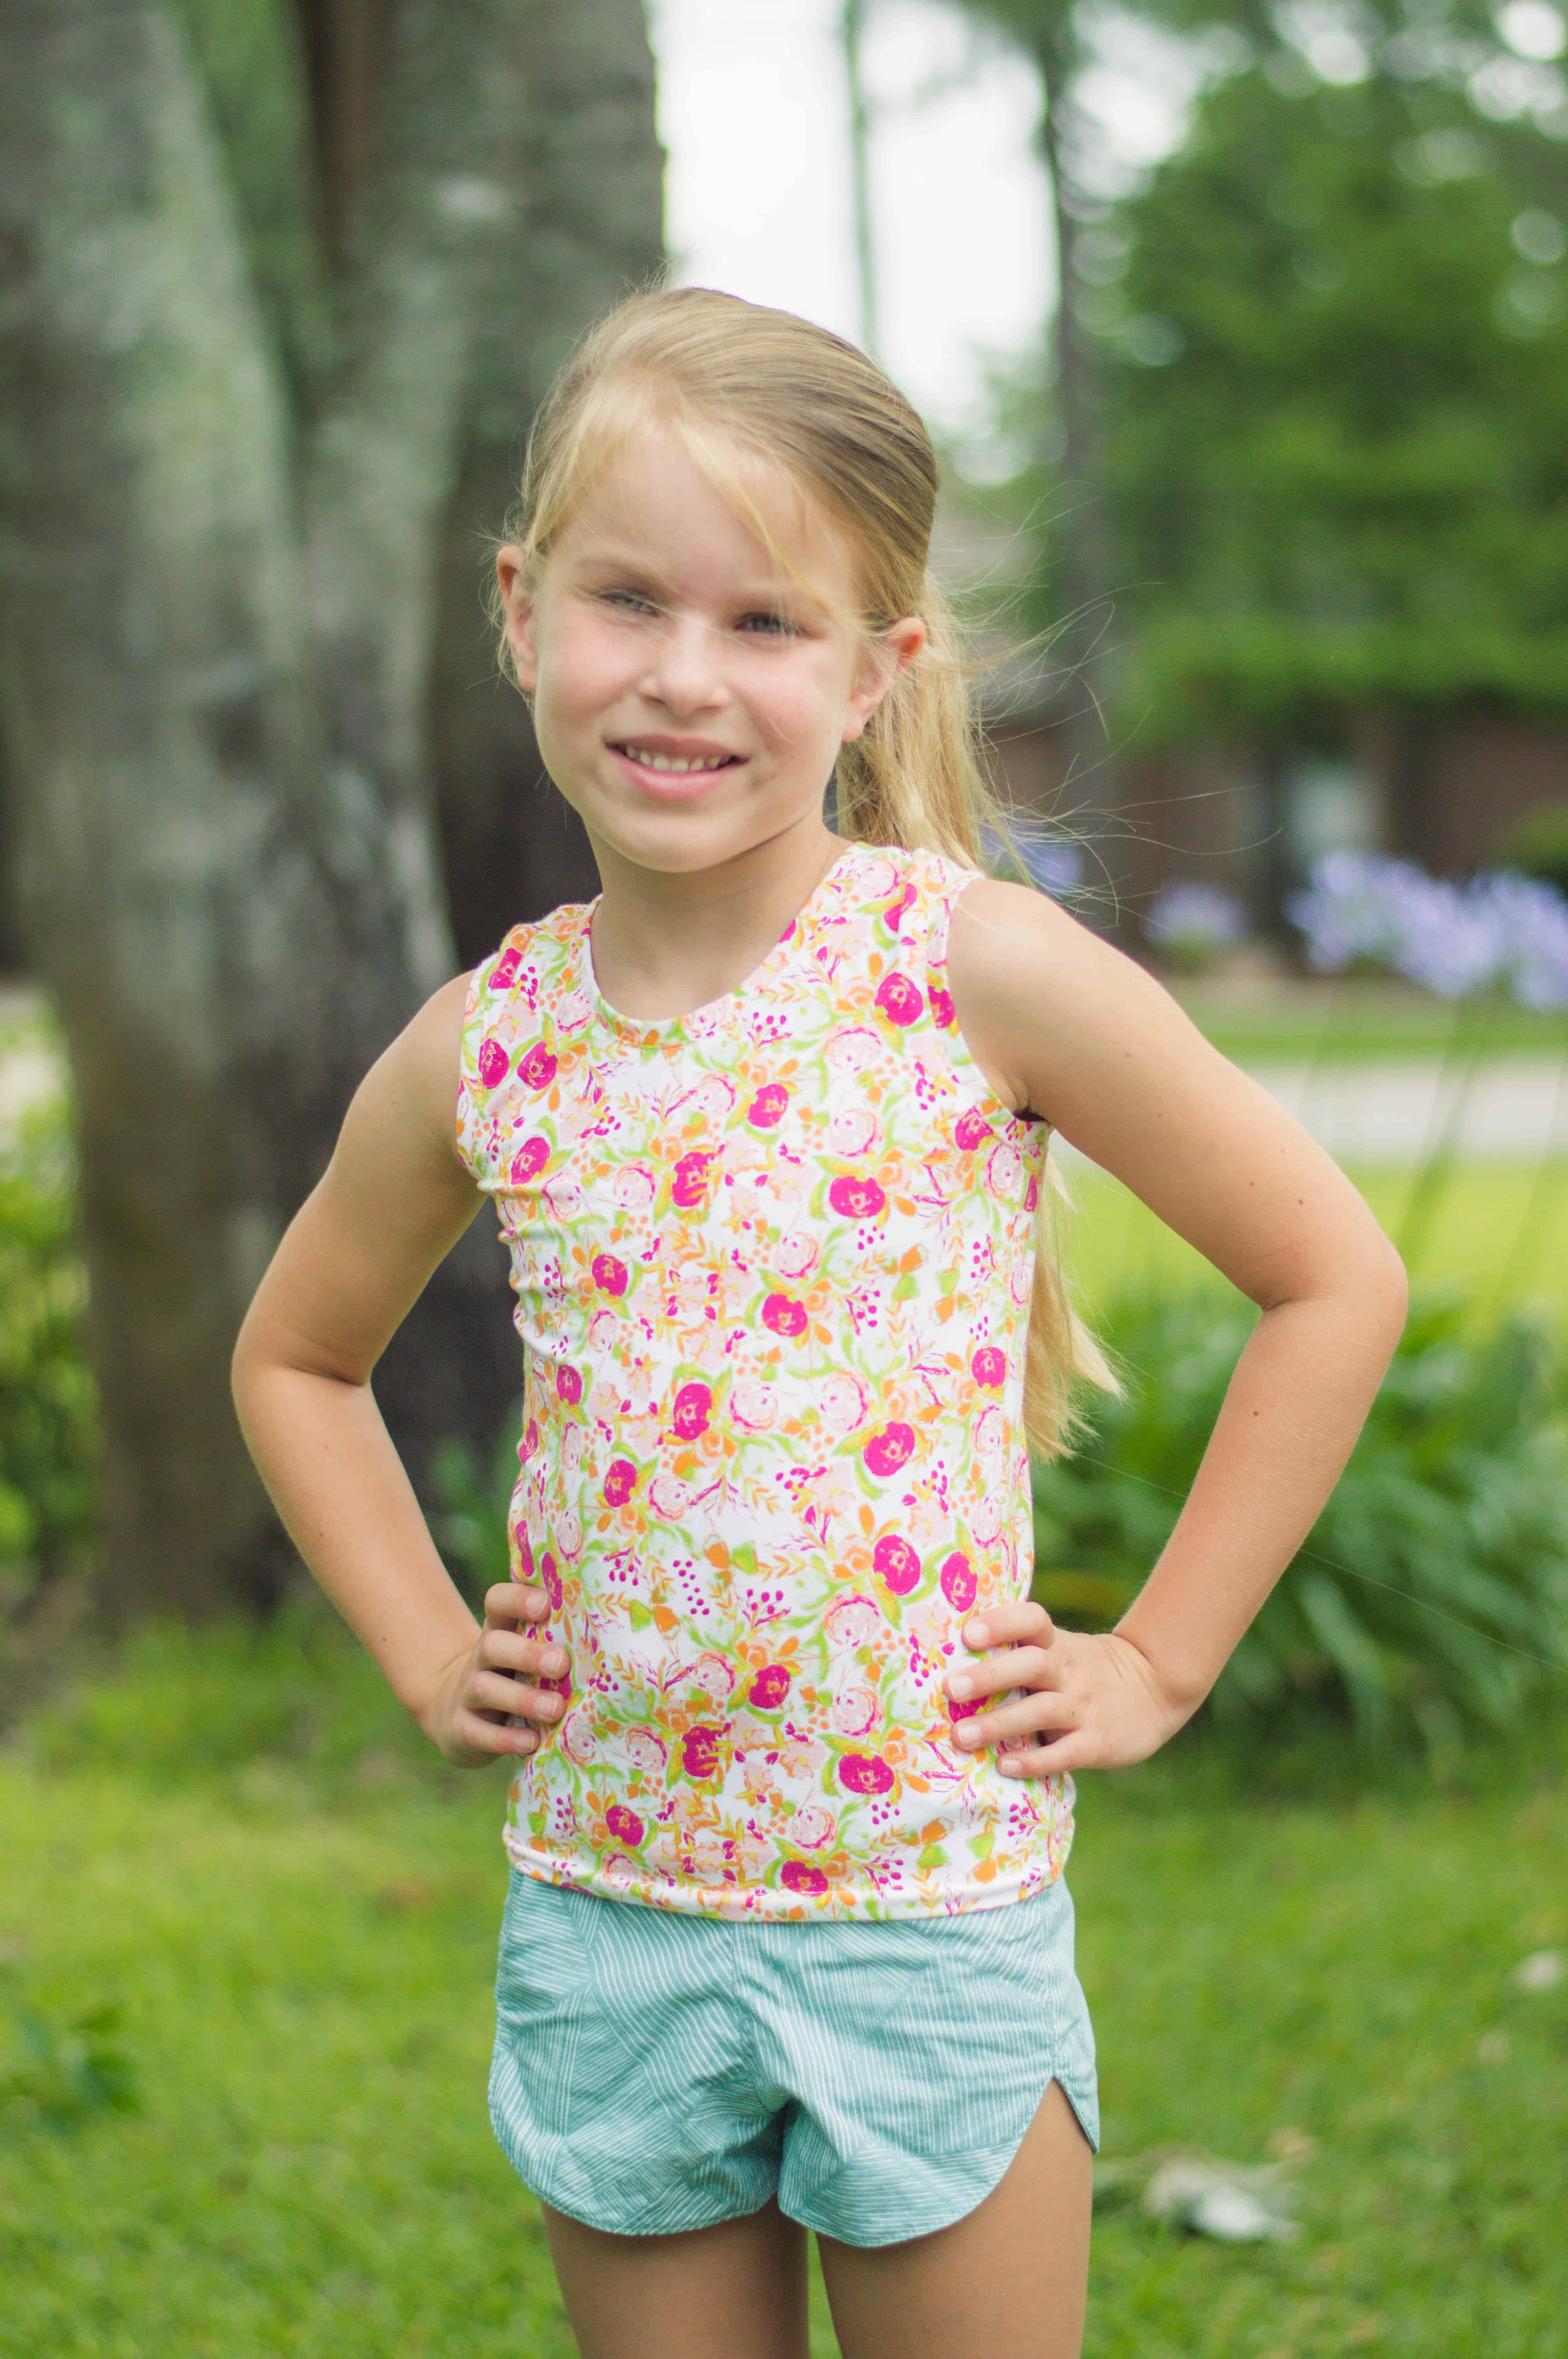
Hey friends!! Last night as I was scrolling through our fan group, I came across a post asking about the knit Lucy add-on and if there were instructions for making it as a racerback tank. I thought to myself, “What a great tutorial blog post this could be” and I immediately got started. My daughter pretty much lives in racerback tanks during the summer and you can never have too many!
Don’t Forget, all Lucy patterns are currently 20% off during the month of May for the Pattern of the Month, so grab your copy of the Knit Lucy and read along to learn how to make a racerback tank using the Knit Lucy add-on.

Let’s get started…
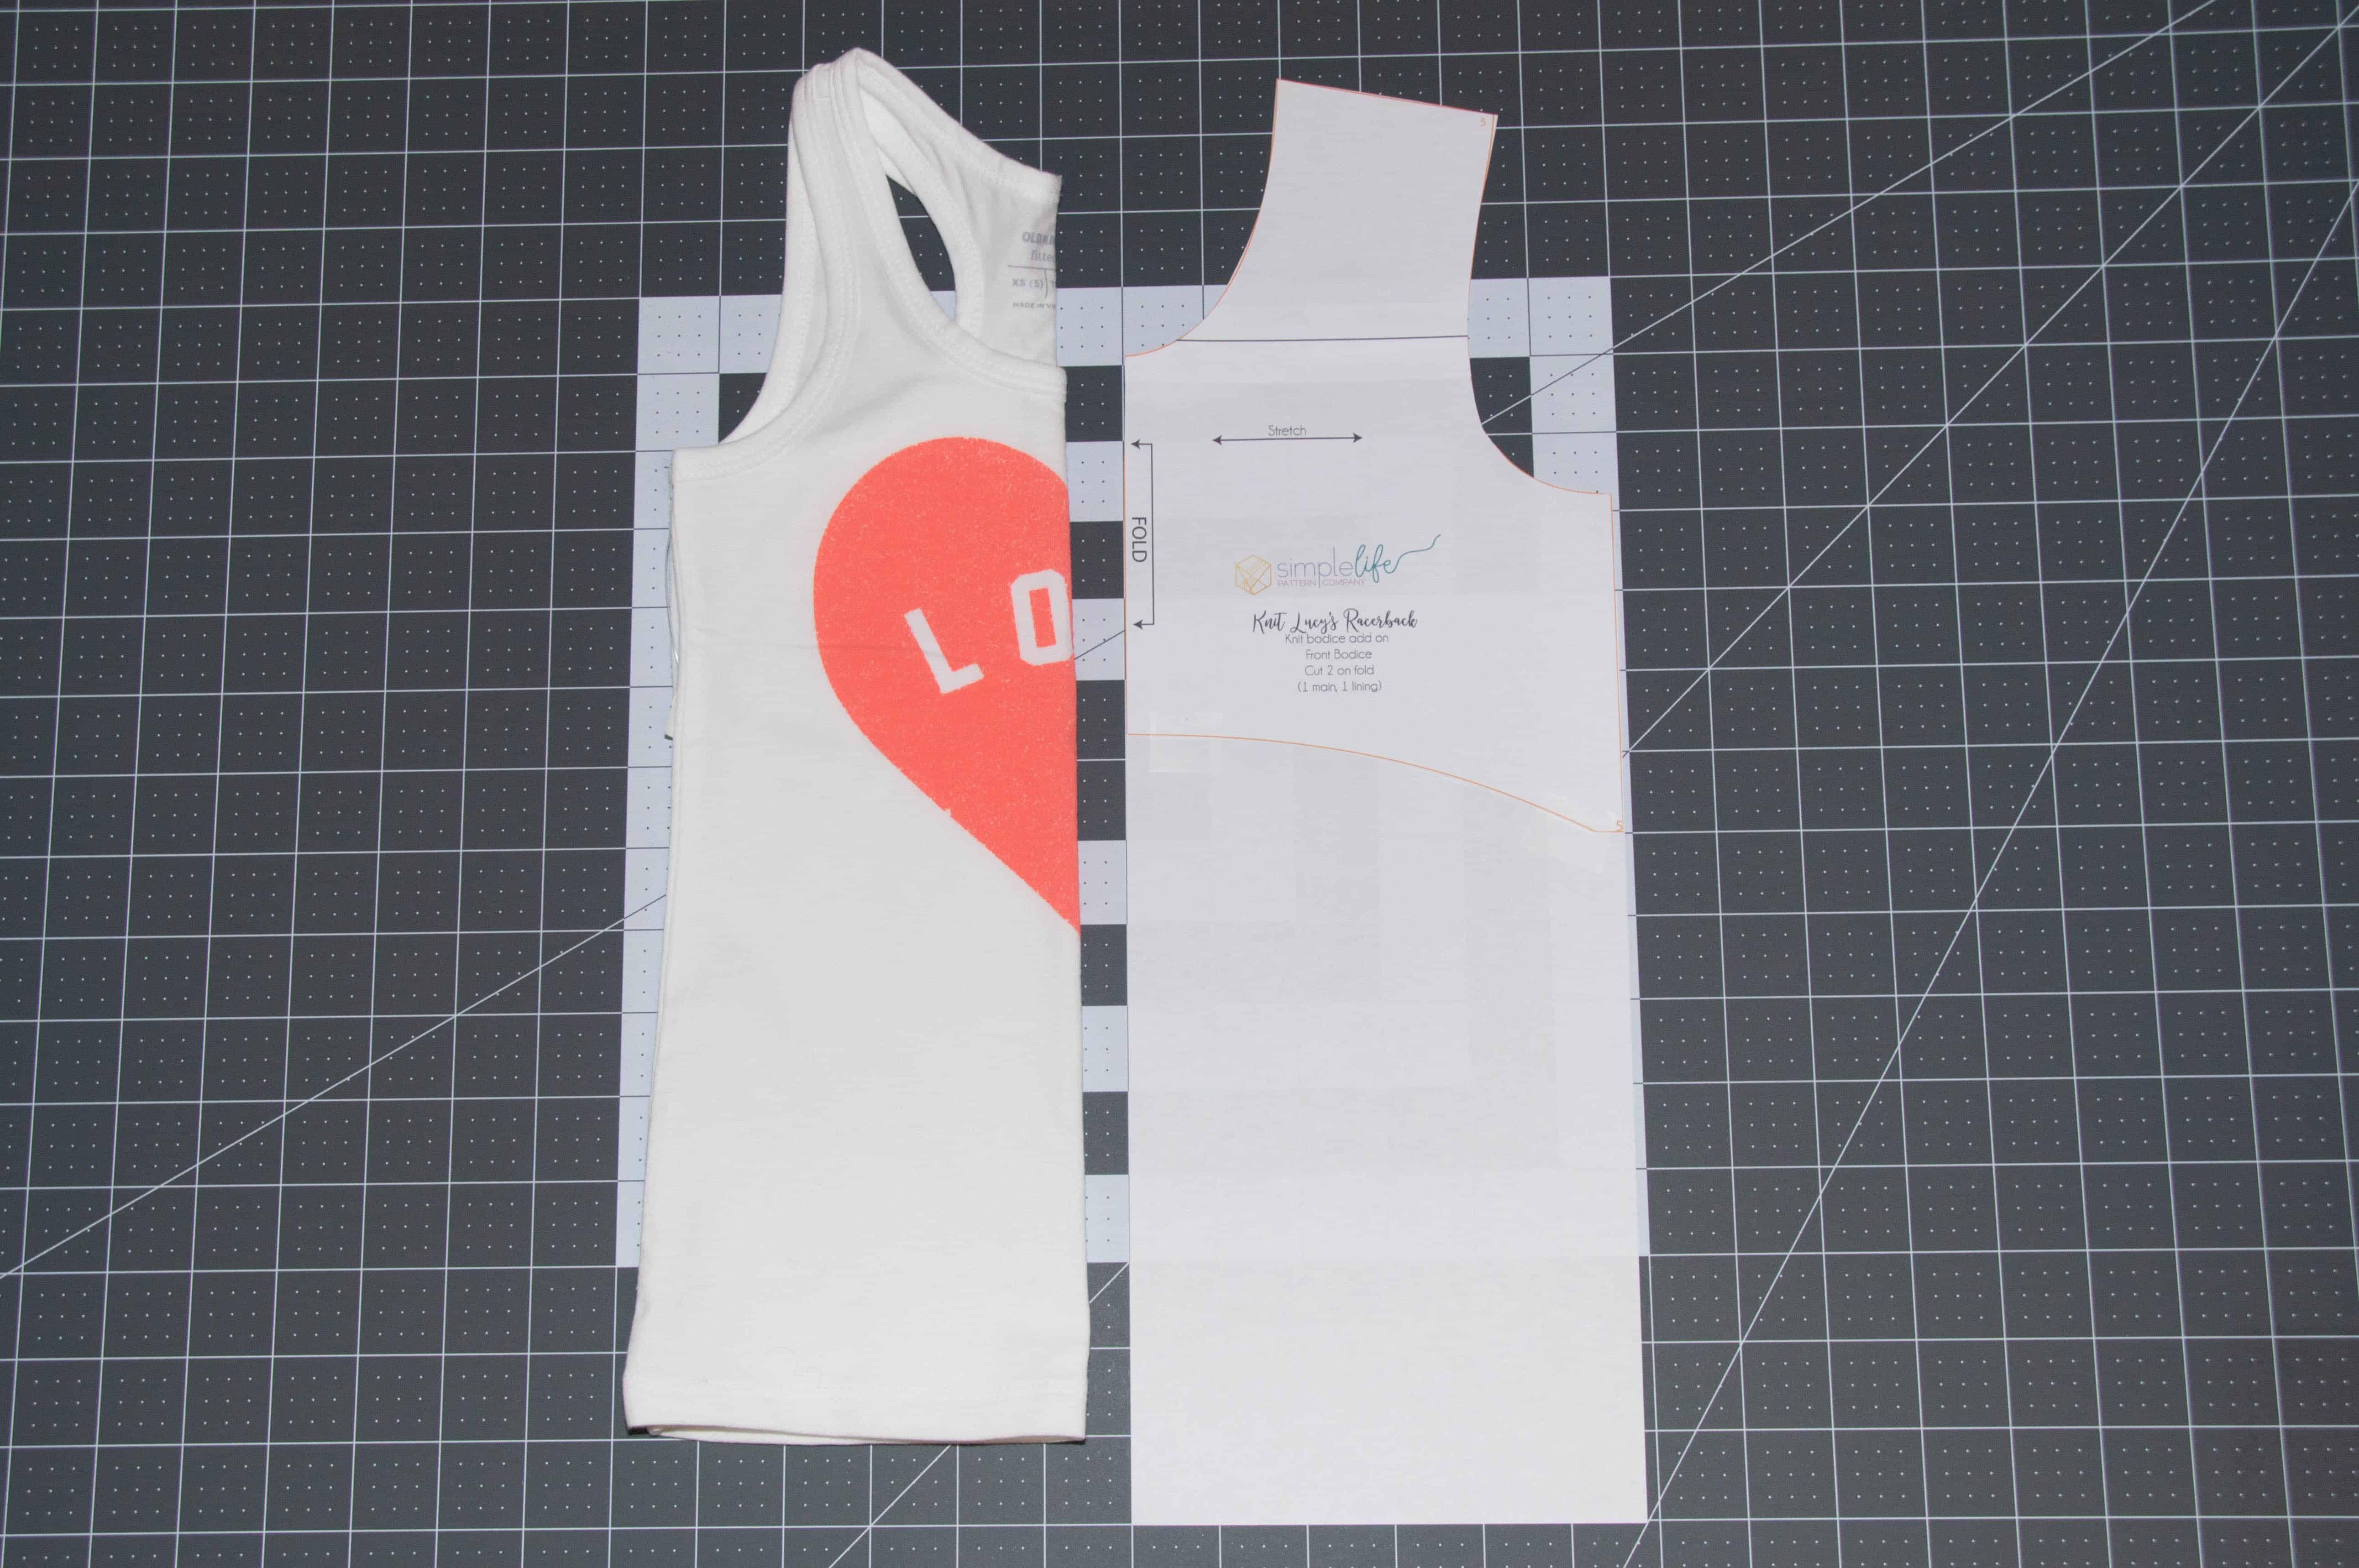
1.) Print out the Knit Lucy bodice in the size you need and cut it out. You are going to extend the length of the bodice. The easiest way to do this is to grab a shirt your child already has in their closet and measure the pattern against that. Remember to add 1/2″-1″ at the bottom for your hem.
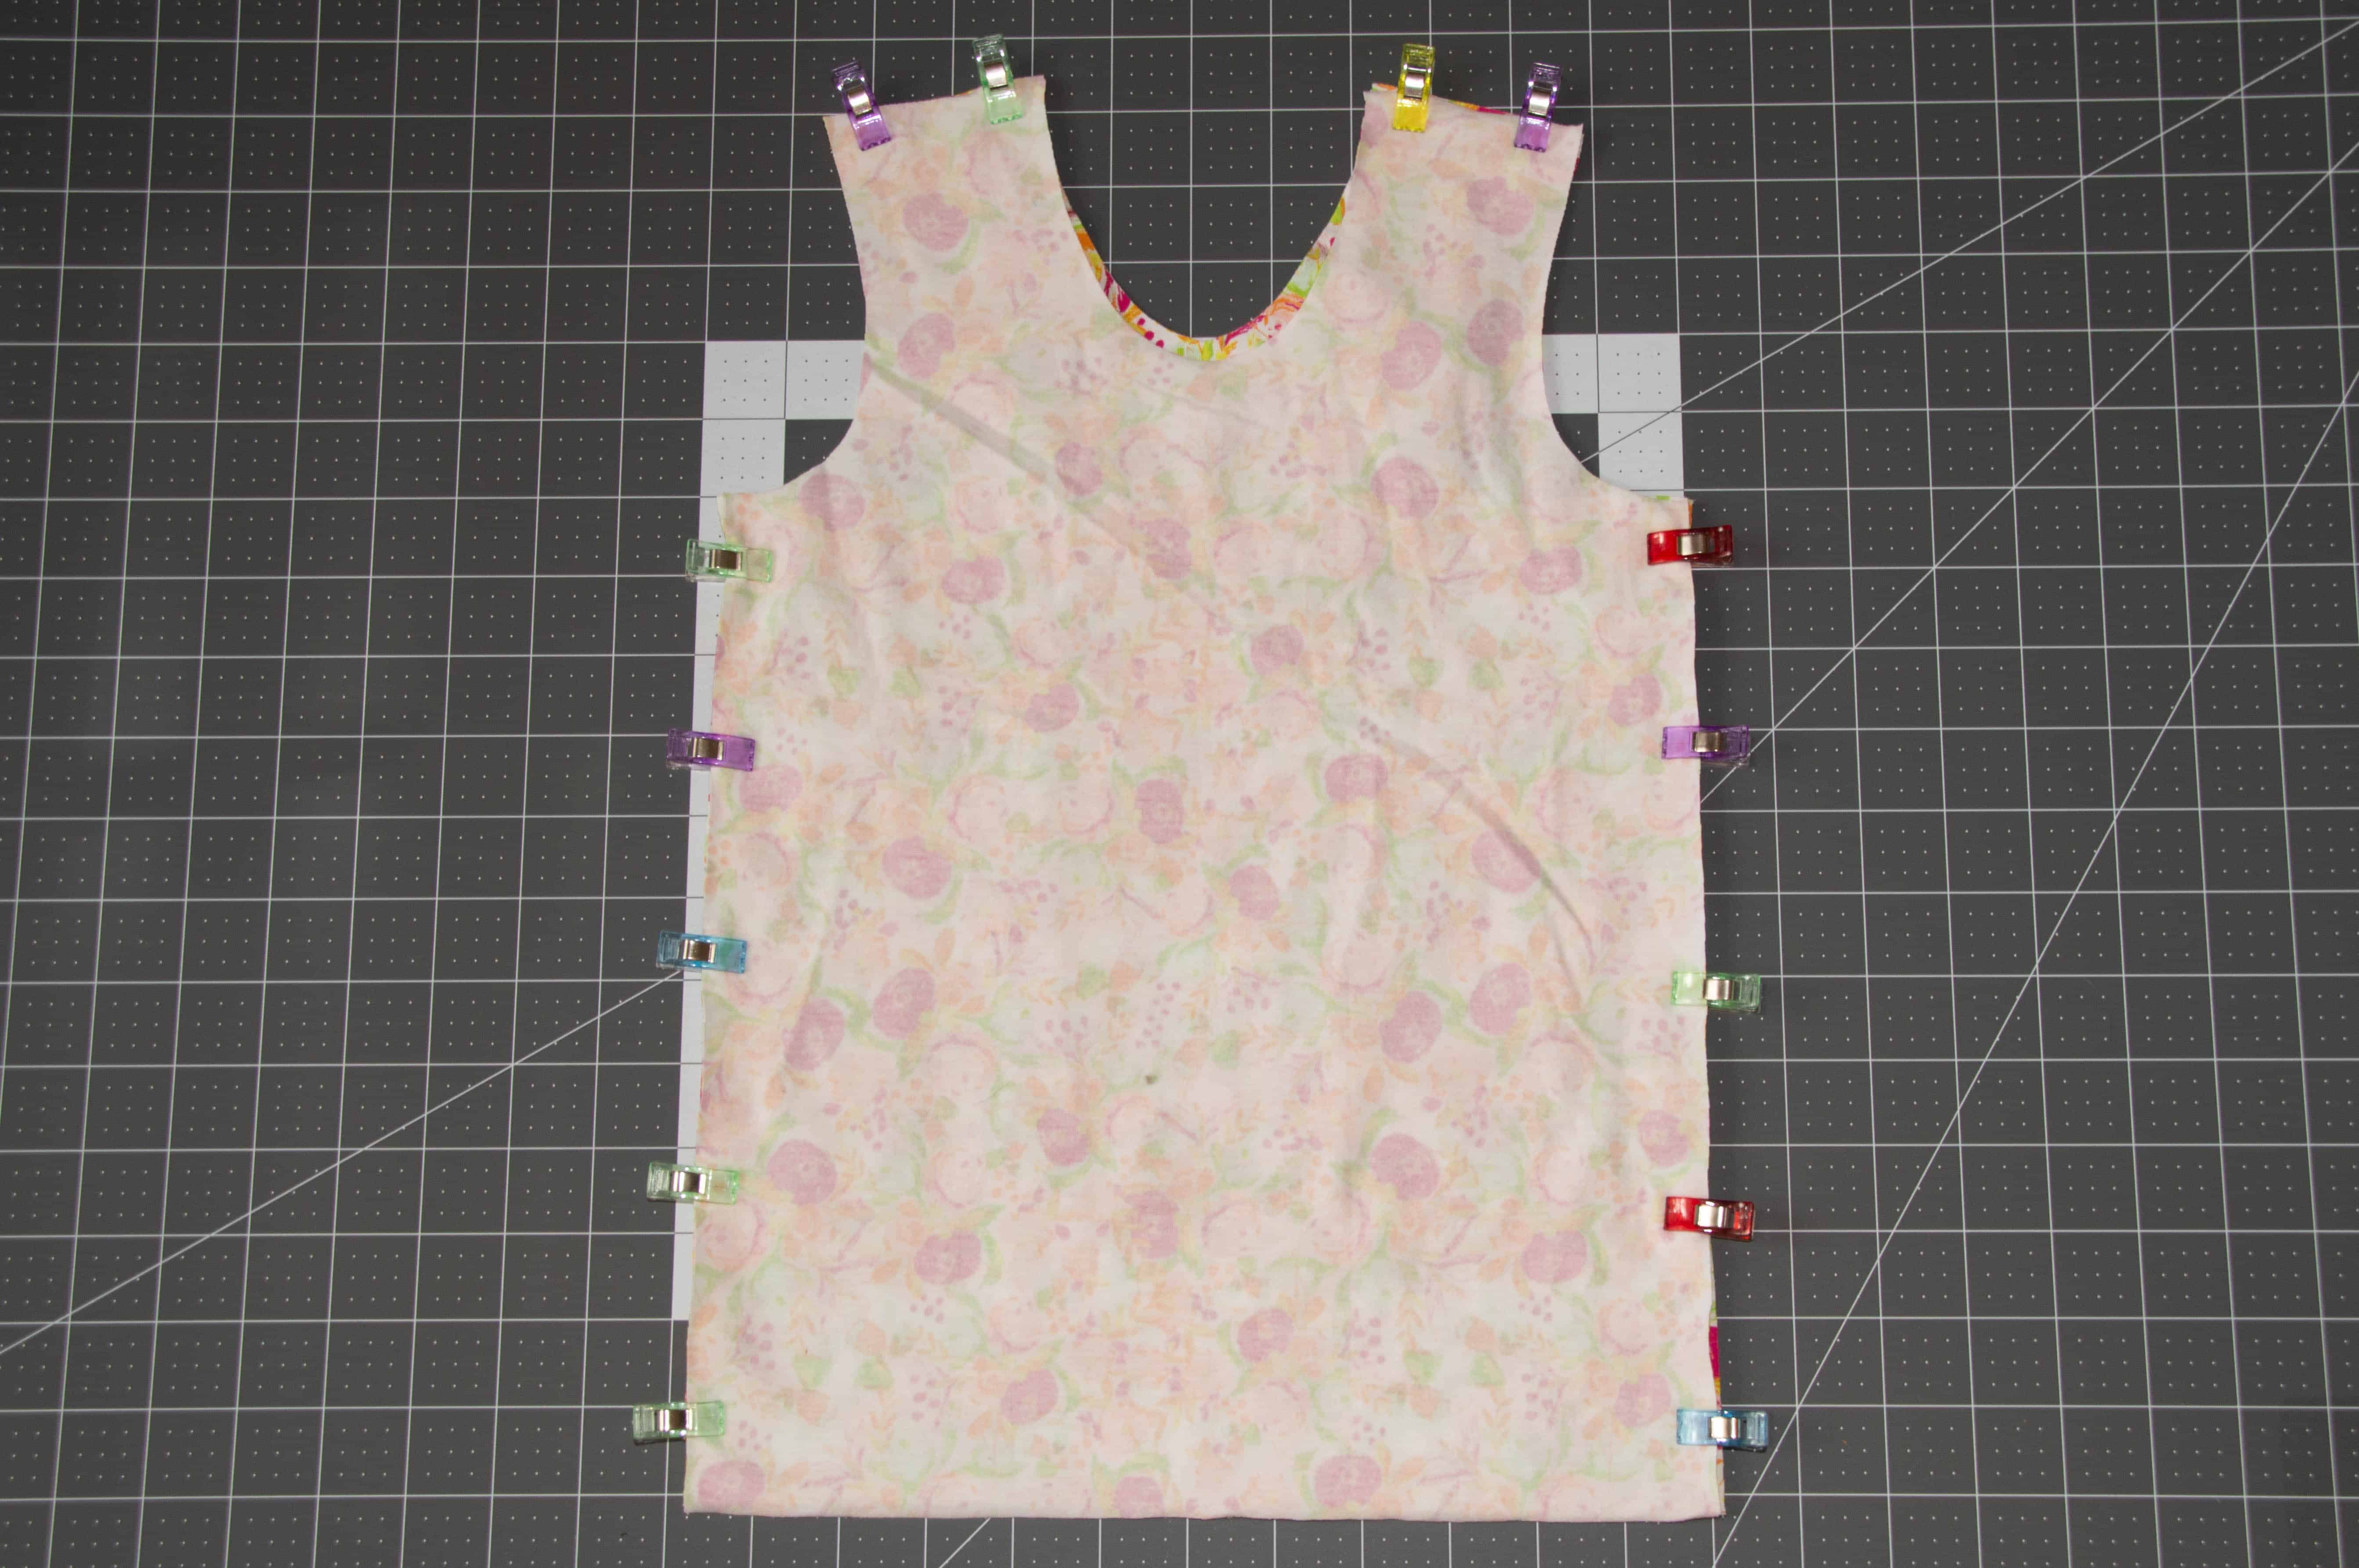
2.) Next, you want to sew the side seams and shoulders per the pattern instructions.
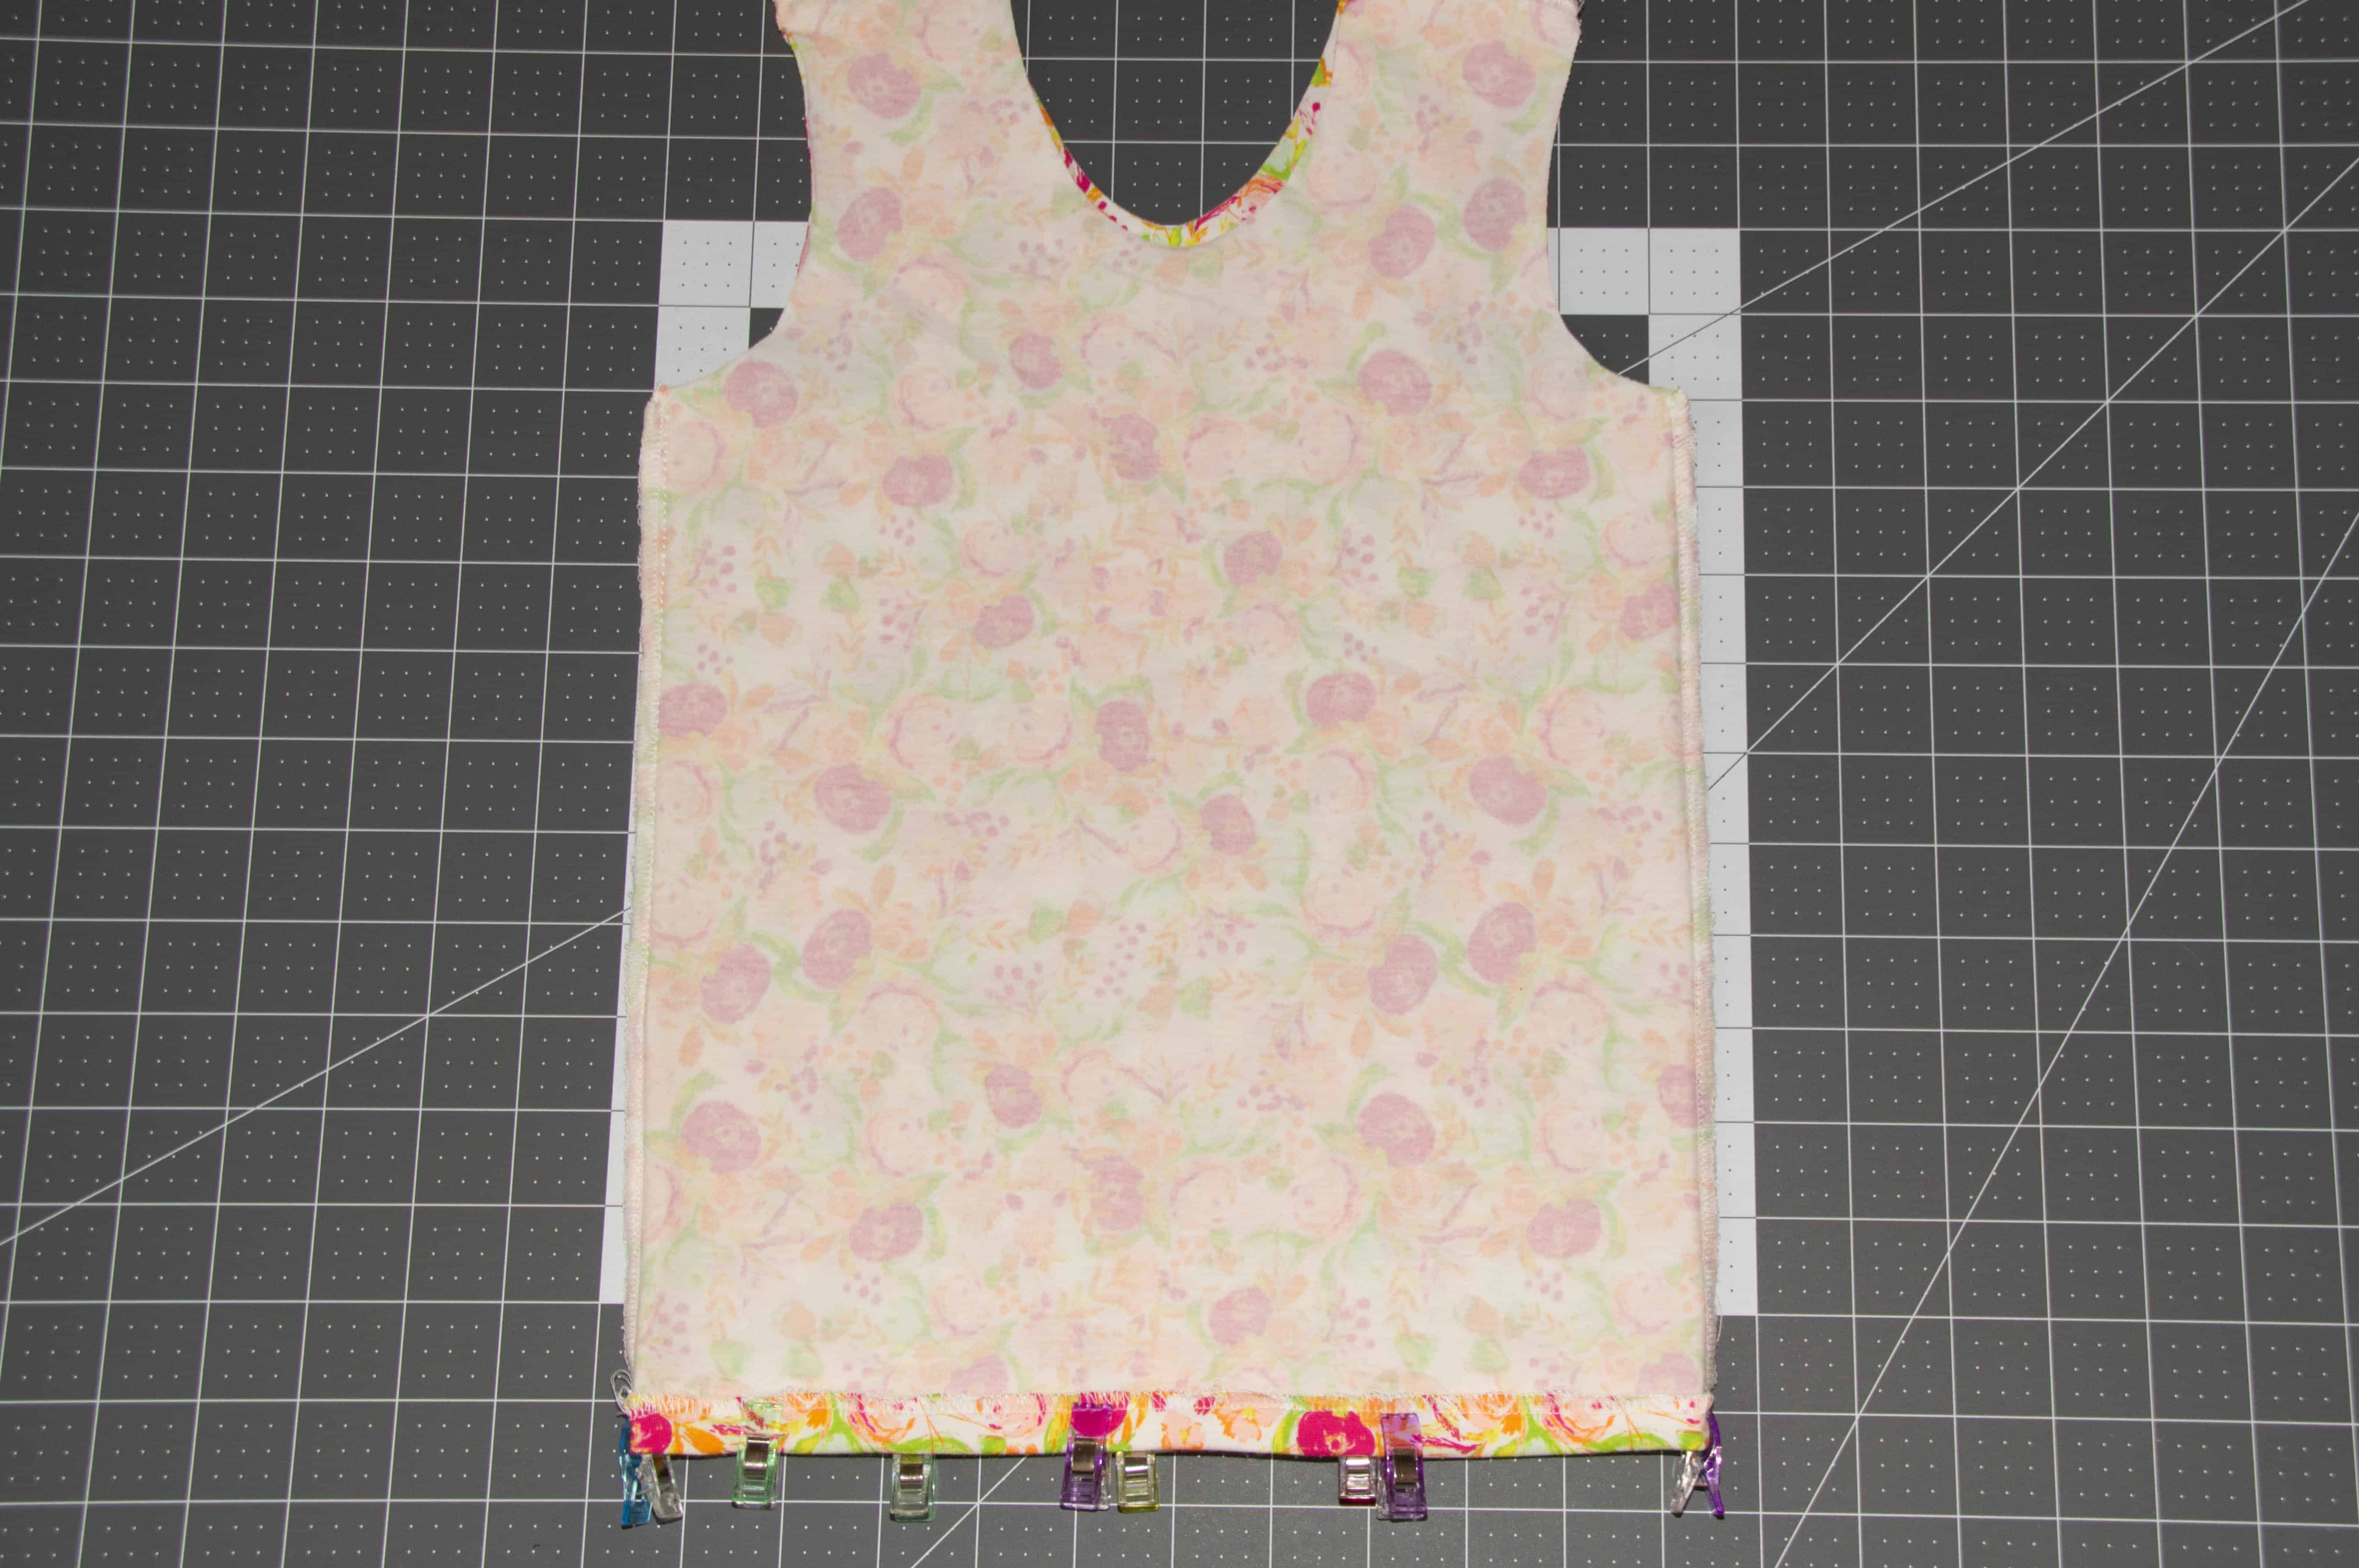
3.) Finish the bottom of the tank with your serger or zig-zag stitch. Fold the hem up 1/2″-1″ (depending on how much you added above for the hem) and stitch 1/8″ away from the edge.
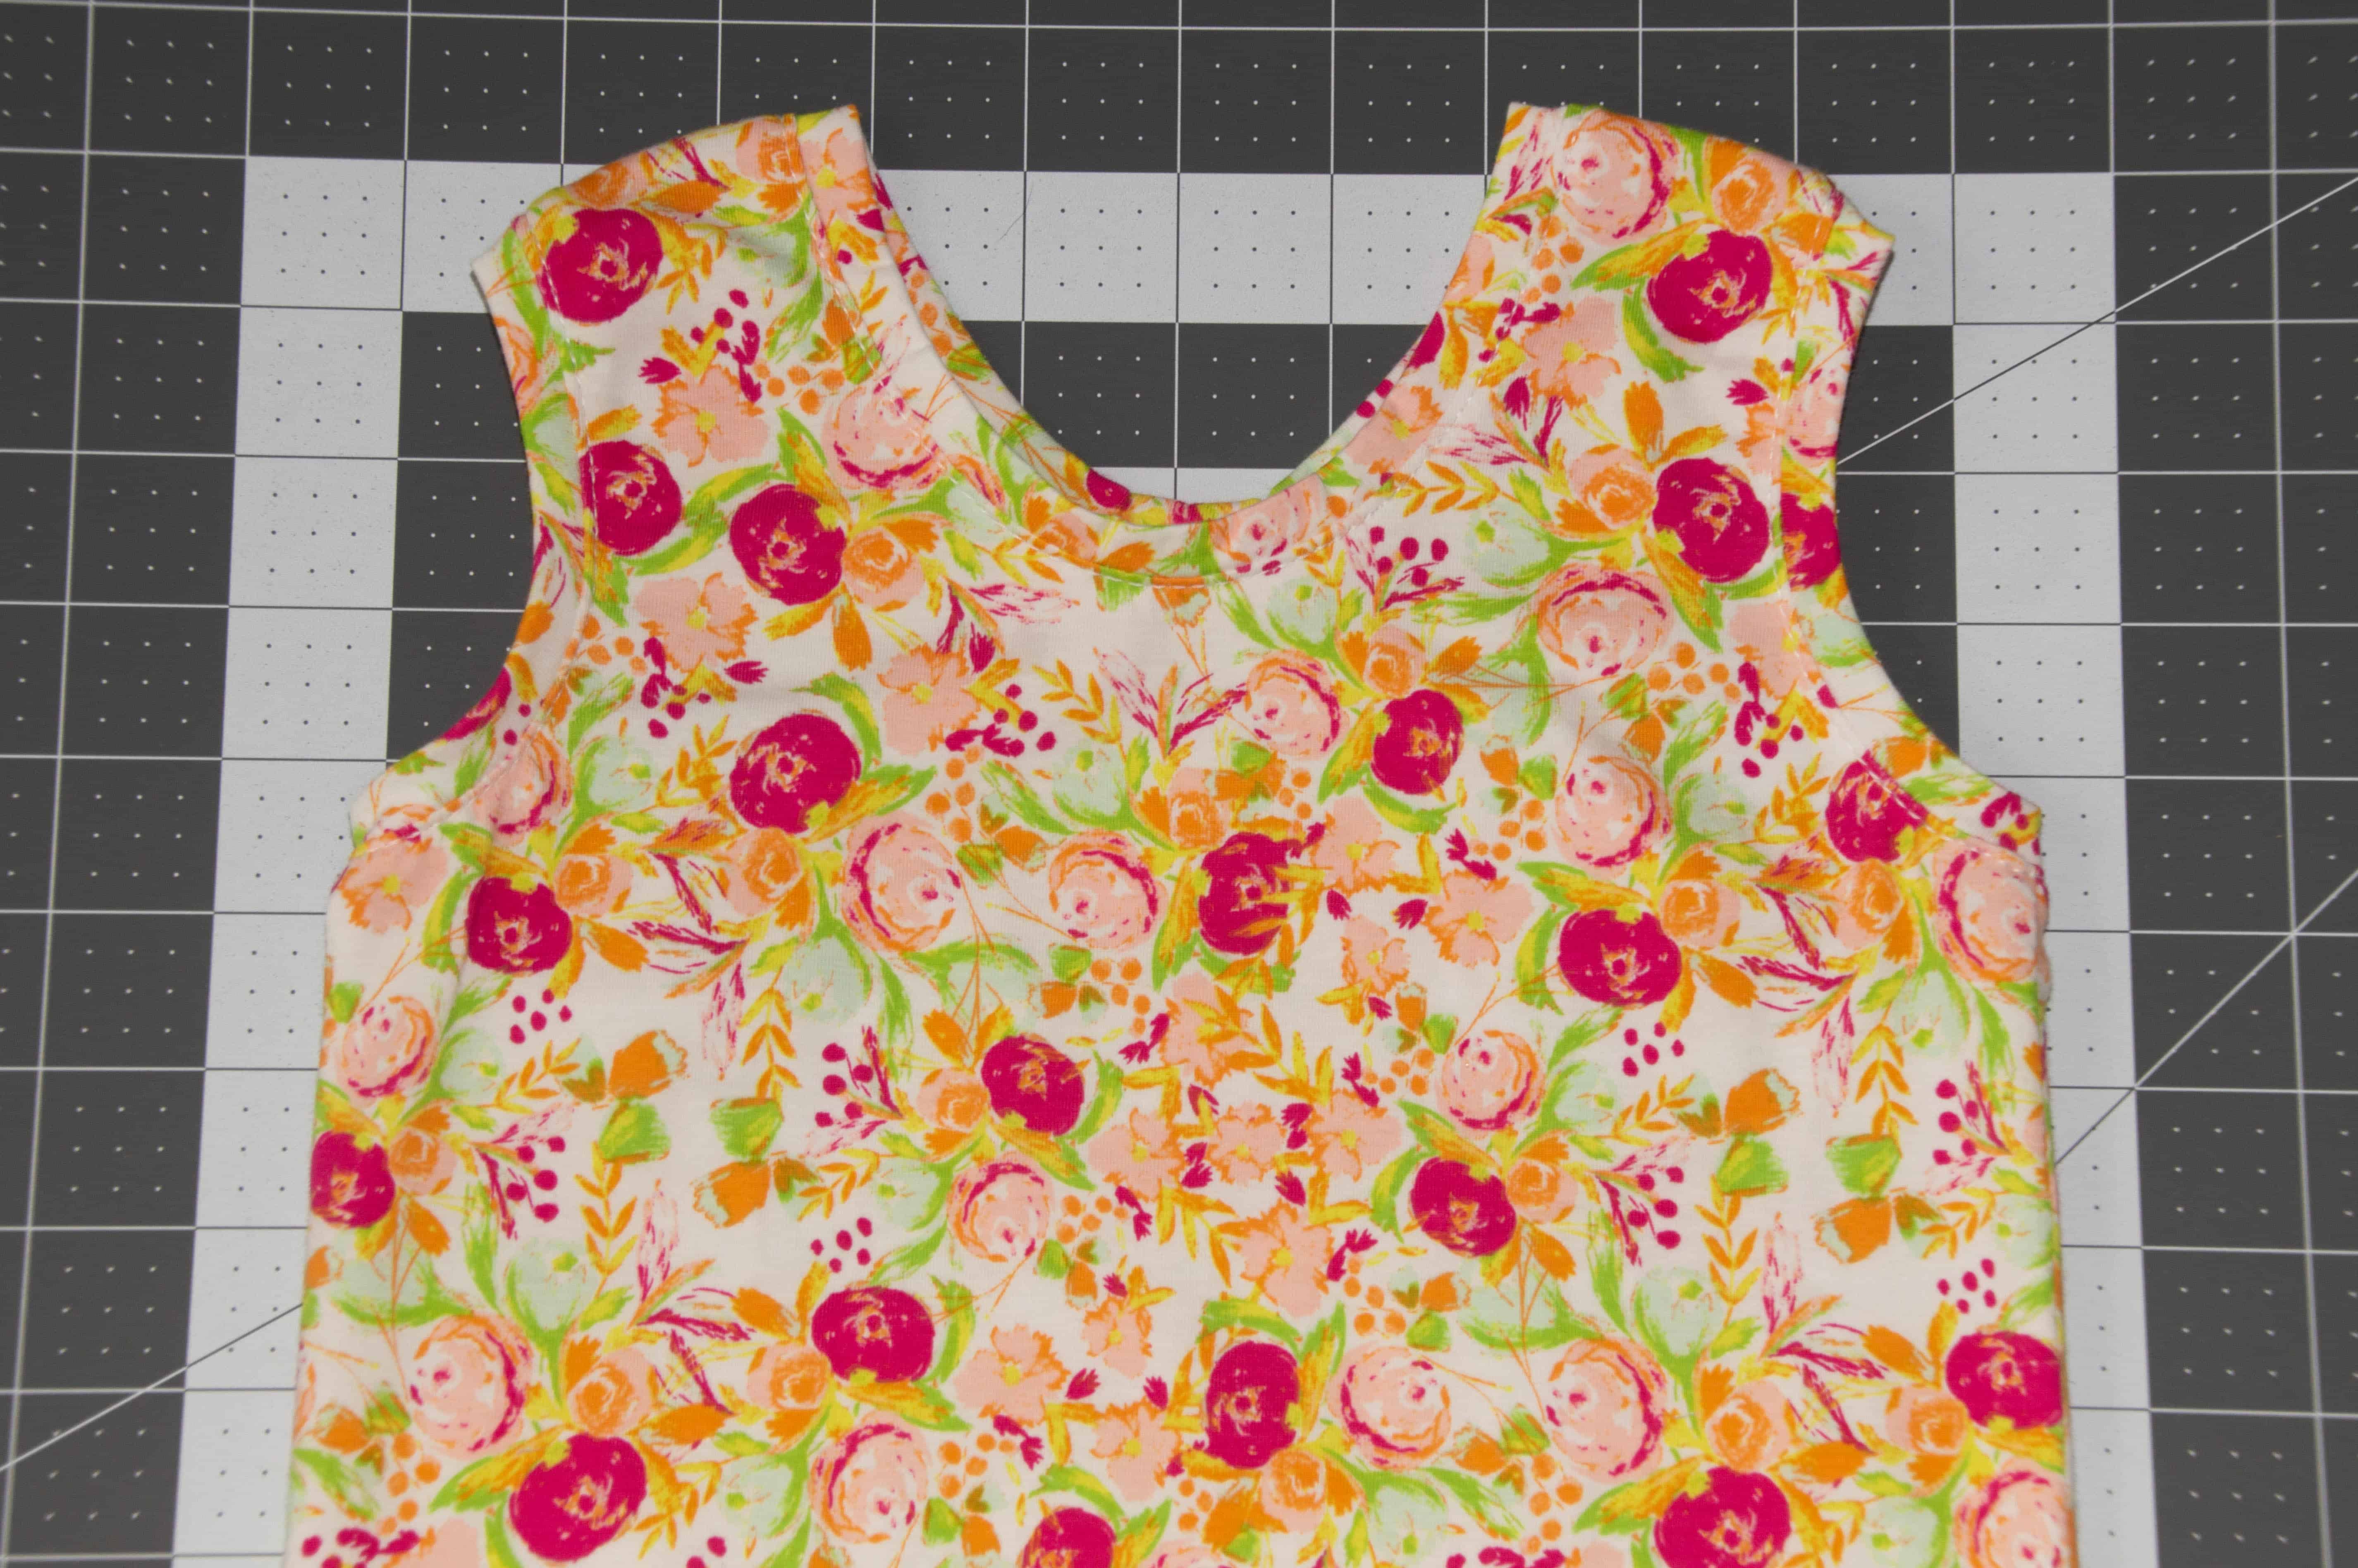
4.) Next, we want to bind the neck opening. This will take a bit of math on your part, your binding should be 85% of the neck. Measure the neck opening and multiply this number by 0.85 to get the length of your binding strip, then add the seam allowances (3/8″) to that number. Remember there are 2 edges that need a seam allowance so you’ll need to add it twice.
For example, a size 5 neck opening is 19.5” (19.5″ x .85= 16.5″ + .75″= 17.25″)
5.) Cut the binding strip 1.5″ by the length you determined above. (Example: 1.5″ W x 17.25″ L) Sew the short ends of your strip together and fold in half lengthwise, wrong sides together, creating a loop. Press lightly.
6.) Section the neck binding and the neck opening into four even sections.
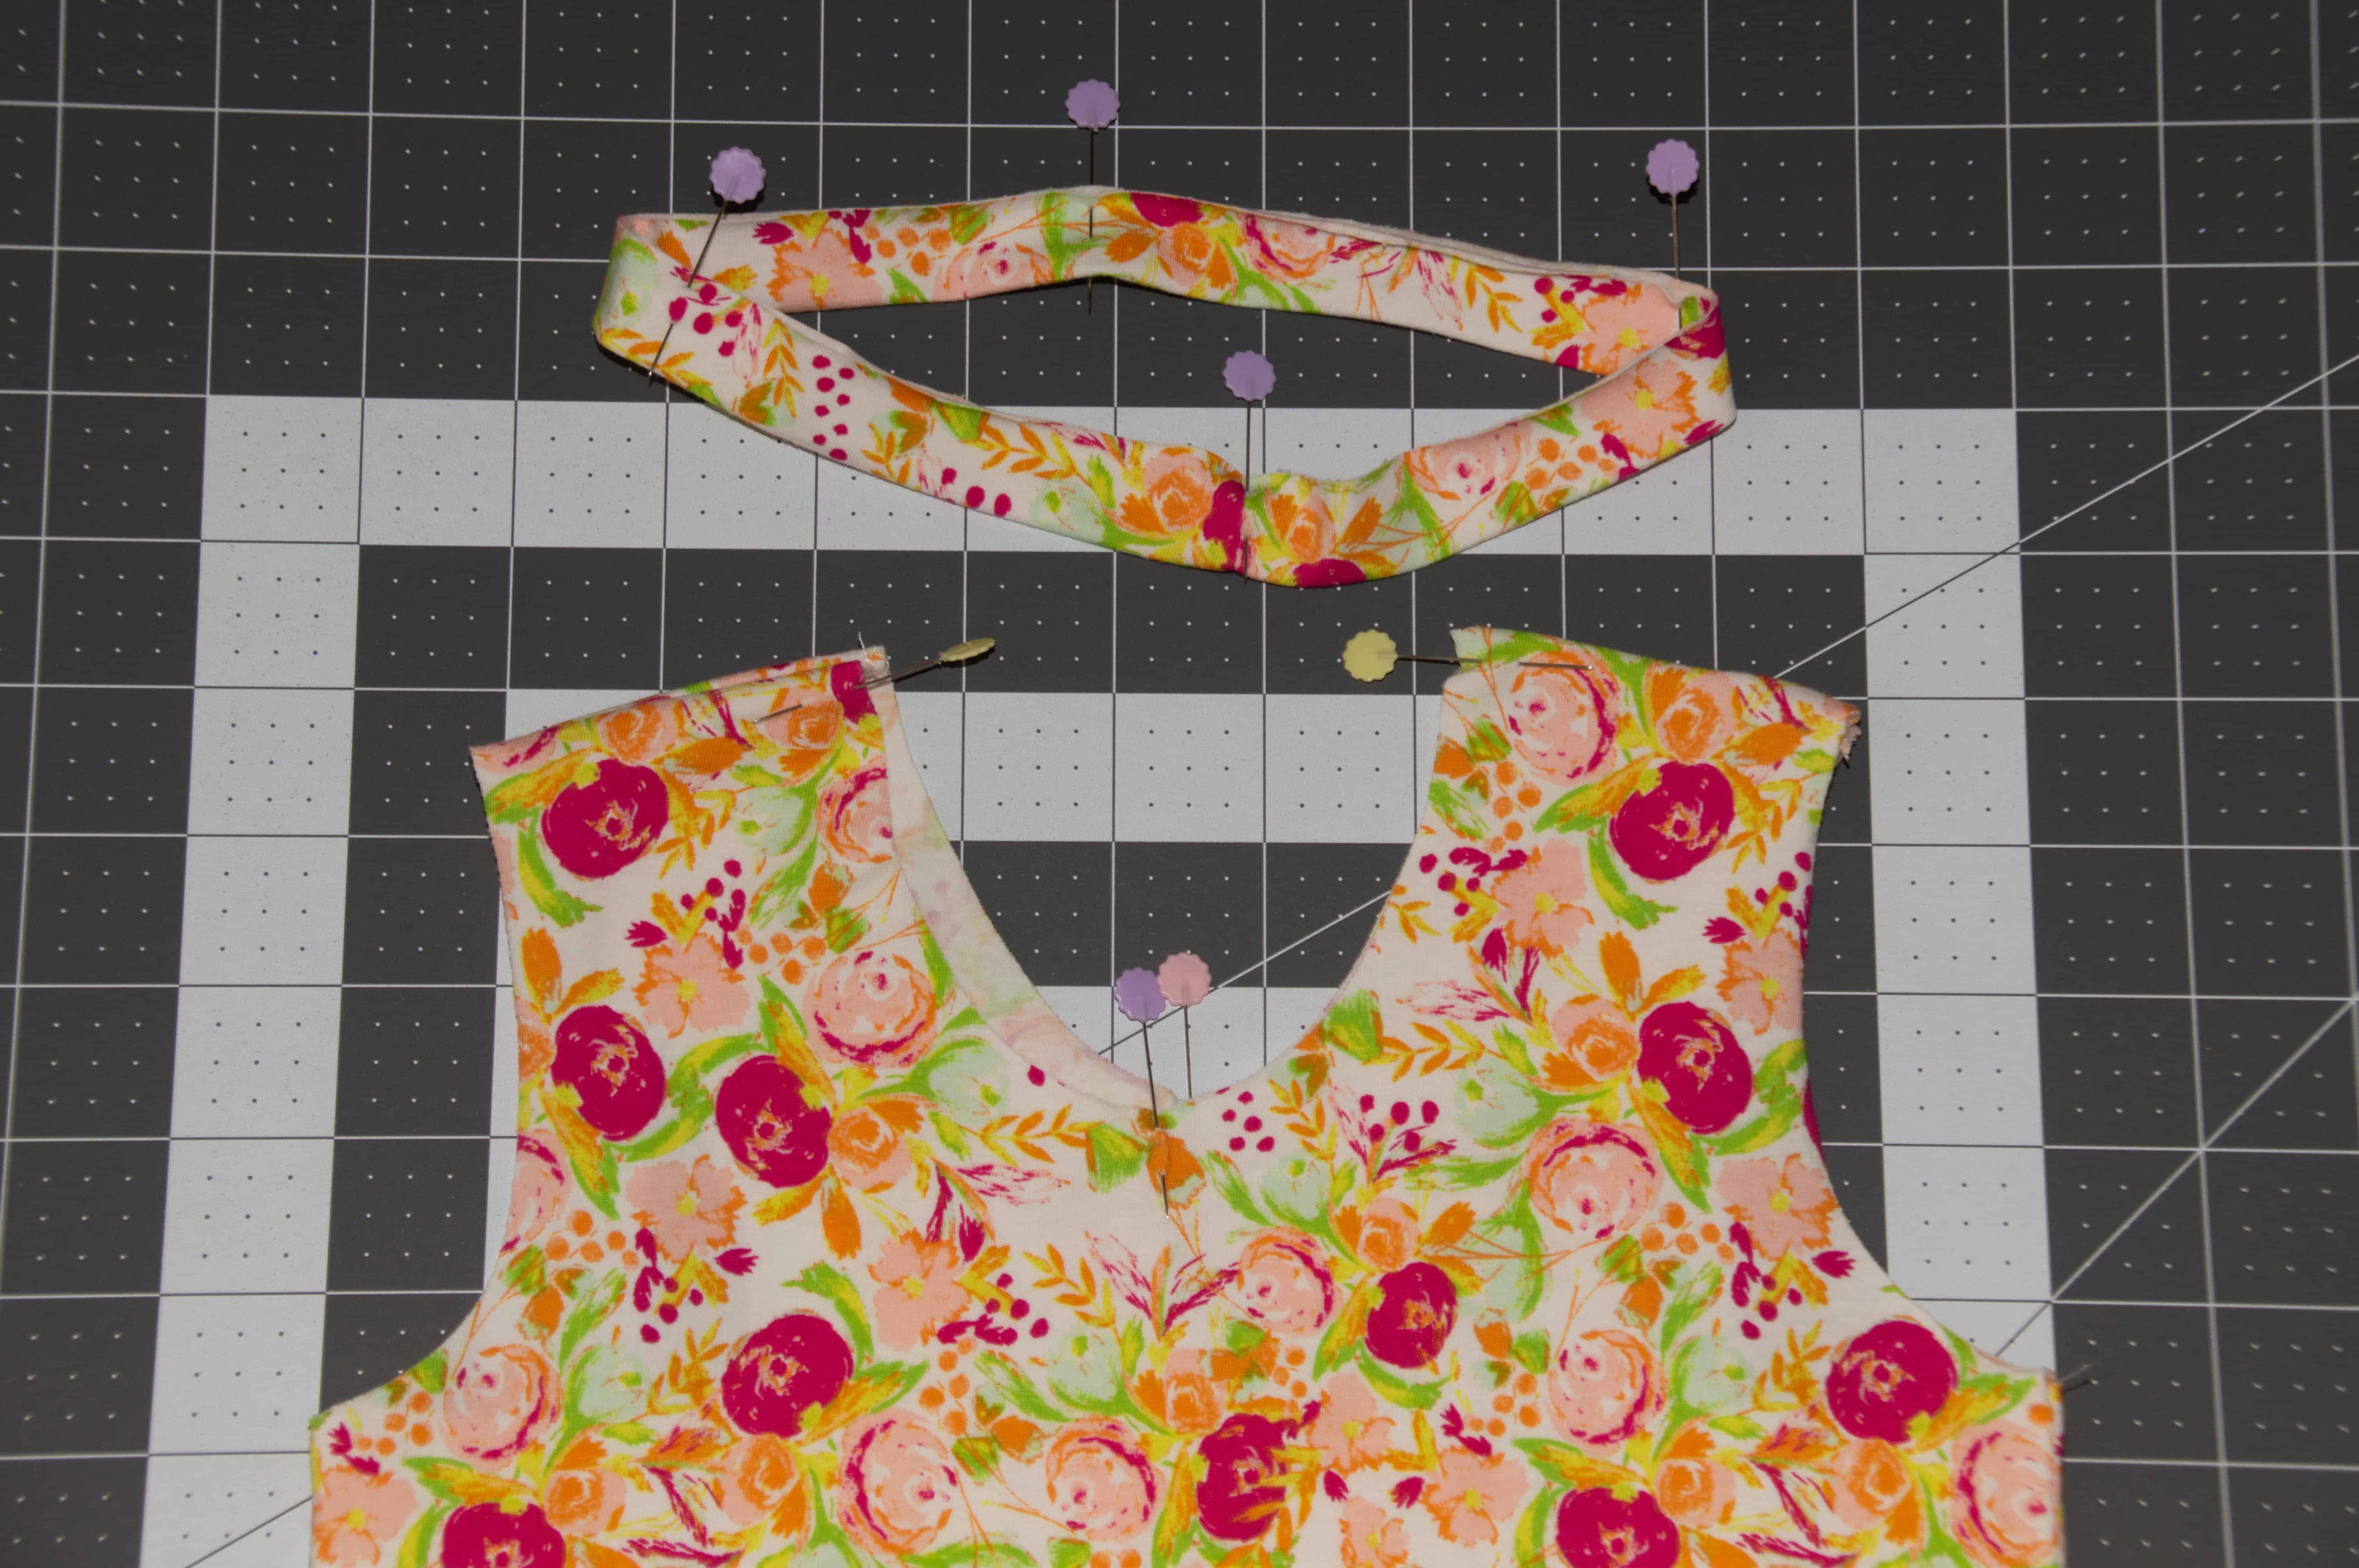
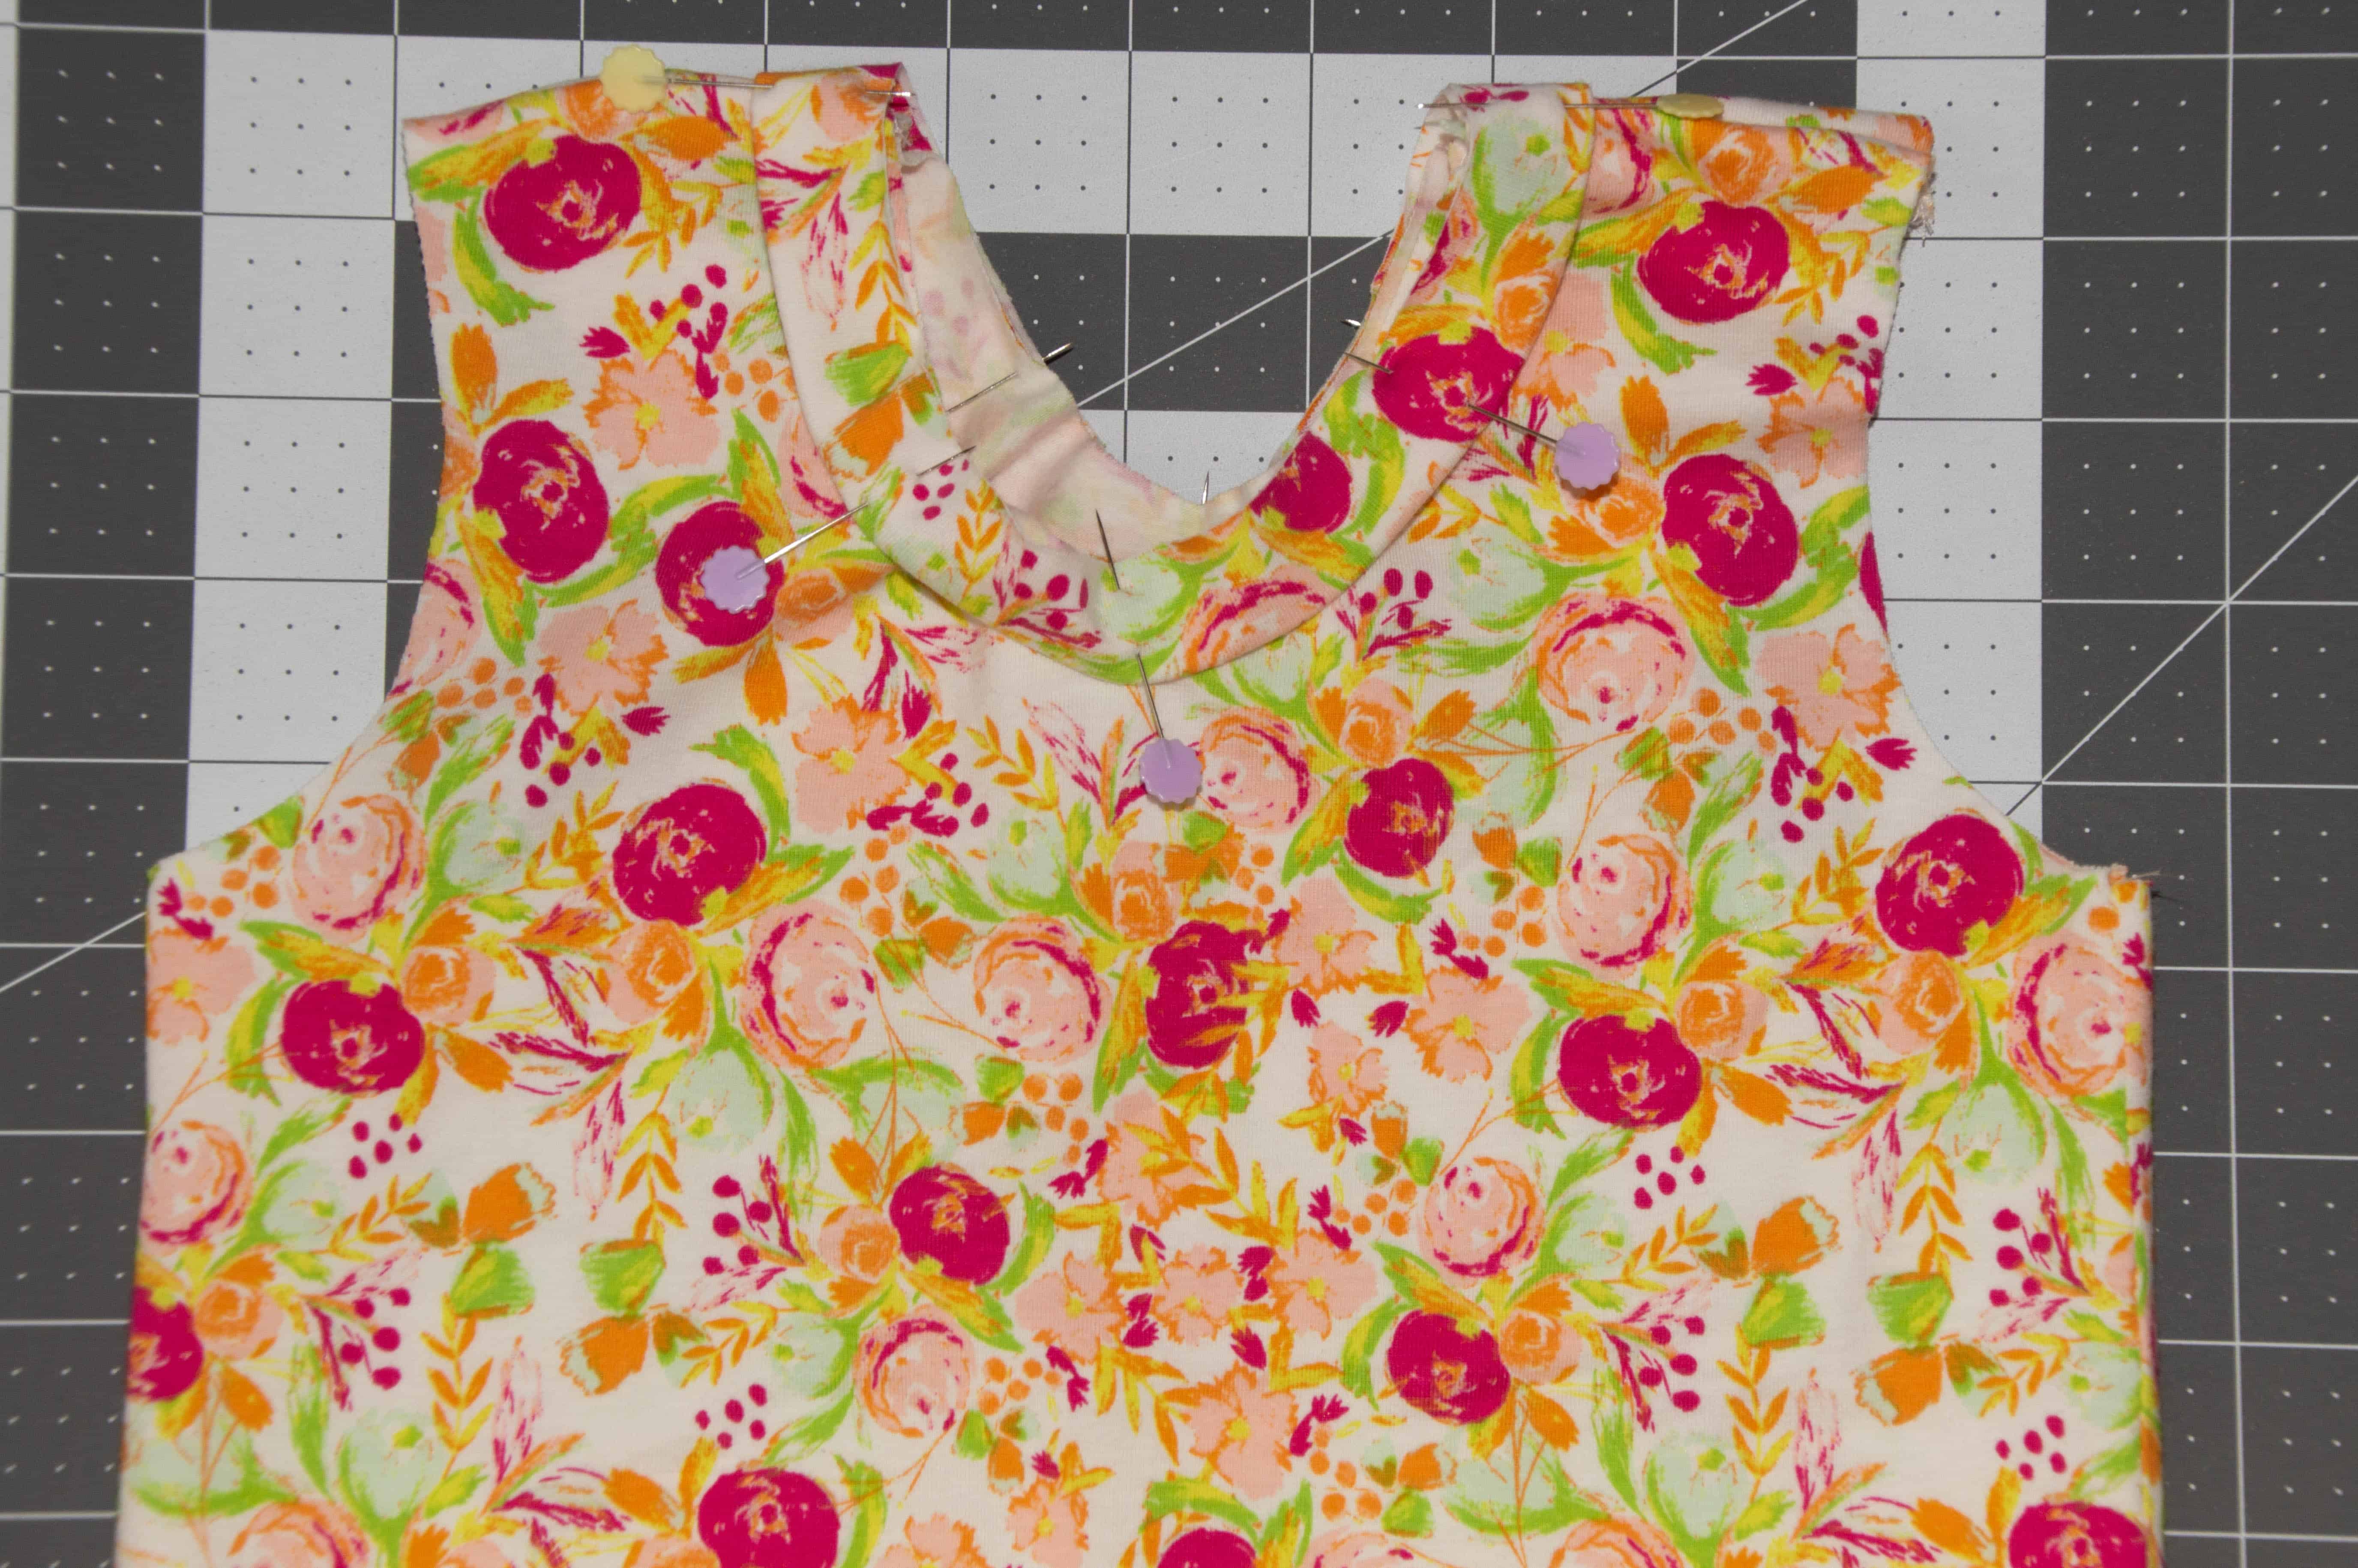
7.) Pin the neck binding to the right side of the neck opening, matching the pins. Center the seam on your neckband to center back of the shirt. Slightly stretch each section until the neck binding is the same length as the neck opening and pin each quartered section. Attach the neck binding using a stretch stitch and finish the seams.
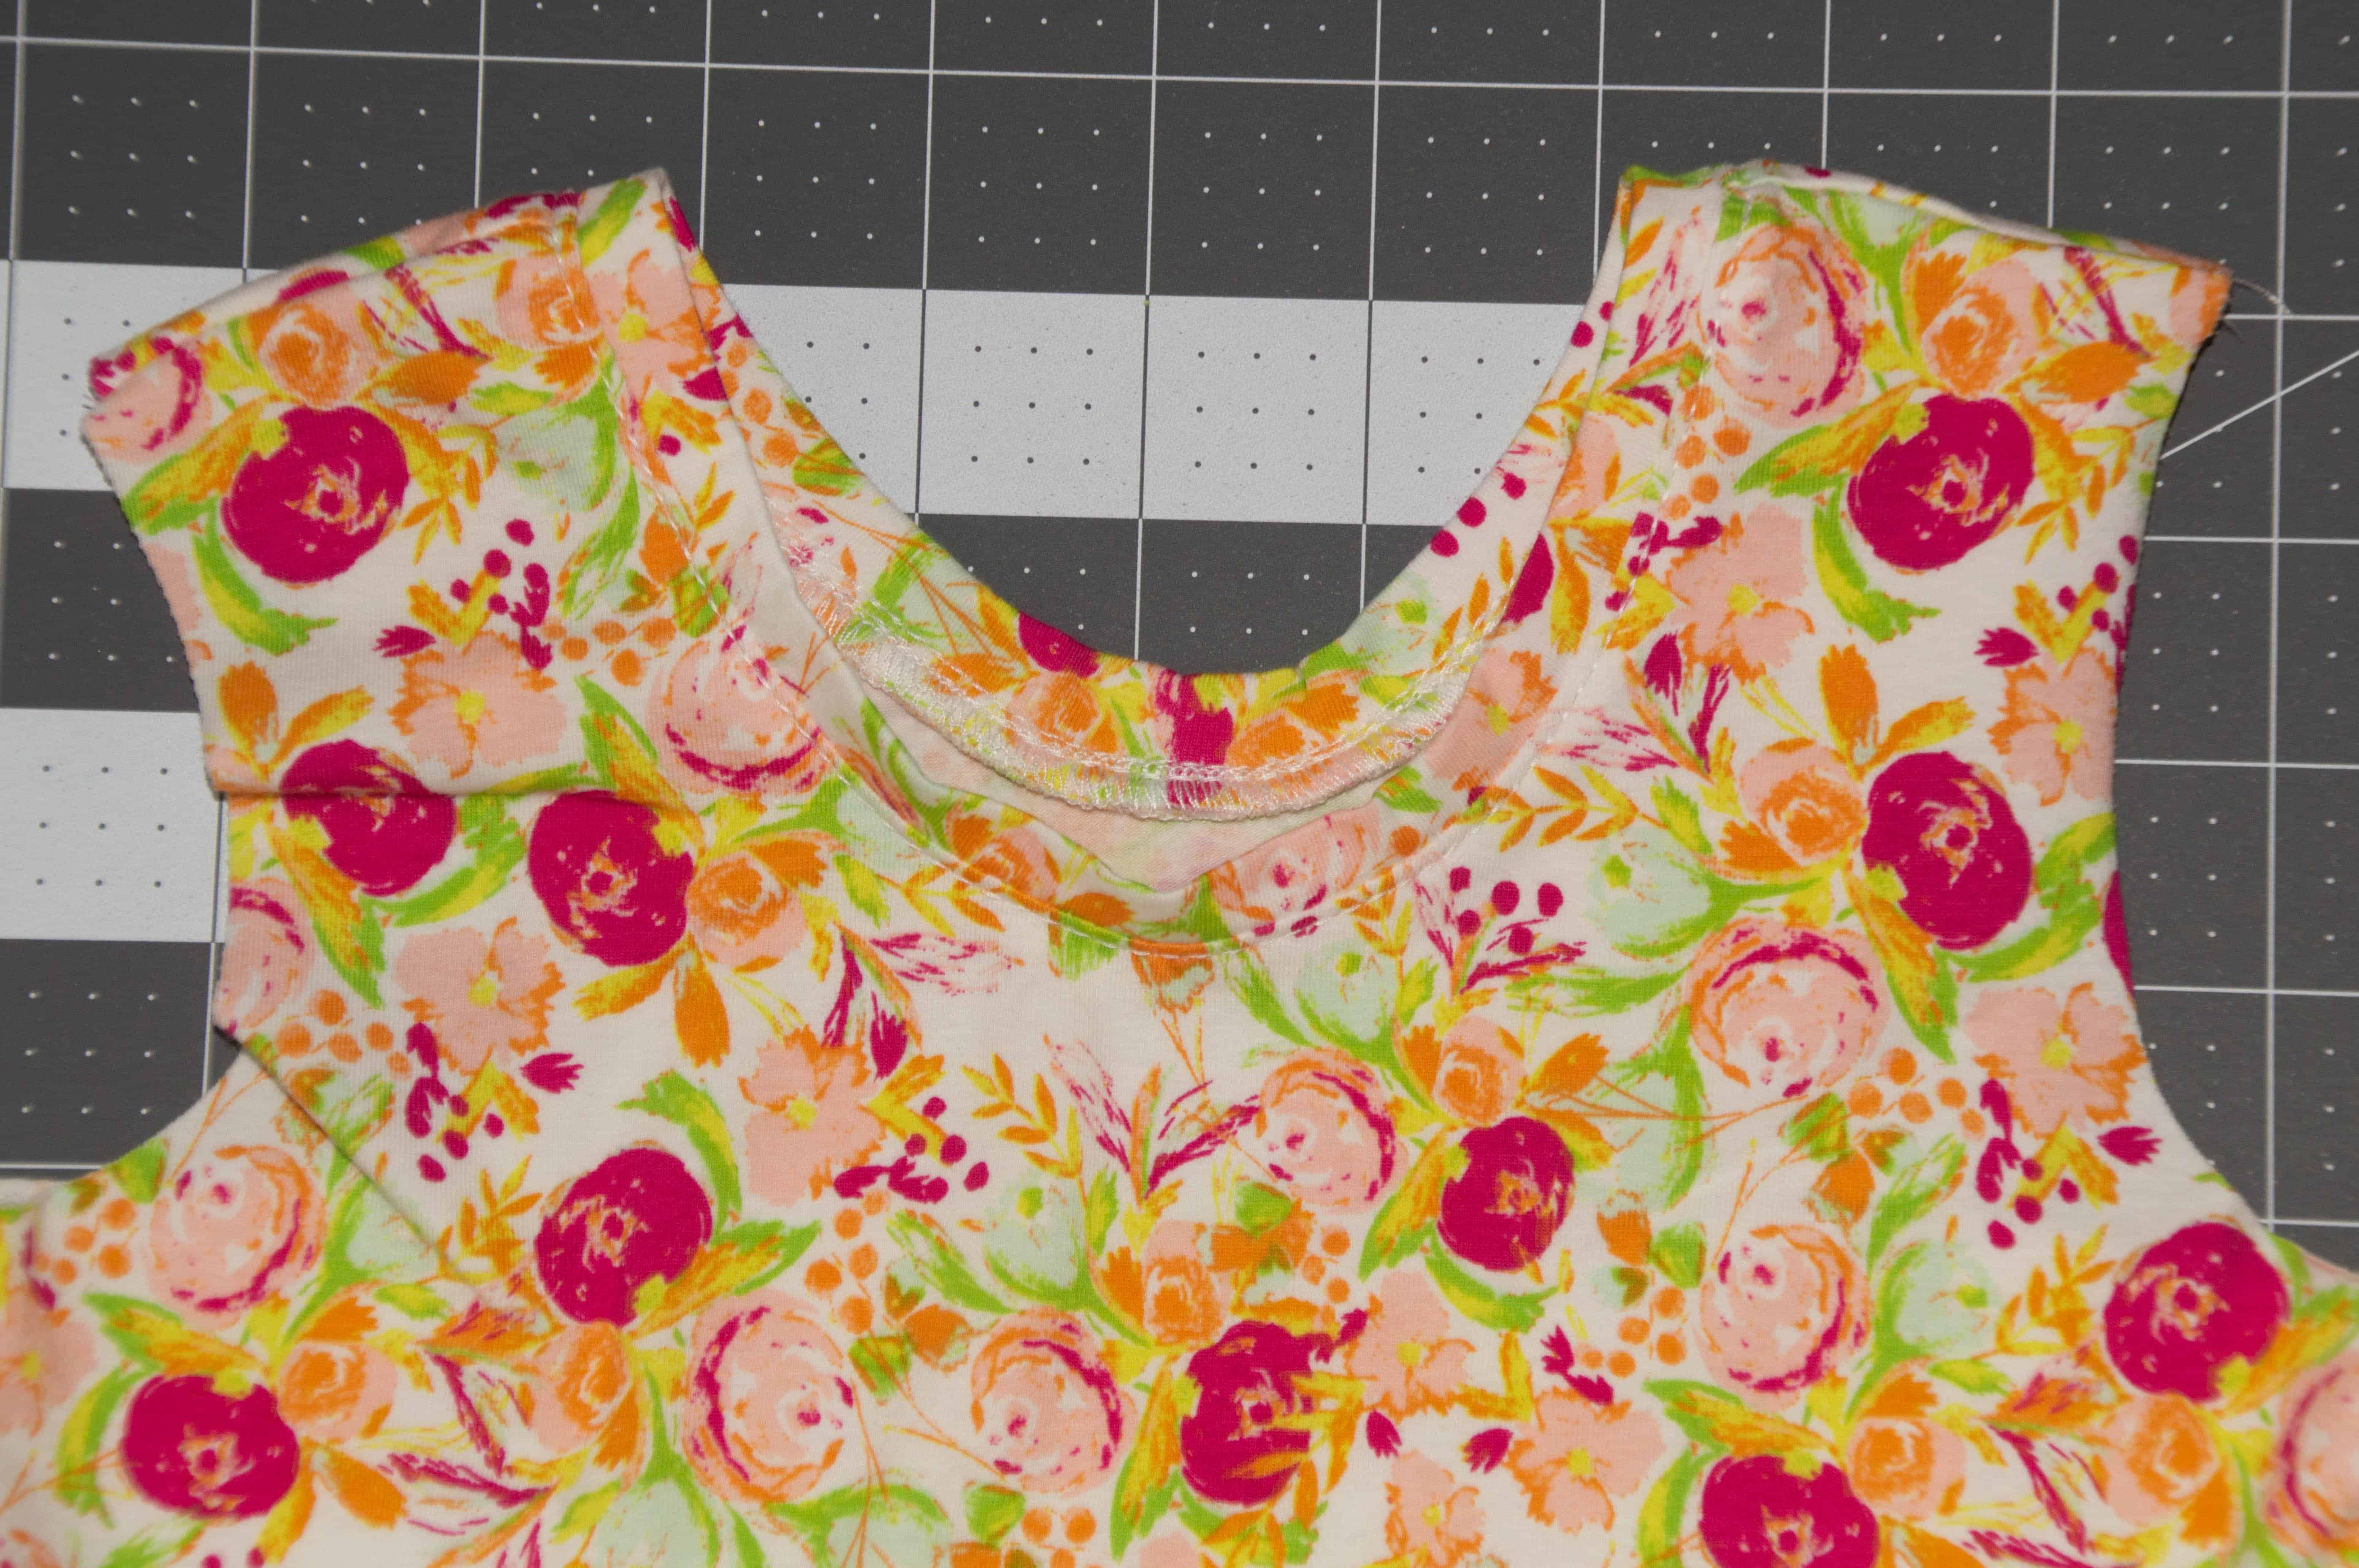
8.) Flip the neckband up and press lightly. Topstitch the seam allowance down 1/8″ from the seam.
9.) Repeat steps 4 through 8 for the armholes.
There you go…a quick and easy way to make your own super cute racerback tanks!
I hope you enjoyed this tutorial. Please let me know in the comments what other tutorials you’d love to see this summer.
Happy Sewing!
xoxox-Becca