Norah & Shelby Sew Along – Day 2
Welcome back friends! For day two of the Norah and Shelby sew-along we are working on the bodice. Our task today is to complete steps 1 through 12. This includes adding the straps to the back of the bodice. It looks tricky but I promise once you do it a few times it gets so much easier. I’ve also added a video in the FB group to help guide you along.
Bodice Construction
Whether you are working on Norah or Shelby, the construction of the bodice is the same. However, just make sure you are using a stretch stitch if working with knit fabrics. First, we will start by pinning our front bodice main to our back bodice main with right sides touching along the shoulder. Sew in place. Repeat with your lining pieces.

Next, fold your strap piece(s) in half lengthwise with right sides touching and sew along the raw edges using a 1/4″ seam allowance. Turn your strap piece(s) right side out and press. Topstitch along both edges of your strap(s).
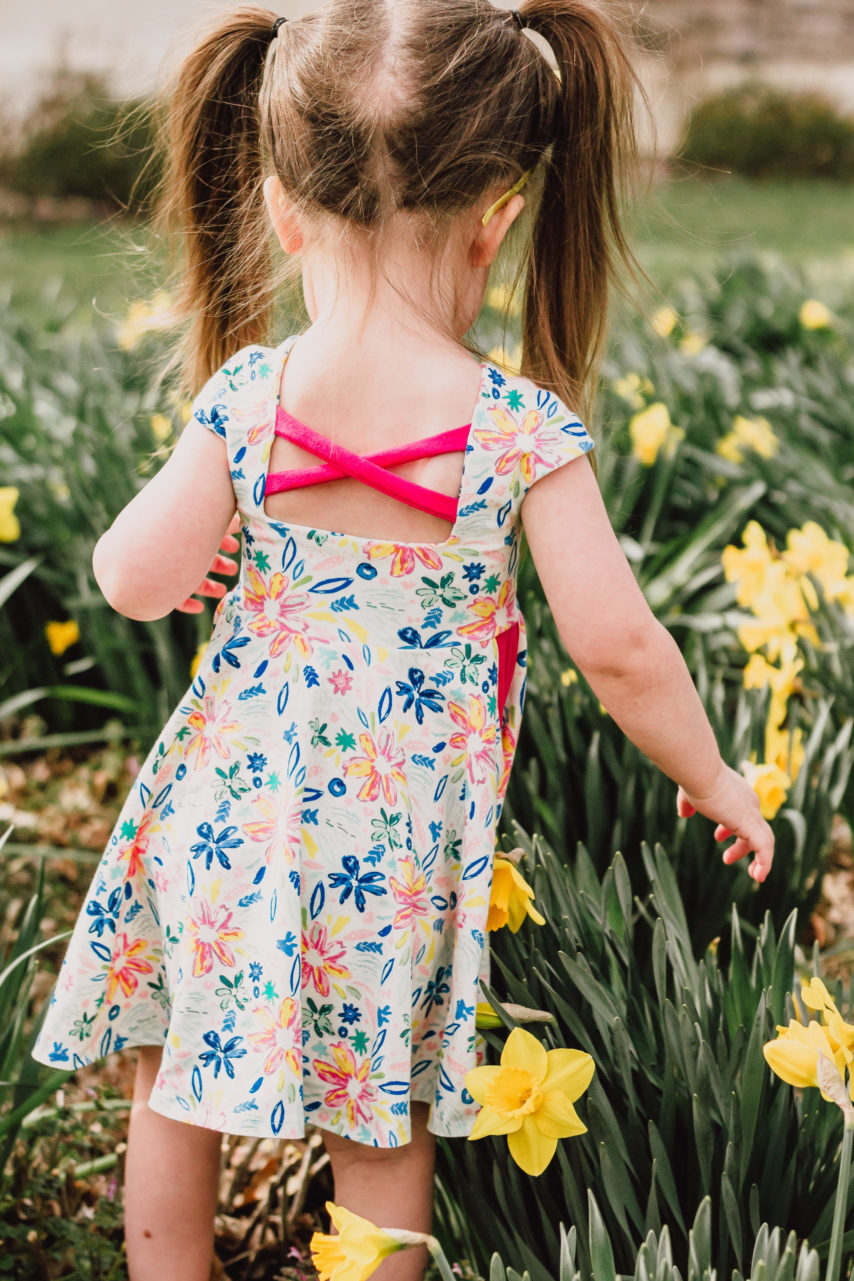
Now, using your back bodice pattern piece as a guide, mark your strap placements using a pin. I prefer to make a small mark using a fabric pencil. Refer to step 4 of the pattern for strap placement regarding cross, double, or single strap(s).
Lay your main bodice right side up and place the lining pieces on top, with right sides touching. I find it helpful to match up the shoulder seams and pin there first. Sew along the front neckline only. DO NOT sew the back bodice pieces together yet.
Adding Straps
Take your time on this section because patience will pay off. Start by centering your straps along the marks you made, with right sides touching. Pin in place. Certainly make sure your straps are angled if doing the cross back version. The angled edge should be parallel with the raw edge.
Next, flip the lining back over the main fabric and pin in place. Sew along the side where your straps are pinned. Continue across the lower back a little over halfway.
Lay your bodice with lining side up. Separate the main and lining fabric on the side without straps attached.
This next step will probably be the hardest. Take the main and lining fabrics from the side your straps are on and fold them under to the other side. Step 10 of the pattern instructions provides even more details on what this should look like.
Once you have the straps flipped under, make sure they have not become twisted and are laying out straight. Now, take your straps and fold them over and pin them to the other side of the bodice along the markings. Pin in place.
Finally, flip the lining over the straps and onto the main fabric. Sew the side of the back bodice and across the lower back to your other stitching. Clip all corners and curves along the neckline. Turn right side out and press well.
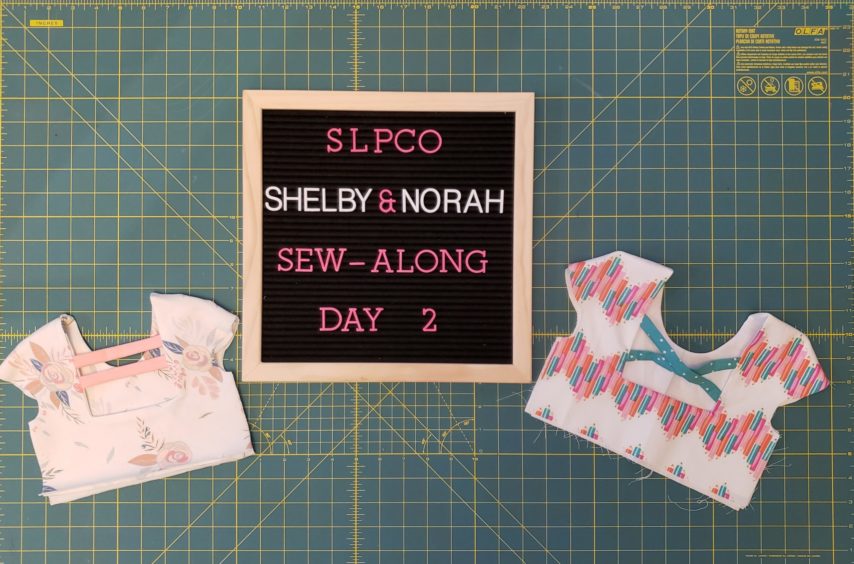
Day 2 Progress
That is it for today. If you struggled through attaching the straps, please find my video in the FB group. However, if you continue to struggle with attaching the straps, please don’t give up! You can message me in the sew-along album and I’ll be happy to help anyway I can. Once you have completed today’s tasks, take a photo of your half-finished bodice and upload it into to the sew-along album for a chance to win one of the daily sew-along prizes!
Happy sewing,
Chauncey.