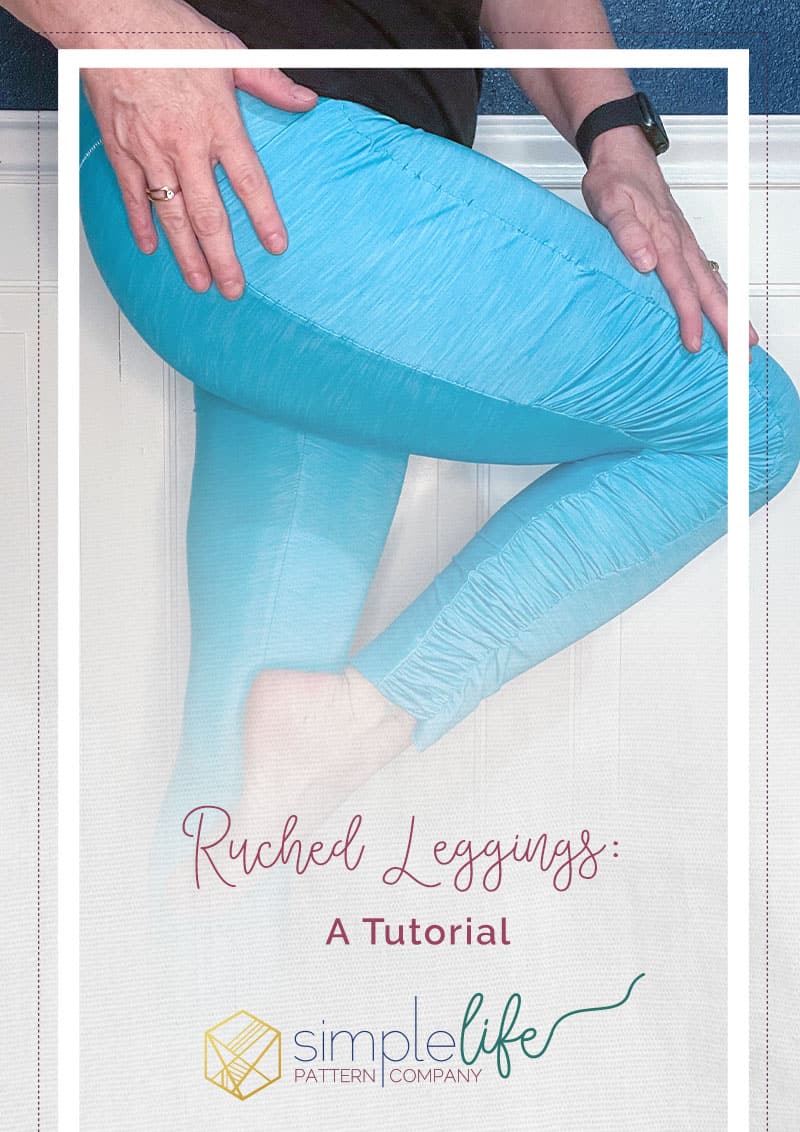
Ruched Leggings: A Tutorial
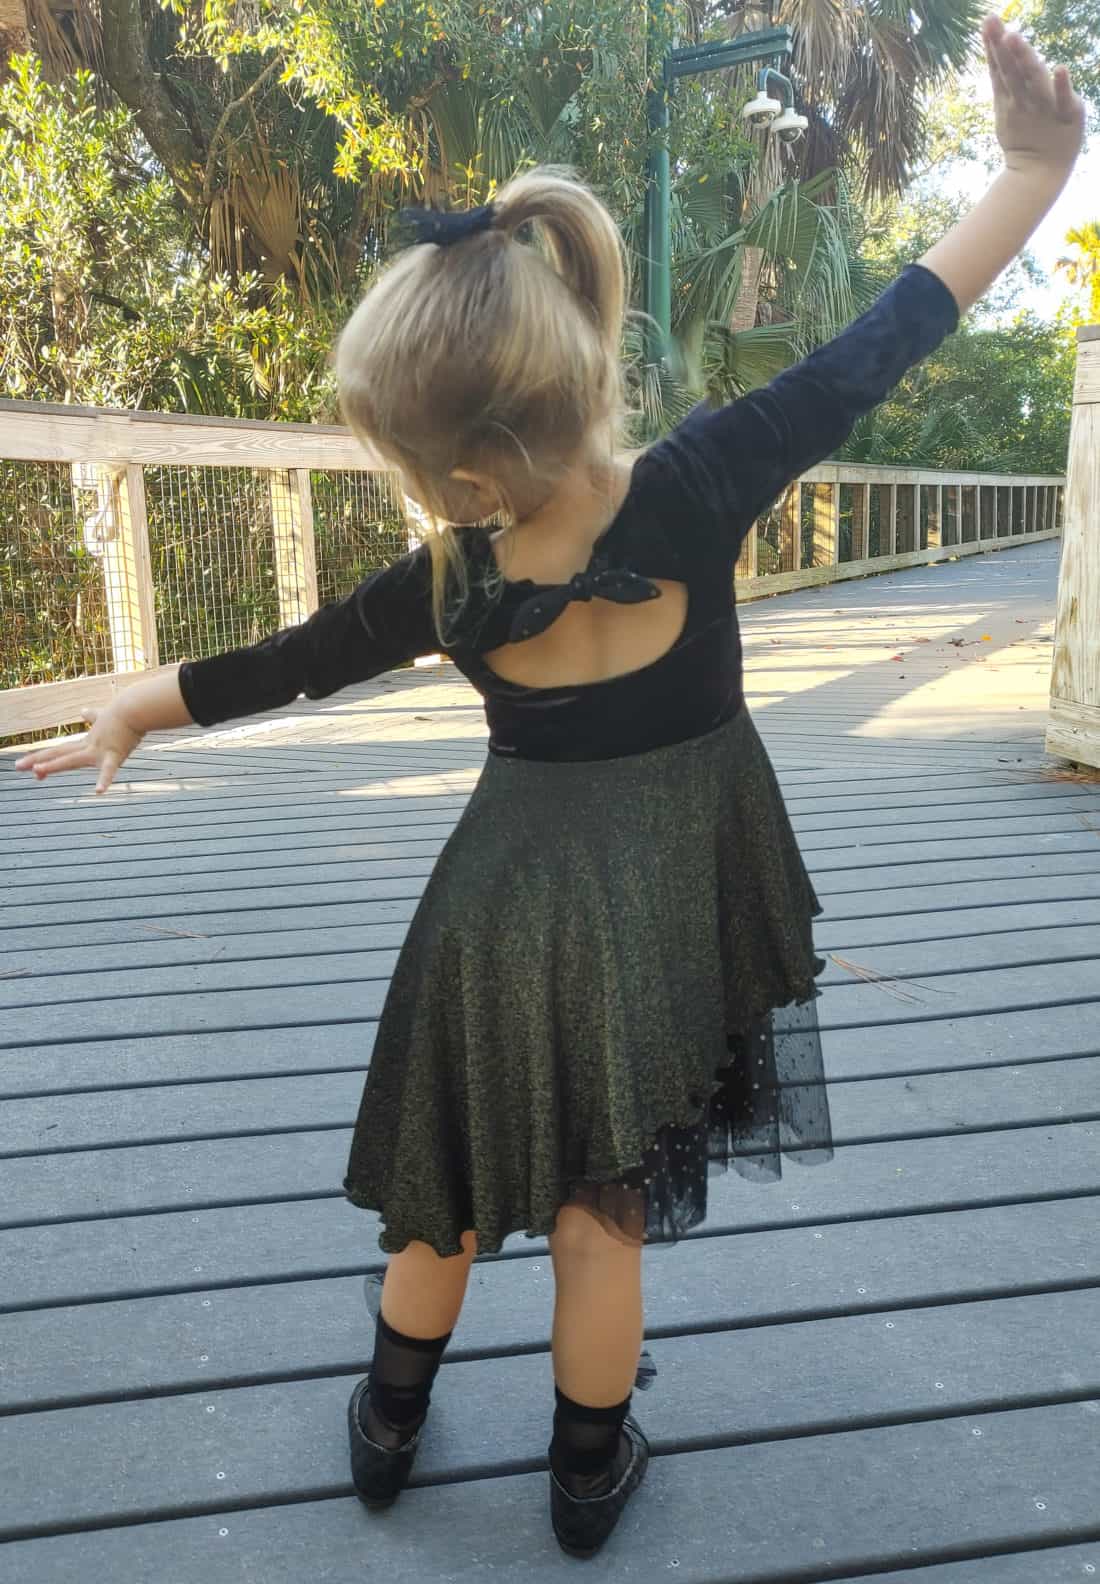
I keep seeing Ruched Leggings out in the wild as well plastered all over Pinterest. The Energize Leggings are my all time favorite, so I decided to use them as a base to make my own. It was pretty easy to do as there is already an option to include a panel.
Cutting the Pattern Pieces
To get started you will want to take all of your necessary measurements. Please plan on doing any grading that you need. Cut the front and back of the leggings to your desired hem length using the panel option. Cut the waistband main and liner as you normally would do. Cut the pocket if you want a pocket.
Preparing the Panel
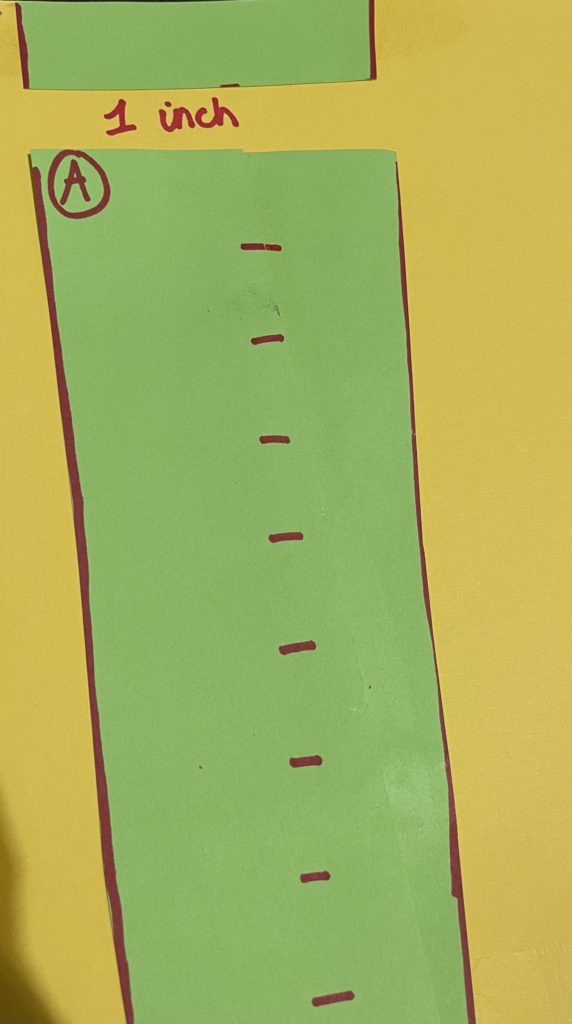
We want to double the length of the panel. But we need to keep the shape of the panel. To make the pattern for this; trace a copy of the panel onto paper starting from the shorts line to your hem length. Mark your copy every 1 inch.
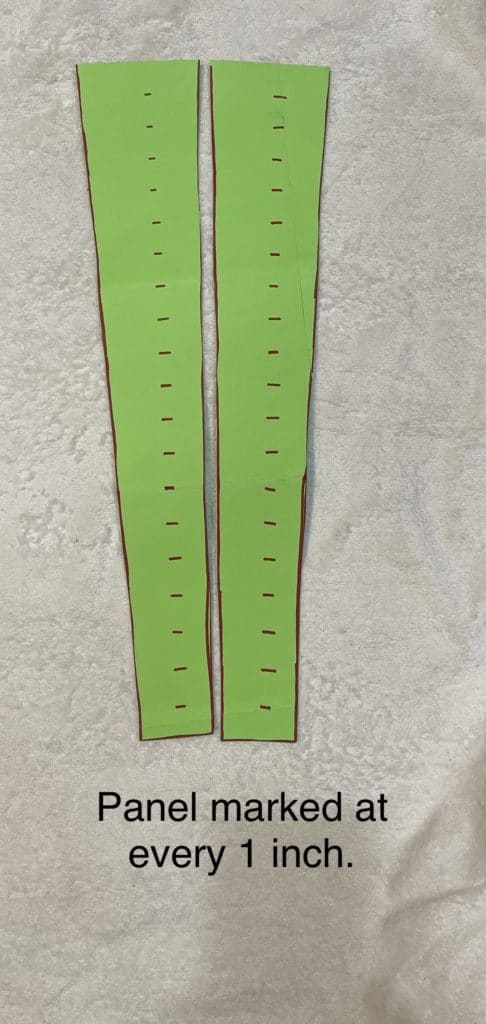
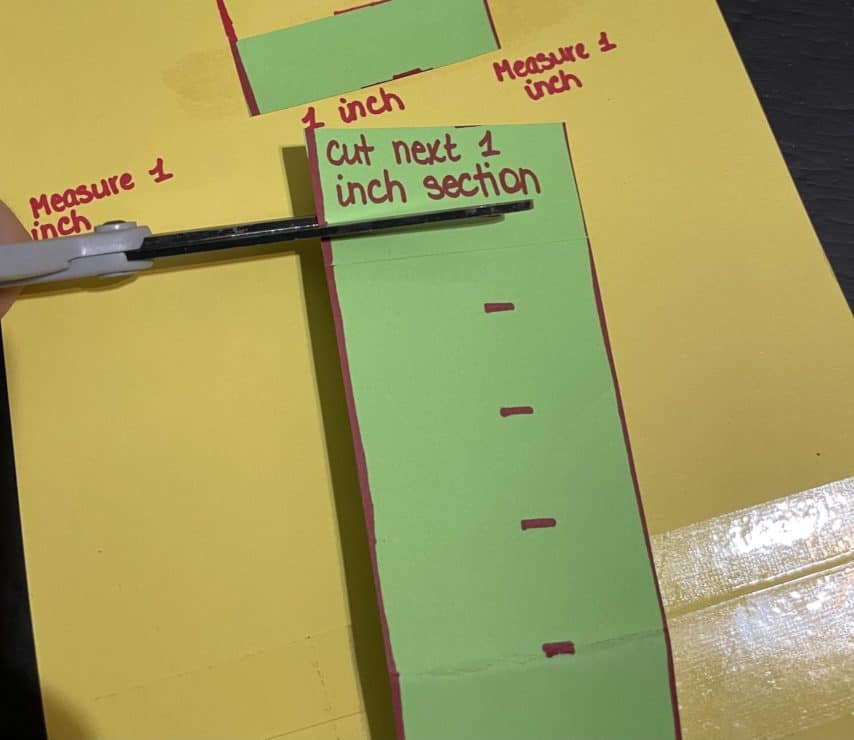
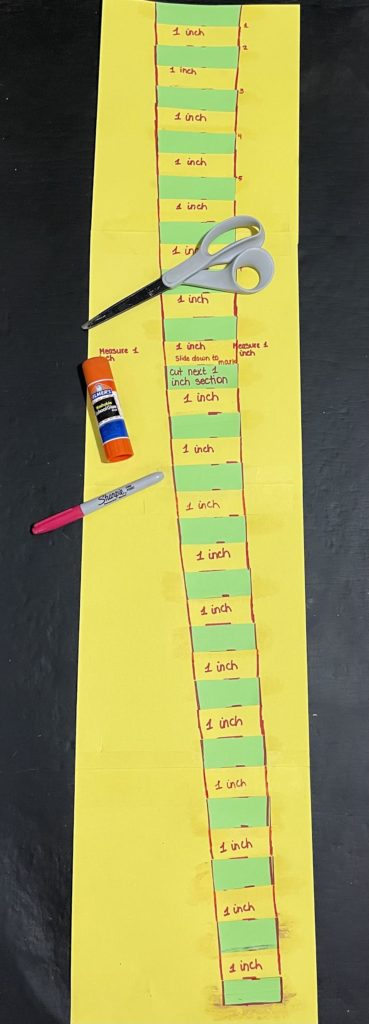
For the next step, you will need a long piece of paper. I got super fancy and just taped some cardstock together. Using the panel piece you just traced, you will cut at the first, and second inch mark. Glue the top piece of your pattern piece to the long sheet of paper. Measure down one inch from this piece and make a mark. Glue your second inch piece at this mark. Following the pattern angles, draw lines to connect these two pieces.
Continue this process, cutting, gluing, and connecting.
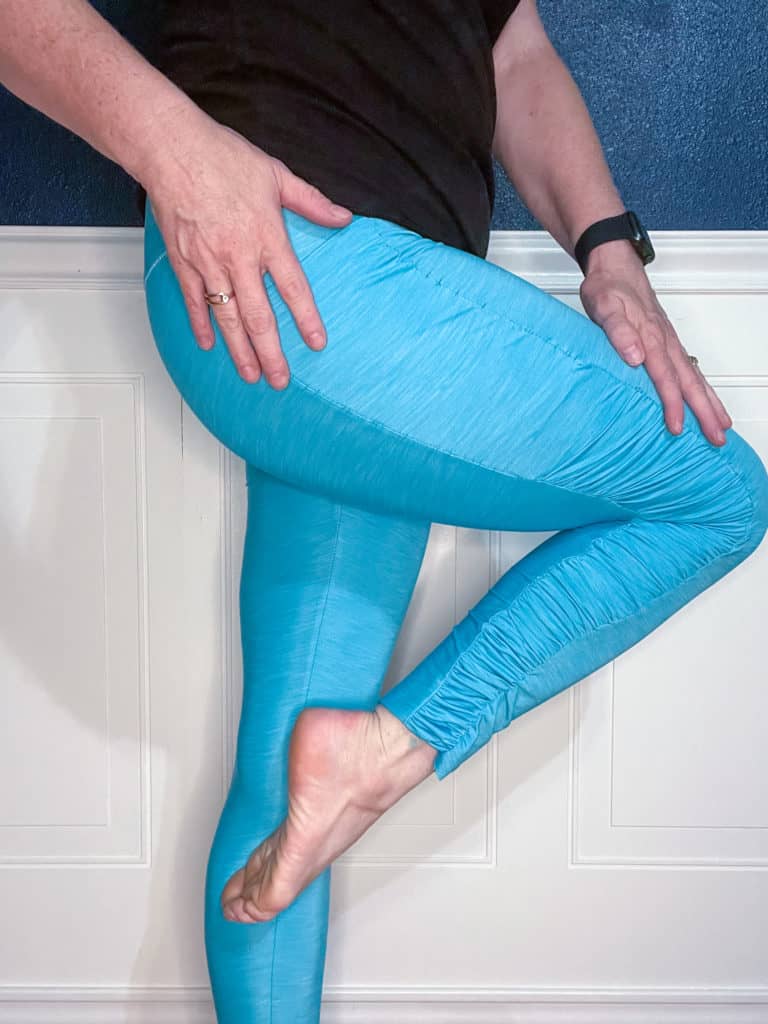
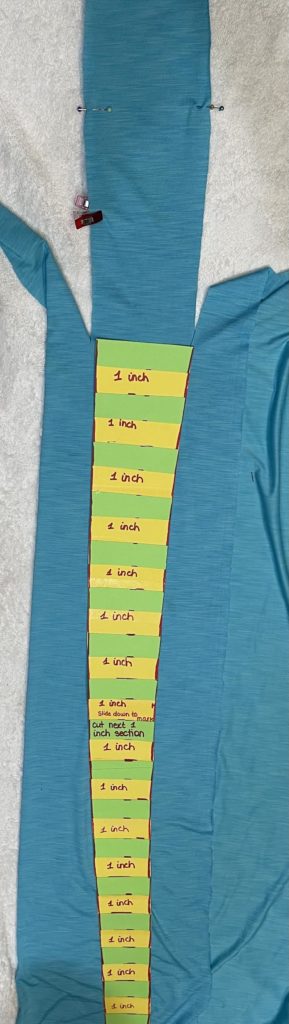
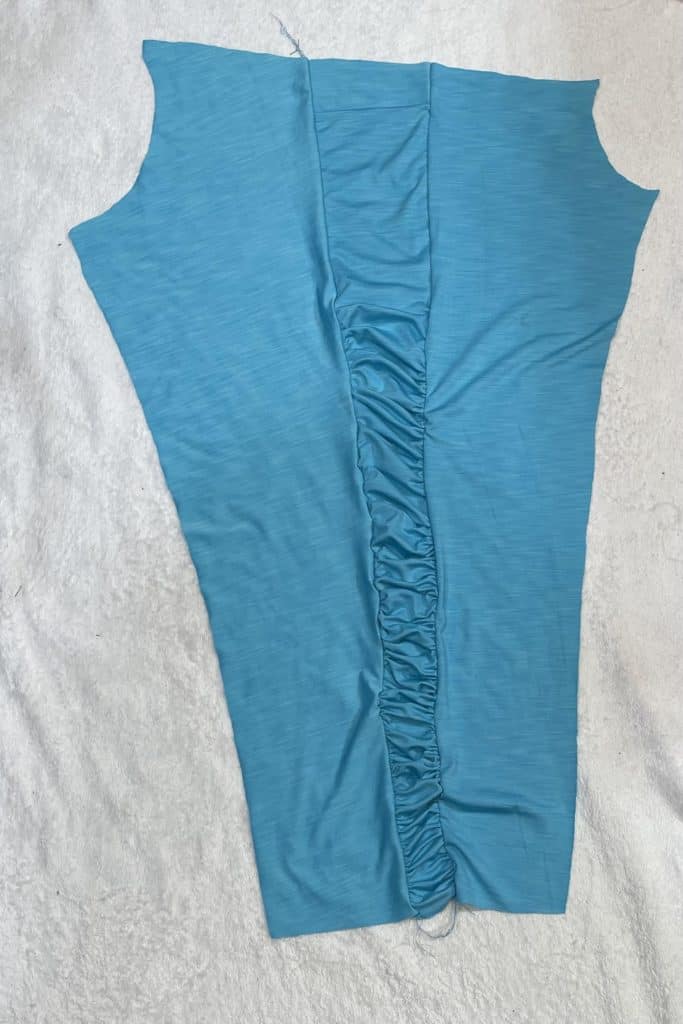
You should now have a panel piece that is twice as long as your original, that follows the same narrowing as you reach the hem line.
Cutting the Modified Panel
Using your original panel piece, cut your fabric to the shorts line (do not cut across this line, just to this line) Lay your modified panel pattern on top and complete that cut.
Completing the Leggings
You should have the following pieces: Front and back leggings, waist band and lining, long panel piece (2), and pockets (2). Complete steps 1-4 as stated in the tutorial. Now for the ruching! From your shorts cut line to your hem, you will use your favorite gathering technique. I always hand gather, but use your preferred method. We don’t want to have gathers on the pocket area.
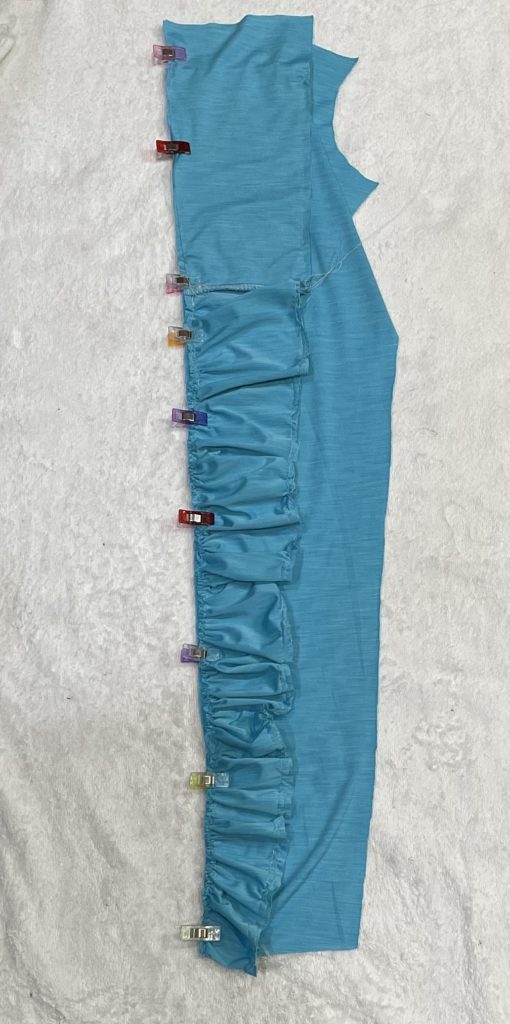
Make sure your gathers are evenly distributed. Complete step 5, paying attention to the pocket length for front/back. Repeat for your back legging piece. Repeat steps for the other set. Complete step 6.
Complete the remainder of the tutorial.
You should now have a lovely pair of super trendy leggings. I can’t wait to see what you make! Be sure to share your creations using the following hashtags: #SLPco #SLPcoEnergize #SLPcoWomens #SLPcoruchedenergize