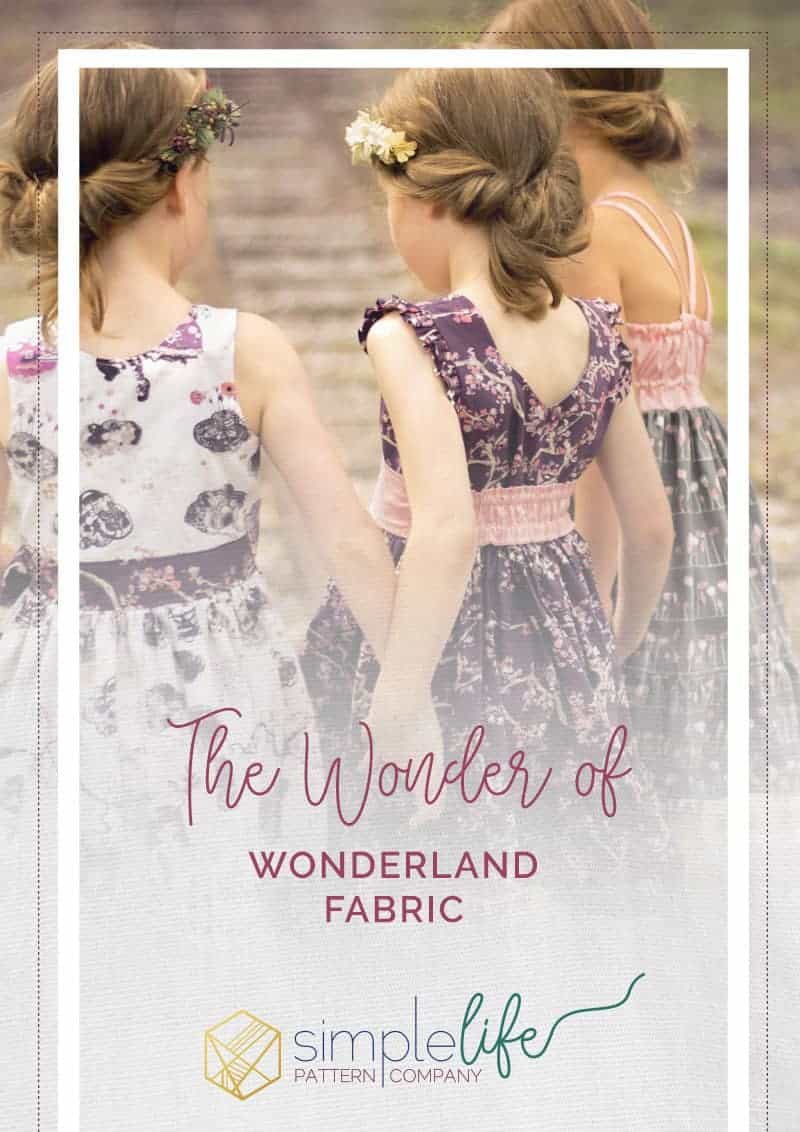
The Wonder of Wonderland Fabric
The best thing about having twin girls is getting to do girl things, like having tea parties. The problem is, we don’t really have tea parties. We have backyard picnics with string cheese and lemonade and call them a tea party. I have always wanted to host one of those beautiful tea parties you envision for your daughters, you know, like the ones you see on Pinterest.

The Wonderland fabric line, created by Katarina Roccella, inspired me to create such a tea party. A magical, mystical tea party.
The magic began for me on September 10, 2015 when my Wonderland fabrics package arrived from Art Gallery Fabrics. Imagine opening your mailbox and receiving a package that contained these beauties???

I was making 3 dresses using patterns from The Simple Life Company that were suitable for my vision of the magical tea party. I spent several days soaking up the richness of the prints. You know, touching the fabrics (because Art Gallery fabric really does feel different), laying them out, rearranging them, and, to be perfectly honest… getting my courage to cut into them!
Dress #1: The Bella Dress.
For my first dress, I used the Bella pattern. I chose the Petal Flamingoes in Coo for the skirt and Cross your Heart in Pink for the bodice. I used the strappy back version of Bella and kept the skirt and bottom ruffle in the same fabric. The result is stunning! The colors complement each other so well and this is truly a dress that cuts across all seasons. Here’s a sneak…

Dress #2: Kinley + Bella with a sash of Lilly.
The Enchanted Leaves in Plum fabric is stunning. STUNNING! I knew I wanted something a little different for this one, I wanted to make a super feminine dress suitable for my fairy-tale tea party.
I cut the Kinley outer bodice with the Enchanted Leaves in Plum and used a gray solid for the lining. I also cut the Bella skirt and bottom ruffle. To make the flutter, I decided to make a small fold-over ruffle just along the shoulder line. I am so in love with this flutter! It adds just the touch of femininity the dress needs!!

Here’s what I did:
First, I completed Steps 1 through 4 from the Kinley pattern.
Next, I made my flutter. I laid out my bodice and measured the straight part of the shoulder, stopping just before each arm curve. I wanted the ruffle to only be on the shoulder. On the size 5, this was 8”.
I doubled this length for my flutter. I cut two strips of fabric that were 2.25” x 16” (length x width). I folded the strips in half lengthwise with the long raw edge together and pressed in place. Then I added a gathering stitch along the raw edge and adjusted the gathers to be 6” wide, or 2” shorter than the length of the shoulder portion. I didn’t want the short raw edge to show.
Placing the flutter on the right side of the bodice, I pinned the folded flutter raw edge (the unfinished side of the flutter) at my two furthest points (see the arrow in the picture). I just tapered the flutter so and adjusted the gathers to be evenly space. I had a bit of a tail from the taper (see just next to the arrow). I basted the flutter in place ¼” from the raw edge, trimmed the little taper tails off and then continued with Step 5 to complete the Kinley bodice.

After my bodice was finished, I followed the instructions for the Bella skirt and attached the skirt to the Kinley bodice. For the final touch I made a Lilly sash (best sash ever!) to compliment the dress using the Cross Your Heart in Pink! Gorgeous!
Dress #3: Megan + Lilly mash up.
For my next look, I wanted to use the Megan dress to really show off the Wonderlandia in Confection. I also decided to try adding a full coverage back to the Megan pattern.
My daughter wears a size 6, so I printed the Megan pattern piece in a size 6. Since Lilly is a looser fit than Megan, I went down a size on Lilly and printed a size 5 Lilly back. I lined up my pattern pieces along the side seams, just under the arms. That’s when I realized the length on Lilly is bit different from Megan, so I adjusted the length of the Lilly back so that the Lilly back piece was the same length as the Megan bodice piece.
Now, I was ready to cut into Wonderlandia in Confection. Eeekk!! It is so pretty! The metallic squares scattered throughout the fabric give it such gorgeous shimmer, the colors are so vibrant, and the girls are so whimsical. I was terrified to cut into this fabric. I actually had sleepless nights over making cutting mistakes. Deep breath and cut!
First, I cut 1 set of Megan bodice pieces (2 pieces, mirror image) using the Wonderlandia in Confection. I took great care to position my little girl just right on the bodice. Then, using the Diamond Flush in Gold, I cut another set of Megan bodice pieces (2 pieces, mirror image) for my contrast panel. I cut 2 of my modified Lilly backs using the Wonderlandia in Confection.
I followed the Lilly instructions from Step 1 to 6 to assemble the bodice, substituting the Megan front pieces for the Lilly front pieces. Once the bodice was made, I continued along with the Megan pattern at Step 10. I made the side tie version with the gathered skirt and a bottom band.
Be still my heart! But, we’re jumping ahead a bit.

This was one of those rare, over the top tea parties and we were not going to have a picnic in the backyard. We were going to have a proper tea with cake and forks at a table. Clearly, I needed a table runner. I scoured the Art Gallery Blog posts for table runners. Boy, do they ever have the project ideas!!
Project #4: Modified Strippy Table Runner (free tutorial from Art Gallery)
This strippy table runner tutorial was a winner because I could use up all my scraps! The instructions called for 8 fat quarters, fabric for the front and back as well as fabric for binding. I used two complimentary solids from Art Gallery Fabrics and used the Petals Flamingo in Coo for the binding. Since I didn’t have 8 different fabrics, I used what I had. In fact, I only had a 4” x 5” square of the Enchanted Leaves in Plum!
Not to worry, I cut the strips according to the directions and added some 1.5” Cluny lace to my fabric strips. The fabrics I used were the Pret Tea in Slate, Rosewater in Tears, Wonderlandia in Confection, Cross Your Heart in Pink, and Diamond Flush in Gold. The runner was fun to make, you simply stitch down the strips of fabric and continue to overlay the fabric until you get your desired look. I added the lace towards the end so it was on top and finished it off with some hearts cut from my Enchanted Leaves in Plum scraps. I added the binding and admired my work. WOW!!

Now we were ready for our tea party!! Time to dress up those girls and head to the park!

We decorated the table with the runner, added tea (water), forks and cake and we had ourselves a tea party!


The cake was delicious!! Can you tell?

Simply Wonderland!

Thank you Katarina Roccella and Art Gallery Fabrics!
P.S. Thanks to Chickapee Creations and Little Lady Accessory for the gorgeous wreaths!