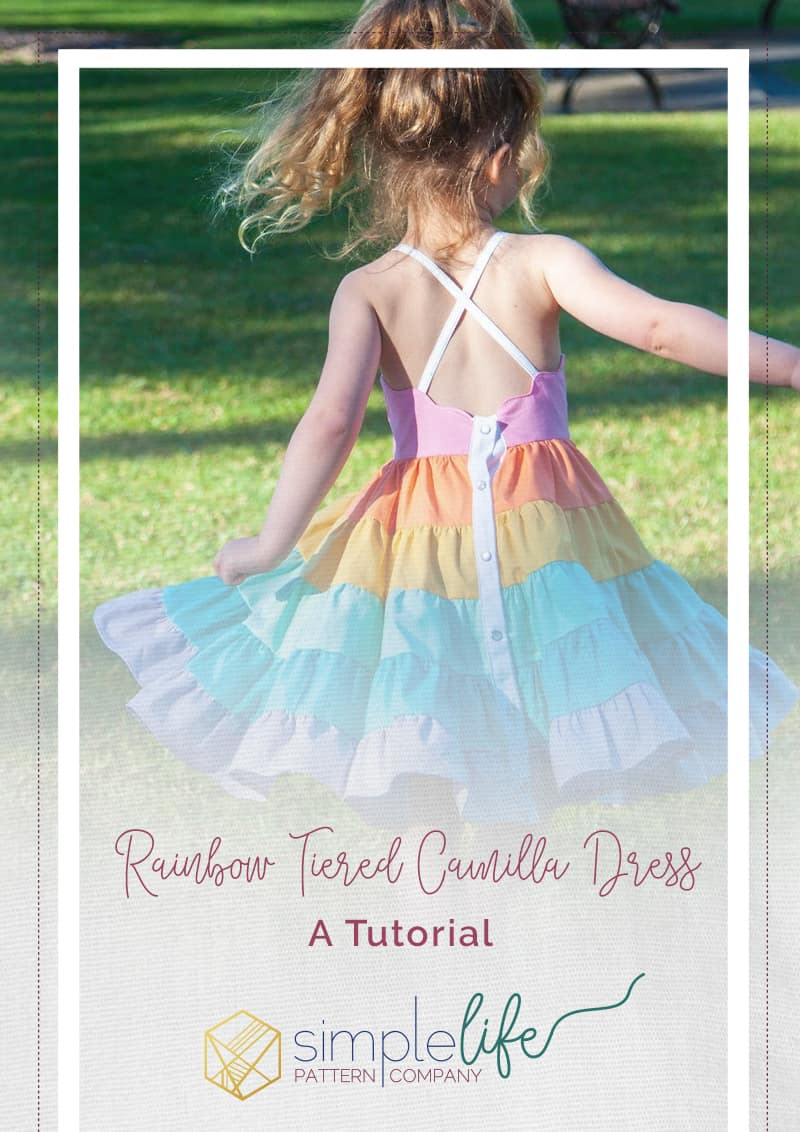
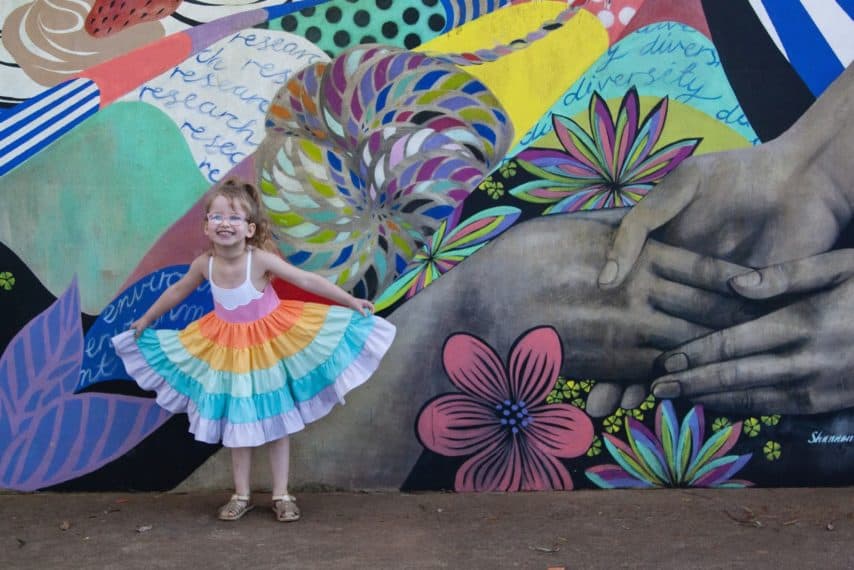
How To Create A Rainbow Tiered Dress With Our Camilla Pattern
Rainbow Tiered Dress using Camilla
We are so excited to have guest blogger Courtenay joining us on the blog today to show you how to create the cutest little rainbow tiered dress using our Camilla pattern!


The Rainbow Tiered Camilla Dress Tutorial
Hi everyone! My daughter has been asking to sew her a rainbow dress for months. I was so excited to test the Camilla pattern because it was perfect to hack into rainbow twirling perfection! Step one, go and buy yourself the beautiful Camilla pattern HERE.
Let’s talk about fabric requirements! For this size 4 in addition to the regular bodice main requirements, I used a fat quarter of the white fabric which was plenty for the cloud, straps and placket. The top 2 tiers required 25cm by WOF, the next 2 tiers required 50cm by WOF and the final tier required 75cm by WOF. Needs may be different depending on the size you make.
The Bodice
So first I will talk you through creating the cloudy bodice. You will need to cut out your bodice main and lining, straps and placket as per the pattern instructions.
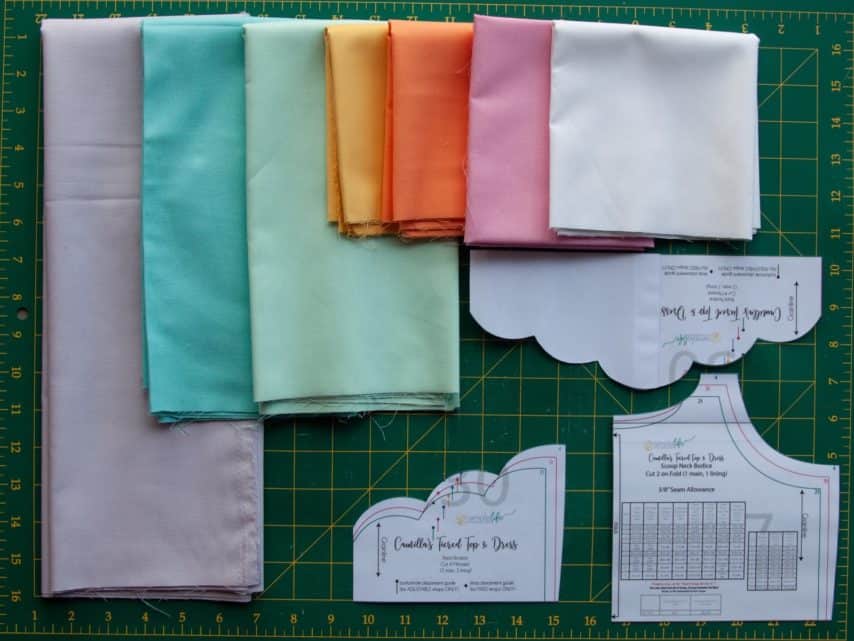
I used 2 copies of the back piece and stuck them together to create the template for the cloud. The dress is a size 4 and I used the size 2 back piece, you may need to adjust depending on the dress size you are making.

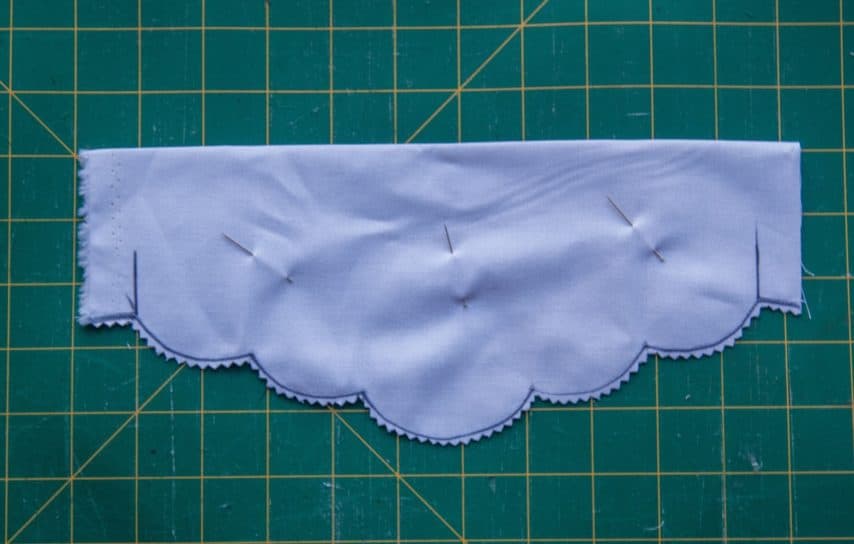
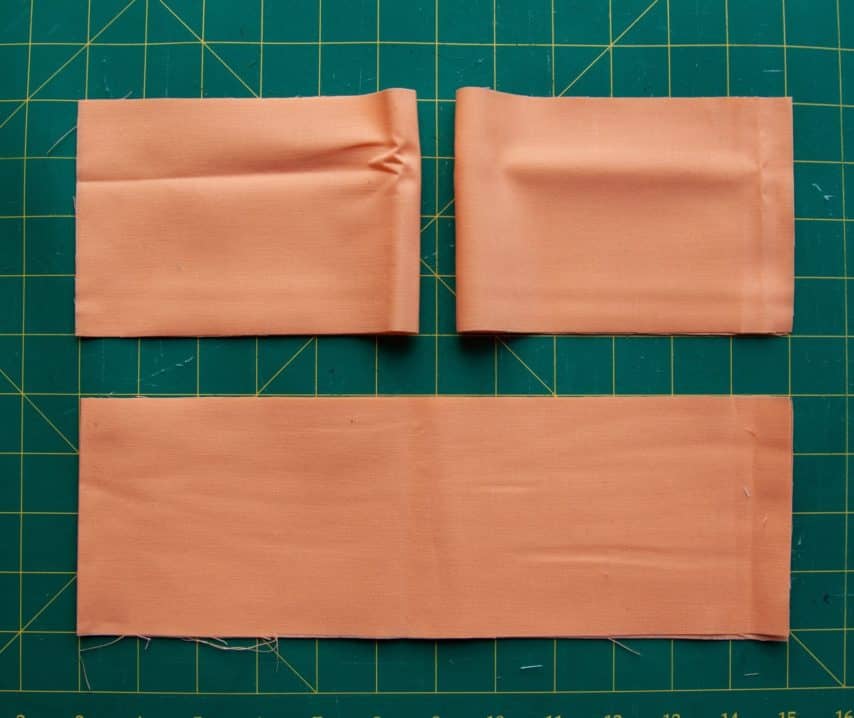
Place the template over the bodice piece. You need to cut 2 rectangles from your white fabric. Measure from the bottom of the template to the top of your bodice piece. Add 1 inch to this measurement to give you the length of the rectangle. Measure the width of your template and add 1 inch to give the width.
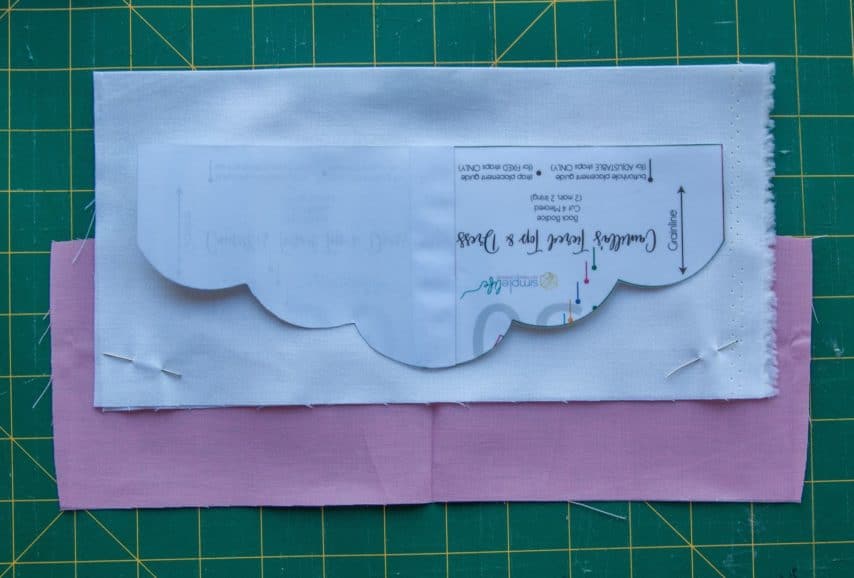
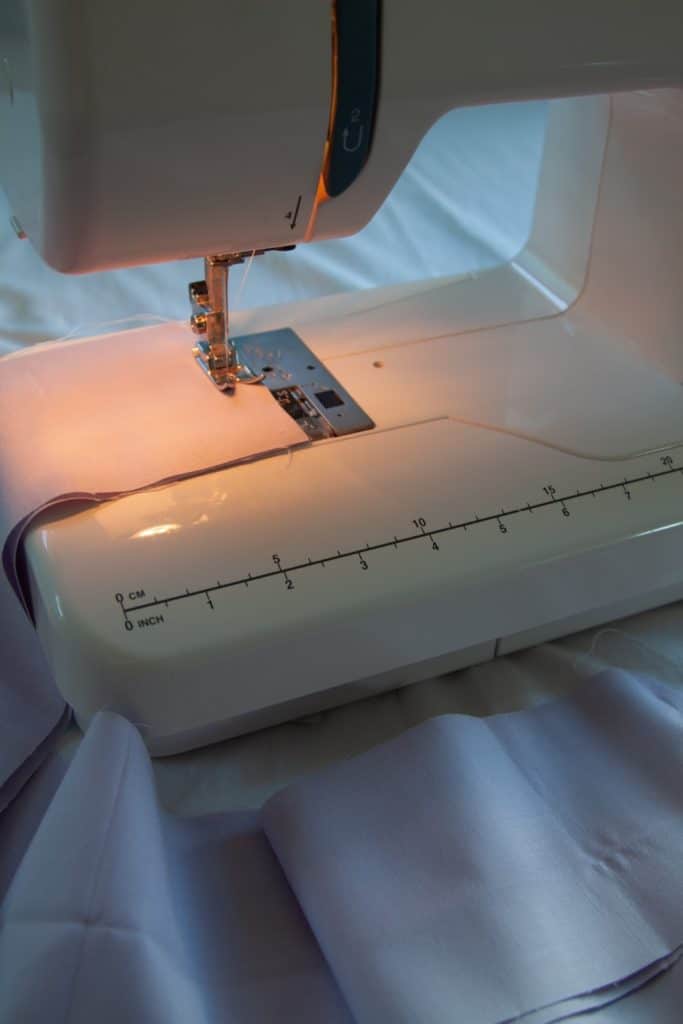
Pin the rectangles together, right sides facing, and trace on the scallop using the template.
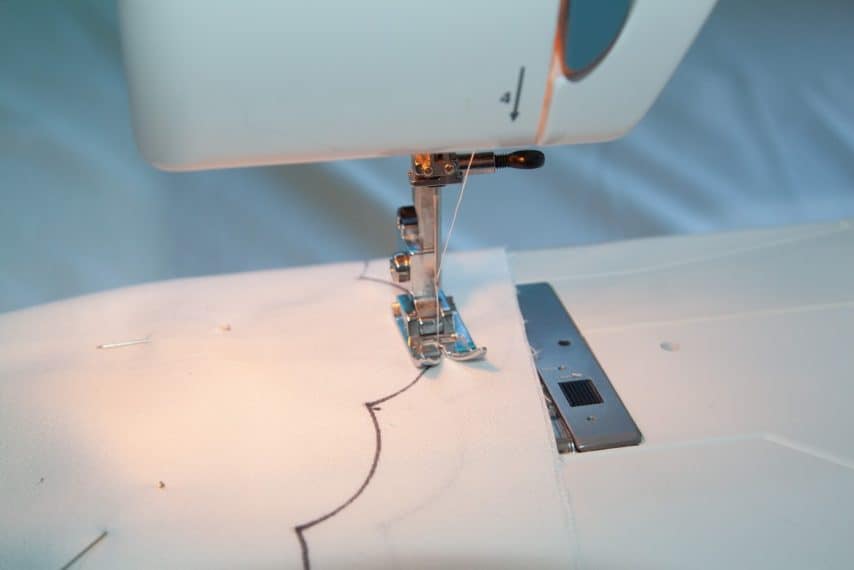
Using a small stitch, slowly stitch along the line. Trim along the scallops and clip the curves. Turn the piece right side out and iron. Using lots of steam will help get beautiful curves.
Pin the cloud piece onto your bodice main (right side) on the desired position. Ensure the white piece covers all the way up to the top of the bodice.
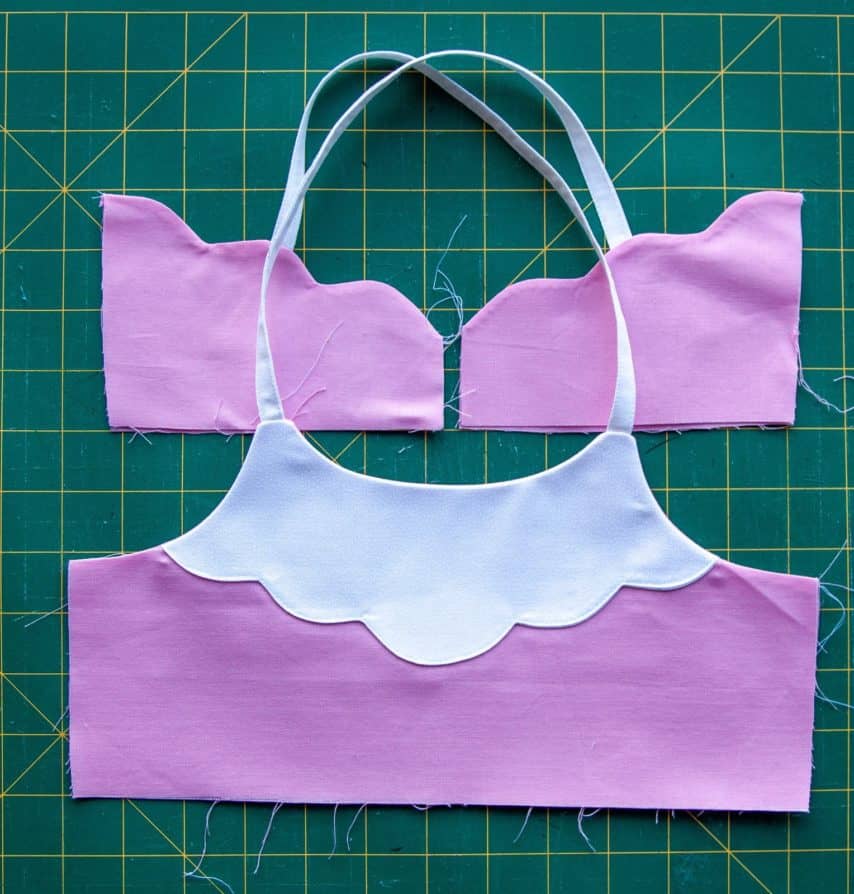
Top stitch the cloud piece to bodice main. You will now treat this as your bodice main piece. Complete the bodice as per the pattern instructions.
The Skirt
Now onto the beautiful skirt. This will take some math.
Firstly decide if you want vintage or dress length. I chose to make dress length in a size 5, which would usually be 15 inches long. This is the important measurement.
I need 5 tiers to complete the rainbow. To calculate the length of my tier pieces you do the following:
Length DIVIDED BY number of tiers PLUS 6/8 inches (for seam allowance)
SO for me, that was:
15/5 + 6/8 = 3 6/8 inches.
NOW onto the width.
Refer to the cutting chart. Using your size, locate the tiered dress TIER 1 measurement. For size 4 that gives me 24 inches. Because this is for one piece I doubled it to give 48 inches for the width of the first tier. Each tier is 1.5 times the length of the once before it.
My 5 tier widths were:
- 48 inches
- 48 * 1.5 = 72 inches
- 72 * 1.5 = 108 inches
- 108 * 1.5 = 162 inches
- 162 * 1.5 = 243 inches
The number of pieces you need for each tier will depend on the width of your fabric. Connect the pieces together using a straight stitch and finish the seam with a zigzag stitch or serger.
For the first 2 tiers I had 2 pieces, splitting one in half to ensure there was not a seam right at the front of the dress.
Now let’s start with tier 5. Fold up the hem ¼ inch and press. Fold up another 1.4 inch, press and sew with a ⅛ inch seam.

Using your preferred method, gather the piece. Adjust so it is the length of tier 4 and pin in place, right sides facing. Sew/serger the two pieces together. Repeat this process until all 5 tiers are joined together. This is now your skirt!
Now you have your skirt and bodice constructed, return to the pattern at step 39 to connect the 2 and complete the remainder of the pattern.
So there you have it, a beautiful rainbow Camilla! I hope you enjoy this beautiful pattern as much as we do!
Courtenay & Edie