Adding a Bow to Rosie’s Bloomers Tutorial
Happy Thursday!! I am Melissa Gisiner, owner of Piper Sew Posh and I am so excited to be guest blogging for SLPco today!
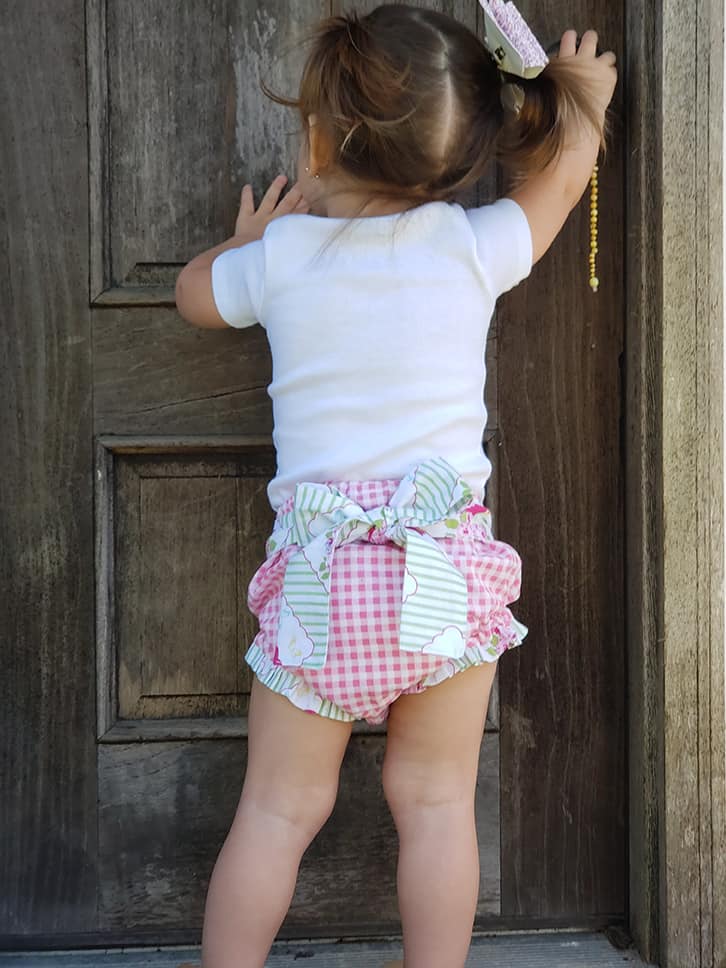
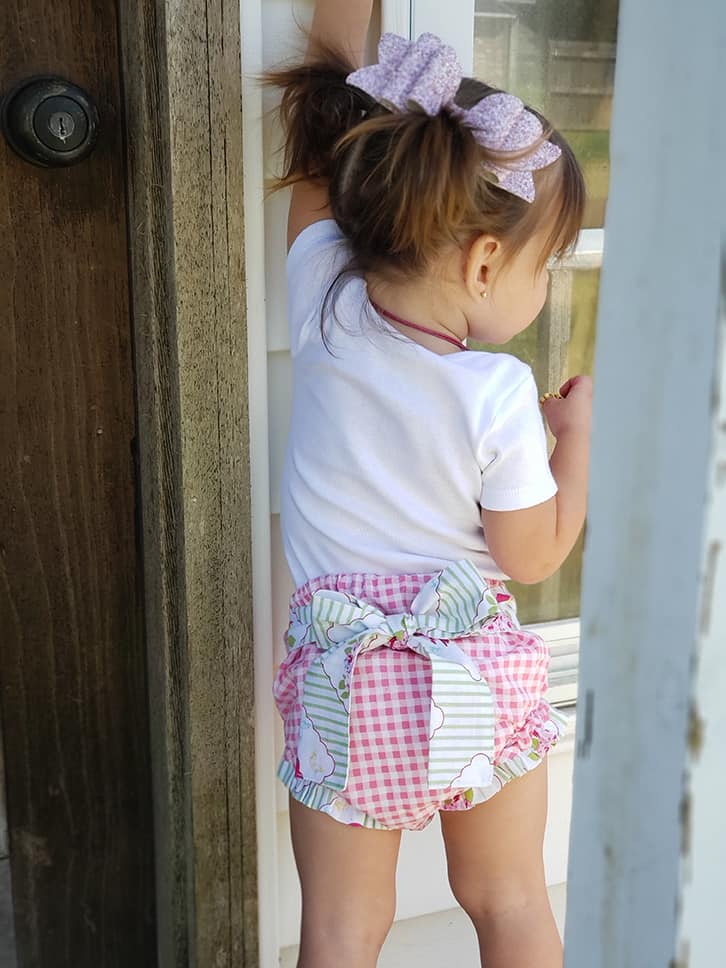
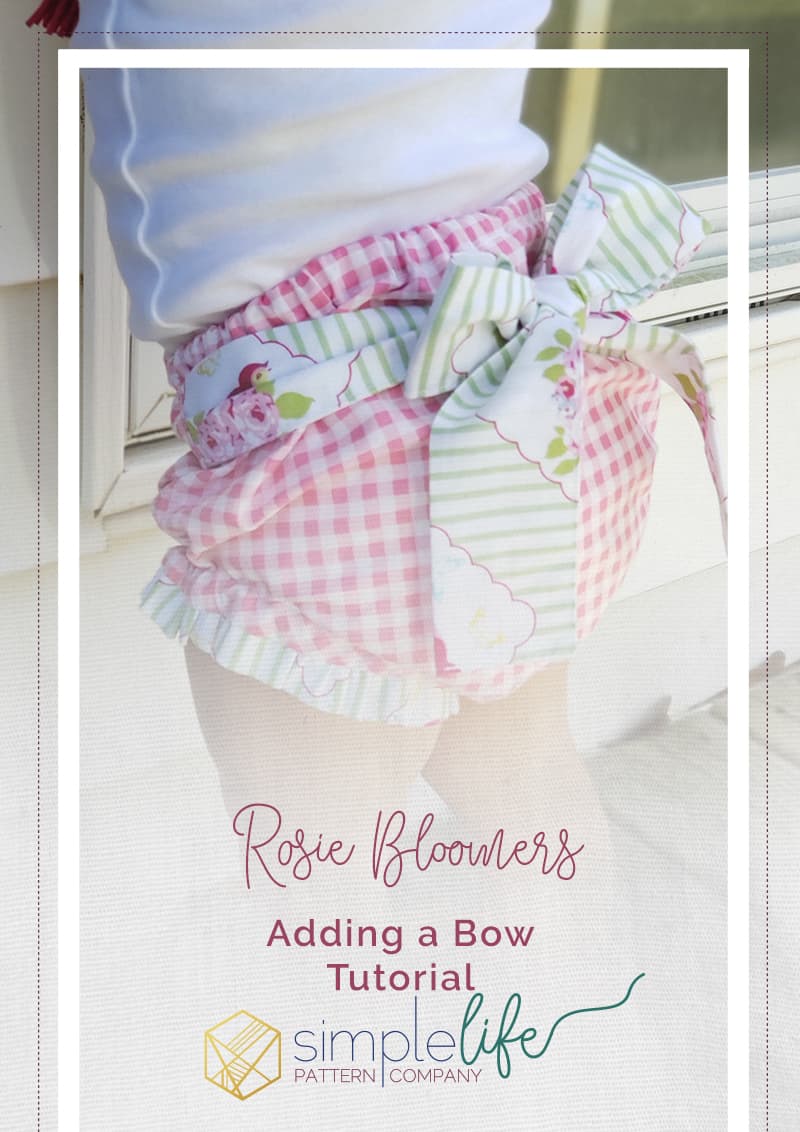
I had the privilege of being a tester for Rosie’s Ruffle Bum Bloomers. With that being said I’ve made quite a few for my girls. These sweet bloomers are so versatile…make a simple bloomer or dress it up with layers of ruffles, a monogram, leg ruffles, decorative trim or as I am about to show you, a cute bow. Who doesn’t love a good pattern with so many options?
Let’s get started. You will first gather everything you need to make your bloomers according to the pattern instructions. I am making the slim fit version with leg ruffles in this tutorial. Here I have my bloomers cut out, leg (2) elastic and wait elastic, size tag (because I have 4 girls), my leg ruffles and leg bias tape cut and ready.

We can go ahead and cut our ties now for the bow we are adding.
I cut my two ties 5”x20” each because I prefer a large bow. If you would like a smaller bow you can make your ties 3”x 16”.

Fold the bow ties in half with right sides together. The long edge will line up.
You can now sew the long edge and then down one side, leaving one end open/unsewn. You will use a 3/8” seam allowance just as you will for the rest of the pattern.

Clip the corner. Using a dowel or a loop turner, turn the tie right side out through your open end. Now press the tie and then top stitch if you prefer. Repeat these steps with the second tie.

Now that your ties are made you’re ready to baste stitch them down the backside of your bloomers you have already cut out. I made the large bow so I like to fold/crease my ties before adding them to the side seam of my bloomers.

I measured down 1.75” from the top and marked with a Frixion pen.

Now you’re ready to continue following the Rosie’s Bloomers instructions just as they are. Remember when sewing your bloomers to make sure your ties are out of the way.
You don’t want them to accidentally get sewn into another seam.

I hope you enjoyed this tutorial!
Happy sewing!
Melissa