The Saige Sweatshirt
When I find a pattern that fits well, I tend to like to make it over and over again. I love finding ways to change up the look of a pattern. Look what you can do with Saige!!
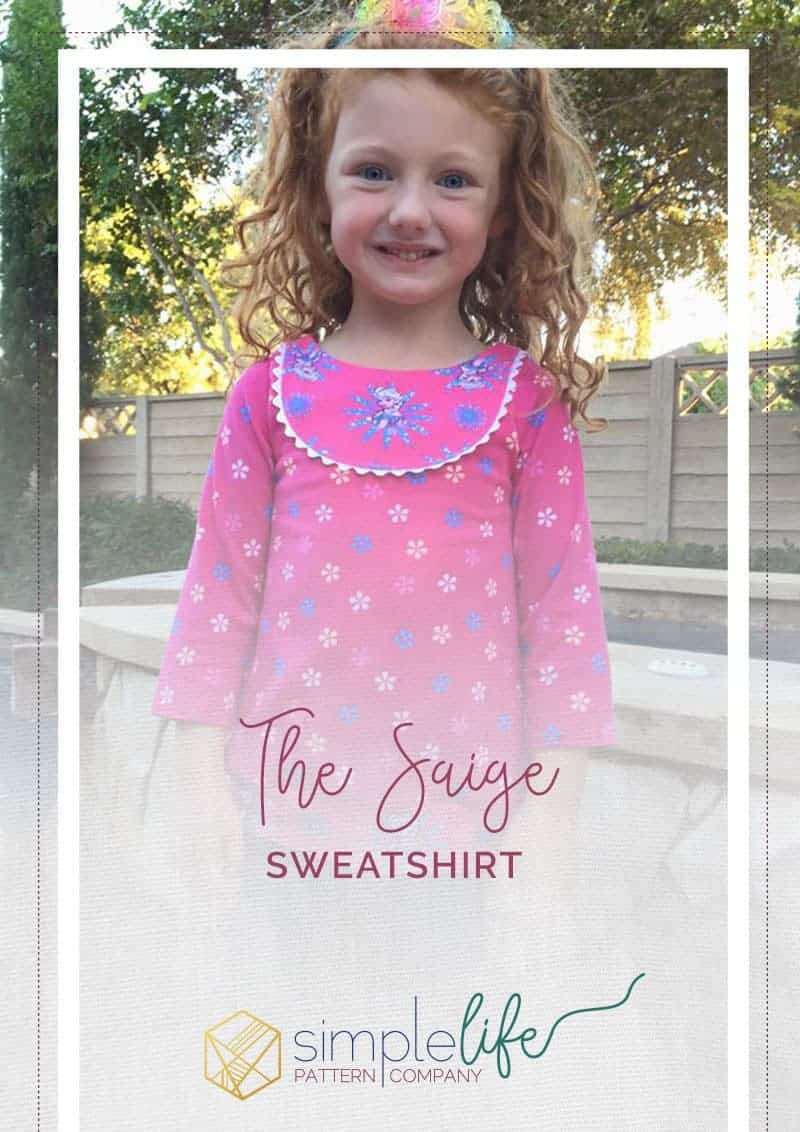
My daughter wanted a special shirt for Halloween and I had just the knit for it. Since it’s getting chillier I wanted to make something long sleeved and more of a sweatshirt style. Saige is perfect for this. Look what I created!!

Making this top is SO easy!! The only change you make to the Saige pattern instructions is at the cutting stage. Take your pattern and draw a line 3″ down from the bodice lining cut line. I used my quilter’s ruler and lined up along the bodice lining mark and drew my line. Cut 2 fronts and 2 back pieces using this cut line. Then complete steps 1 through 8, then steps 12 & 13, and skip down to step 21 through 23.
The last thing we’ll do is add the bottom band. I like a looser fit on the bottom band. Here’s a picture of a looser fit. See how it just pulls the bottom in a bit. But, it’s not tight. This is how my girls like their tops, so it’s how I tend to make it.


The band lengths I’m providing are for this type of fit. If you like it more fitted, take 2-3″ off the band, depending on preference. Here’s pictures of it more fitted (with 3″ off). You could trim the side panels a bit, too. To make the top less flared. You decide on preference!

| Size | Band Measurement(cut 1; L x W) |
| 2t | 4” x 25” |
| 3t | 4” x 26” |
| 4t | 4.5” x 27” |
| 5 | 5” x 28” |
| 6 | 5” x 30” |
| 7 | 5” x 31” |
| 8 | 5” x 32” |
| 10 | 5” x 33” |
| 12 | 5” x 34” |
Sewing Instructions:
1. Cut your bottom band according to the cutting chart.
2. With right sides together, pin the short edges of the band together. Use a stretch stitch and stitch along the short edge. With wrong sides together, fold the bottom band in half lining up the raw edges. Press to set the bottom band crease. You’ll have a loop with the bottom band.
3. Next, quarter the band. Start with the seamed edge and place a pin. Place a pin directly opposite of the seamed edge. Place a pin halfway in between the two pins on both of the band sides.
4. Repeat with the bodice top. Place pins on the two side seams and at the front and back center of the bottom bodice edge. Line up the raw edges of the band and match up the bodice pins with the band pins.
5. The bottom band is smaller than the bodice, you will have to stretch the band to fit the bodice. Work with each quarter section, slightly stretch the band to fit and pin in place. Once the band is pinned, stitch using a stretch stitch. Finish the edge if you’d like, push the seam up towards the neckline and top stitch in place!
Voila, the Saige Sweatshirt! Here are some inspirational pictures!!


Today is the last day of the 25% off sale! Show us your Saige dress and top!!