Autumn Sew Along – Day 2
Welcome back for day 2 of the Autumn sew-along. If you are just now joining along, there is plenty of time to catch up. Just make sure you check out the blog post from day one. Today we are working through steps 1 through 7. This includes attaching the flutters and preparing the optional lining pieces.
Simple Top or Dress
Are you making a simple (non color blocked) Autumn top or dress? If you chose to go the simple route you will only complete steps 1 and 2 today. Start by laying your front main piece so that right sides are facing up. Next, lay your back main piece on top so that right sides are touching. Align the two pieces along the shoulder seam and sew in place. If you also chose to add a lining continue below to prepare your lining pieces. For neck binding we will work on that tomorrow.
Optional Lining
If you chose to add a lining to your top or dress instead of using binding you will need to start by preparing your lining pieces. First, serge the bottom raw edges of your lining pieces. Next, lay your front lining piece so that it is facing right side up. Lay your back lining piece on top of your front piece so that right sides are touching. Align the two pieces along the shoulder seams and sew in place.
Color Blocked Top or Dress
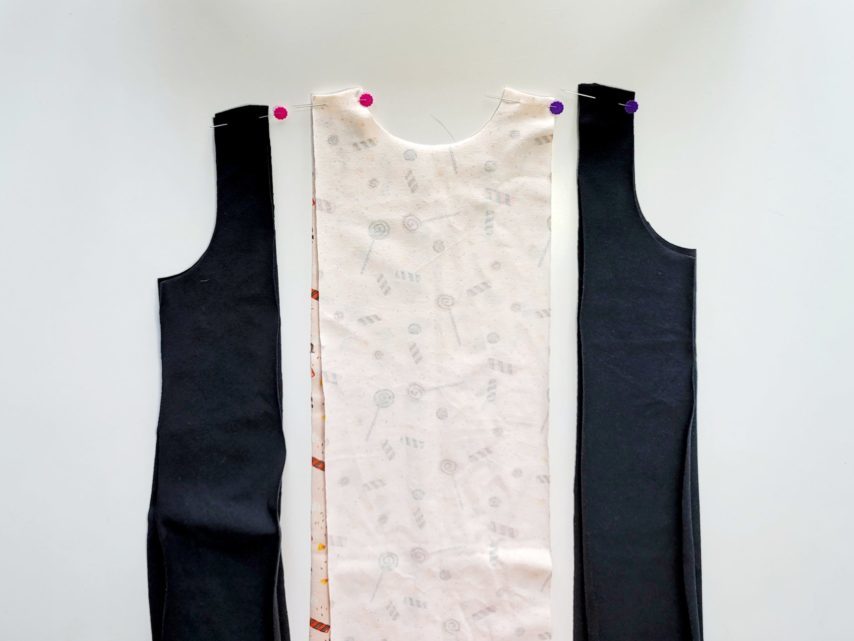
For those of you creating a color blocked top or dress you will need to sew your front/back center pieces and front/back side panels together at the shoulder seams.
Working with your main fabric pieces, lay your front center piece so that it is facing right side up. Now take your side panel pieces and lay them on each side of your front center piece so that the arm holes are facing away from the bodice. Next, take your back center piece and lay it on top of your front center piece so that right sides are touching. Take your back side panel pieces and lay them on top of your front side panel pieces so that right sides are touching and the armholes are facing away from the center pieces. Sew the shoulder seams together of your side panel pieces and front/back center pieces.
Attaching Flutters
Before we can attach our flutters we need to hem them. With your ruffle piece lying wrong side up, press the long straight edge up 1/4″ so that wrong sides are touching. Fold up an additional 1/4″ and press. Topstitch the ruffle 1/8″ from the folded edge. Repeat with your other ruffle piece. Note: if you are using knit fabric that does not fray you can omit this step.
Next, sew two rows of gathering stitches along the long curved edge of the ruffle. I like to sew my rows at 1/8″ and 1/4″ from the raw edge. Fold your ruffle in half to find the center and mark with a pin.
Lay your front/back center pieces in front of you so that right sides are facing up. Lay your ruffle on top of your bodice center pieces so that right sides are touching. The hemmed edge of your ruffle will be facing in toward the neckline. Align the center of the ruffle with the shoulder seam and pin in place. Gather your ruffle and adjust the gathers evenly between the ruffle mark lines from your pattern pieces. Pin your ruffle in place and baste to the bodice. Repeat with your other ruffle on the opposite side of the bodice.
Attaching Side Panels
With your center bodice laying right side up, take a side panel piece and lay it on top of the center bodice pieces so that right sides are touching. The arm hole should be facing in toward the neckline. Match up the shoulder seams of the center bodice pieces with the side panel pieces and pin in place. Continue matching up the raw edges of the pieces and pin together. Sew the side panel piece to the bodice center piece, making sure you are sewing through the ruffle. Repeat for the other side.
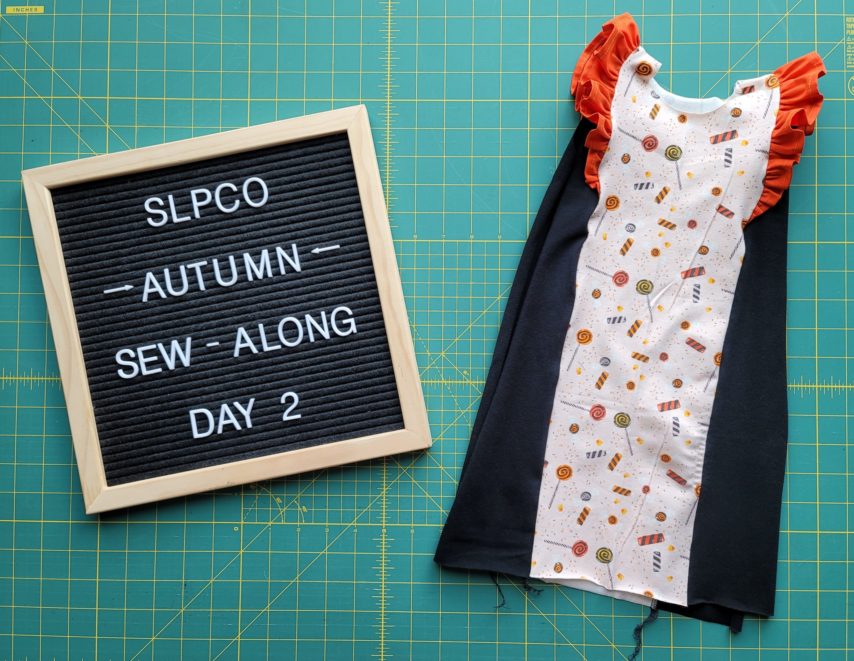
Day 2 Progress
You have now completed steps 1 through 7 of the Autumn pattern tutorial! If you have any questions or get stuck on a step, please message me. You can find me listed as an admin in the Facebook fan group. I have also posted a video of how to attach the ruffle and side panels. Make sure once you finish the steps for today that you take a progress photo and upload it into the Autumn Sew-Along album. The daily progress photos are your entries toward winning daily shop credit prizes! I’ll see you back here tomorrow and we’ll work through adding neck and sleeve binding.
Happy sewing,
Chauncey