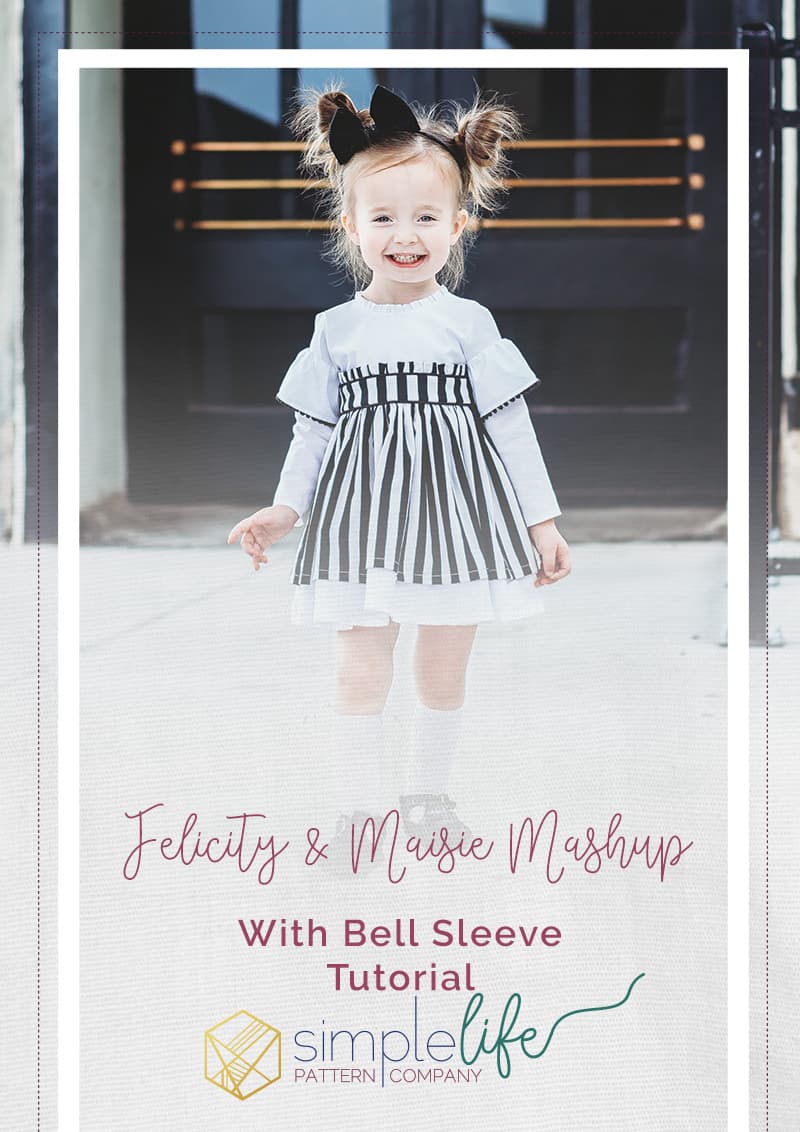
Felicity and Maisie Mashup – With Bell Sleeve Tutorial
I’m going to let you in on a little secret about me. I love vintage-looking children’s clothing. There is just something so sweet and charming to me about the all the details they typically include. Last week, when Maisie released, I knew I wanted to mash it with another one of my favorites, Felicity, to create a vintage inspired look. I also decided to try to add bell sleeves for an extra special touch. This little creation was born and I’m in LOVE. I hope you love it too.
Felicity
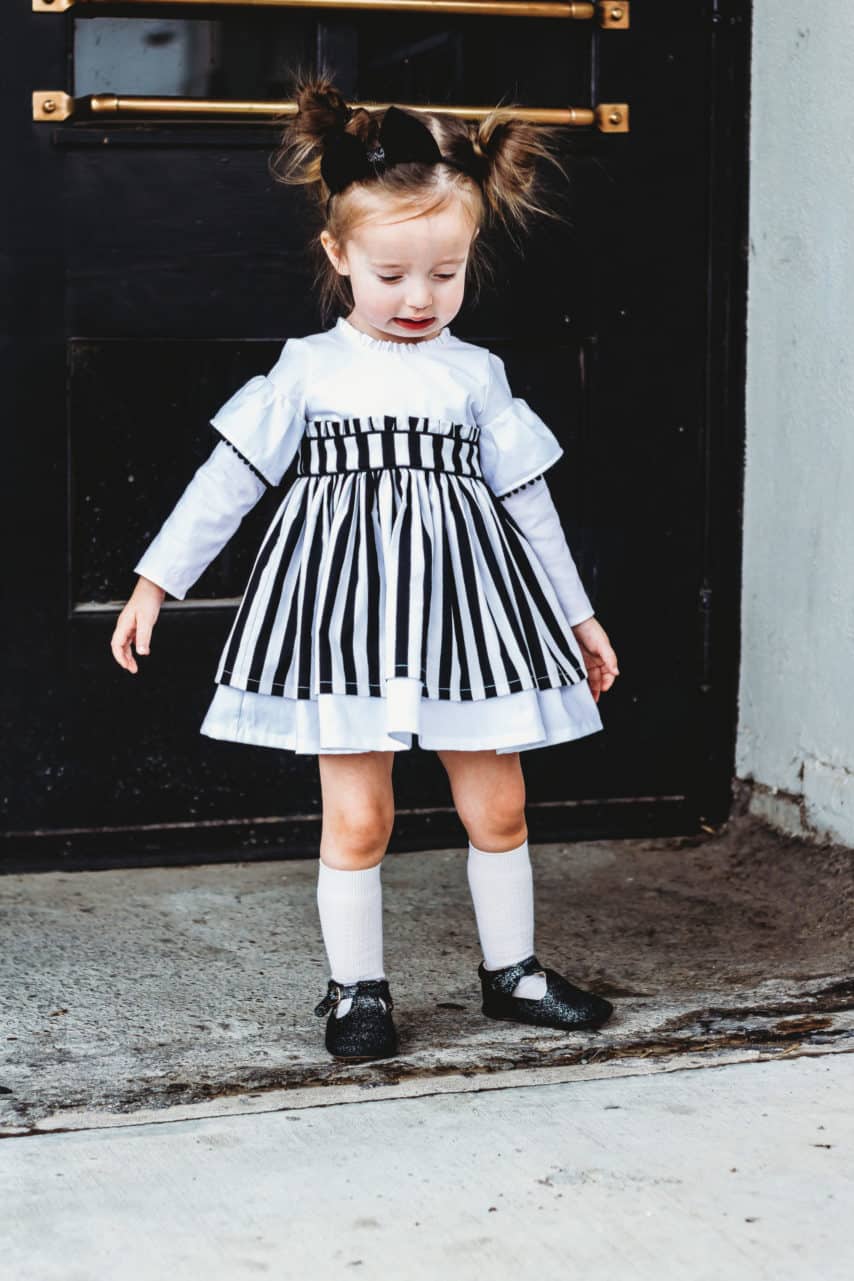
Using Felicity as my base, I began by cutting out the bodice. Then I cut out the micro neck ruffle for extra vintage detail. The long sleeves were also cut using the Felicity pattern pieces. Follow the Felicity instructions for bodice construction and stop when you get to step 11 (attaching the sleeves to the bodice). You will use the bell sleeve tutorial below to add the bell to your sleeve before attaching your sleeves to your bodice. Next, I pulled out my Maisie pattern to figure out how to add the flat front waistband with ruffle.

Maisie
The flat front waistband of Maisie is such a stunning detail. Since Maisie doesn’t come in baby sizes I had to do a little measuring to figure out how to add this detail to the front of my Felicity bodice. The pattern instructions for Maisie made this a simple task but some math is involved.
First I measured the width of my Felicity front bodice piece (10.25″ for a size 9/12m). Then I measured the side height from the bottom of the bodice up to the arm curve (2.75″ for size 9/12m). I subtracted 1″ to account for the ruffle and seam allowance. I then cut a rectangular piece measuring 10.25″ x 1.75″ for my flat waistband piece.
For the ruffle piece I chose to cut at a height of 2″ for baby sizes. The length was calculated using the width of the front bodice piece x 1.5 giving me a total ruffle length of 15.375″ which I rounded up to 15.5″ for ease of cutting. My cut ruffle piece measured 2″ x 15.5″.
Then, following the Maisie instructions, I added my ruffle to my waistband piece. Note: I also chose to add piping to the front waistband along the ruffle and skirt seam for more vintage flare. Once I had my ruffled waistband piece finished I sewed it to the front of my Felicity bodice using the step 5 instructions of the Maisie pattern tutorial.
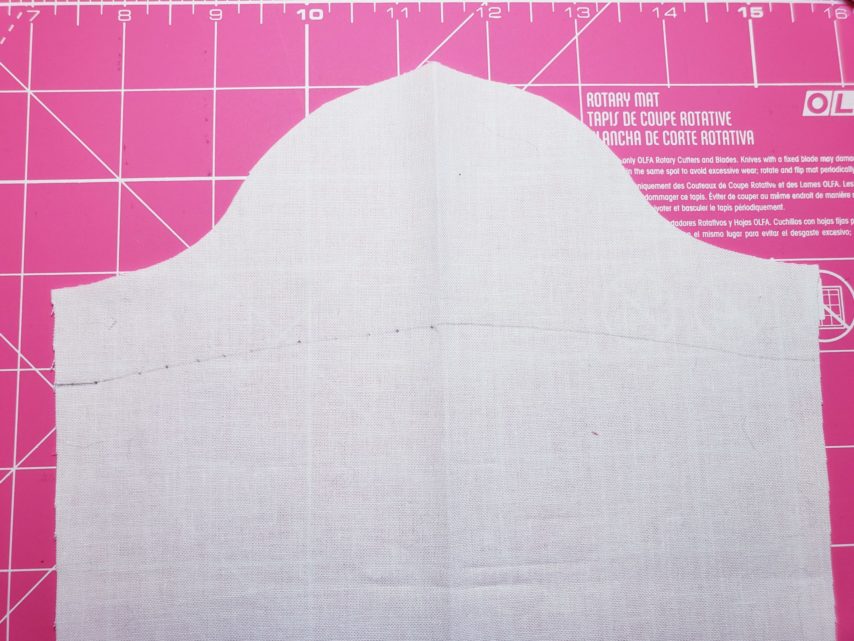
Now we are ready to work on sleeves!
Bell Sleeve Tutorial
Marking Placement of the Bell Sleeve
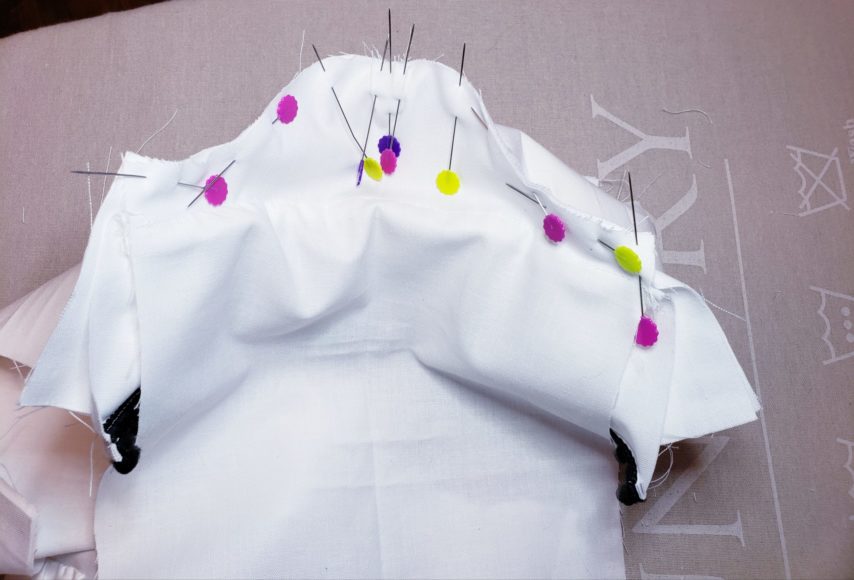
With your Felicity long sleeve paper pattern piece in front of you, cut along the short sleeve line. You will use the bottom half of the paper pattern piece to mark placement of the bell sleeve. Next, with your sleeve folded in half and laying right sides up, measure down 1″ from the bottom of the arm curve and make a mark. Align the paper pattern piece along the mark and make sure it matches up along the folded edge of the sleeve. Follow the curve making a mark on the right side of your sleeve fabric.
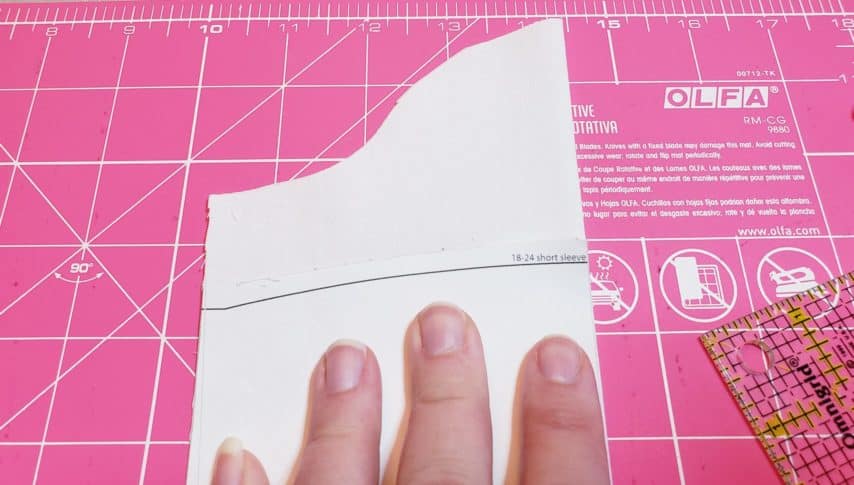
Your sleeve should now have a line drawn on it like this.
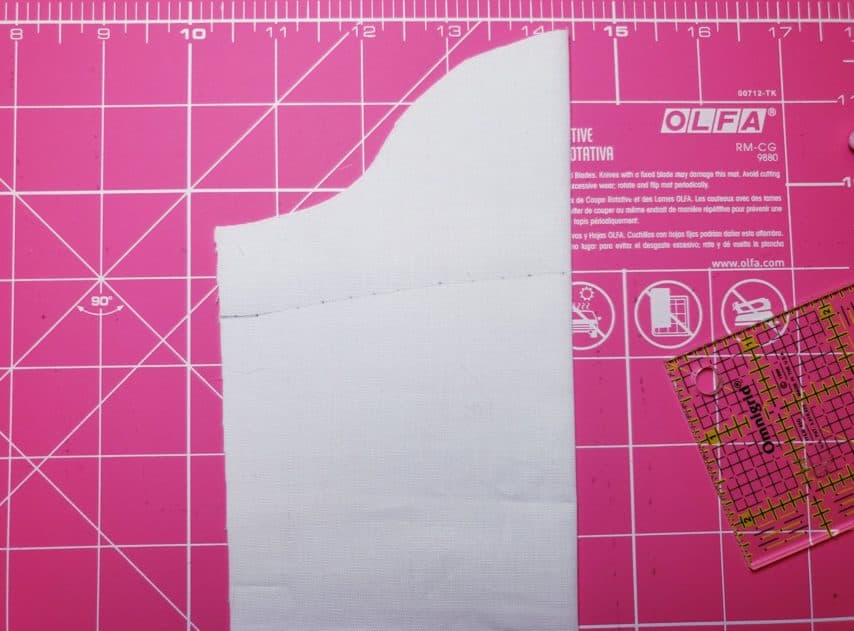
Flip the sleeve over to repeat for the other side. Once finished you should have a line that goes all the way across the right side of your sleeve fabric. Repeat for your other sleeve piece.
Figuring Out Bell Dimensions
Now we need to measure that line to figure out how long to cut our bell piece. For example, a size 9/12m measures 8.125″. 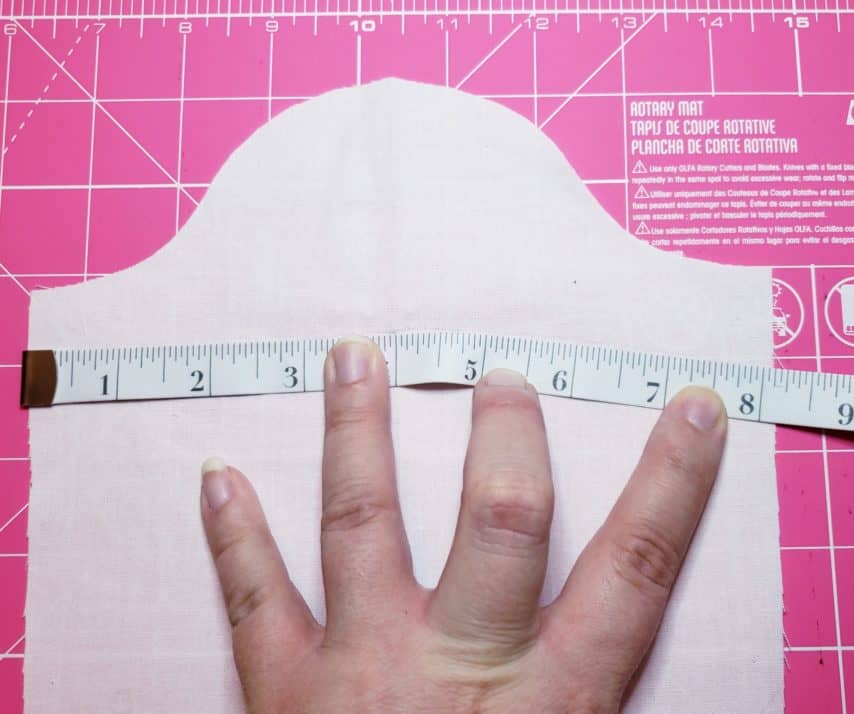
Now we need to figure out the dimensions of our bell so we can cut the pieces. The width of the bell will be the measurement obtained from the step above x 1.5. So, for a size 9/12m, my bell sleeve width is 12.25″ (8.125″ x 1.5 = 12.1875″, but I rounded up to 12.25″ for simplicity of cutting).
I wanted my bell to fall around the waistline once finished. So, I used the Felicity side bodice height from earlier in this post (2.75″) and added 3/4″ to account for the seam allowance and hem. This gave me a height of 3.5″. Therefore, I cut my two bell rectangular pieces at 12.25″ x 3.5″. Note: I know this is a lot of measuring, math, and customization. If you need help figuring out the math for a specific size, please reach out to me. I am happy to help you figure all of this out to achieve the mashup of your dreams! You can find me listed as an admin in the Simple Life Patterns Fan Group on Facebook.
Preparing Your Bell
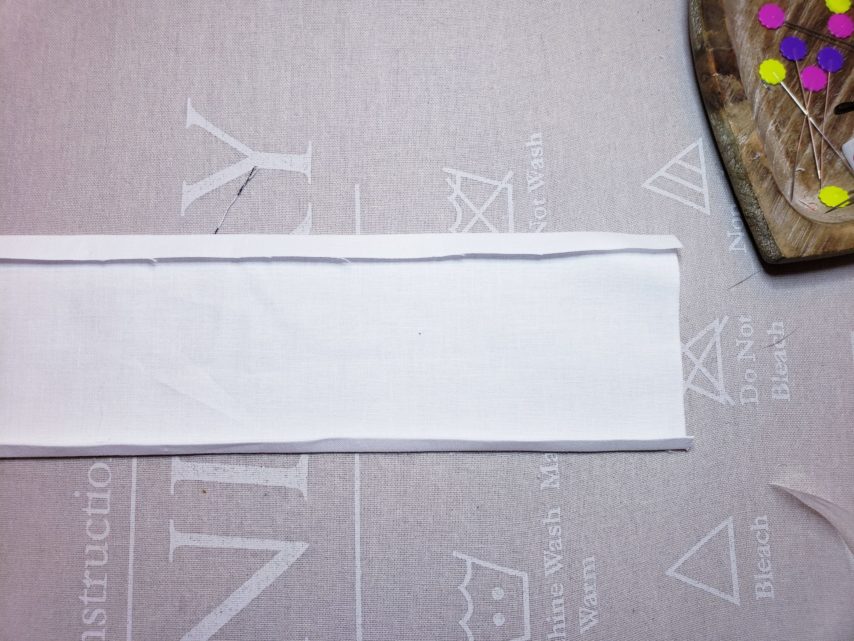
Once you have your bell rectangular pieces cut it’s time to hem them. With your bell lying in front of you so that wrong sides are facing up, fold the bottom up 1/4″ and press. Fold the bottom hem up another 1/4″ and press. Sew the bottom hem 1/8″ from the folded edge. Note: this is a great time to add lace, pom, or other fun trims to the bottom of your bell. I chose to add a coordinating solid black pom trim.

Next, serge the top raw edge of your bell. Fold the serged edge down 3/8″ and press well to create a memory crease.
Now sew two rows of gathering stitches along the top serged edge of your bell. I chose to sew one row at 1/8″ and the second row 1/4″ from the finished edge.
Attaching The Bell To The Sleeve
Lay your sleeve in front of you so that right sides are facing up. Next, find the center of your bell piece and mark with a pin. With your bell facing wrong side up, align the serged edge of the bell along the top of the previously made line marking. Be sure to match the center of your bell piece with the center fold crease of your sleeve. Note: The hemmed portion of your bell will be flipped up toward the arm curve of your sleeve.
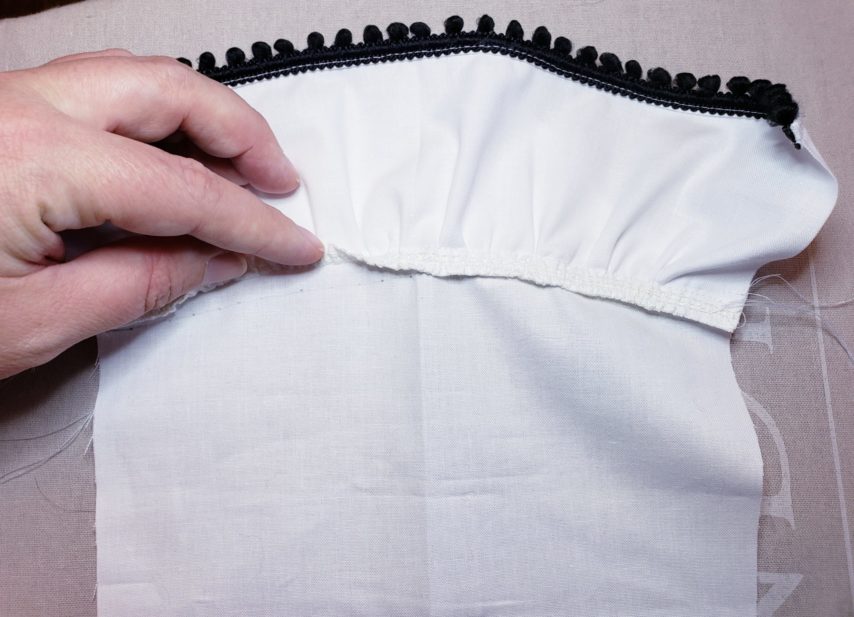
Pull your gathering threads to gather your bell piece to the same width as your sleeve. Pin the bell to the sleeve and sew in place along the memory crease you made.
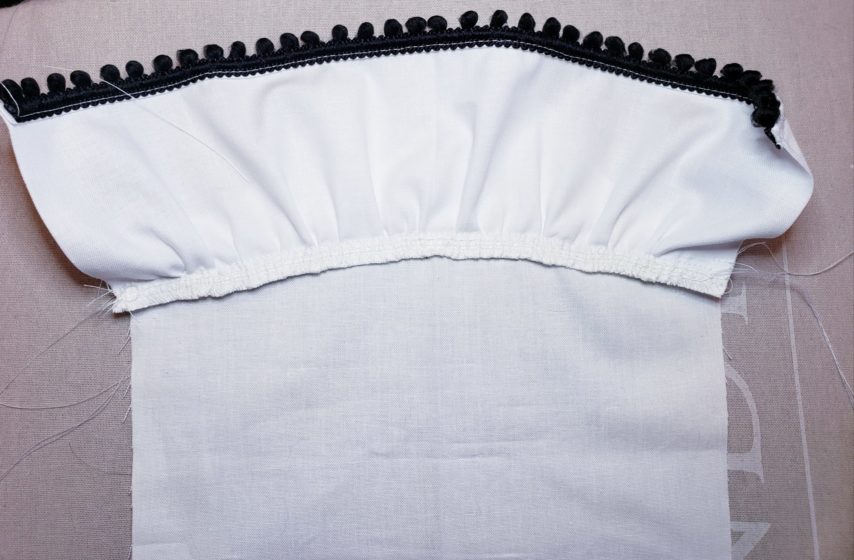
Now, flip the bell down toward the bottom of your sleeve and iron well along the seam.
Attaching the Sleeve to the Bodice
Finally, pin the sleeve to the bodice using the instructions in the Felicity pattern tutorial (steps 11-13). Make certain not to catch the fabric of your bell in the arm curve seam when you sew the sleeve to your bodice.
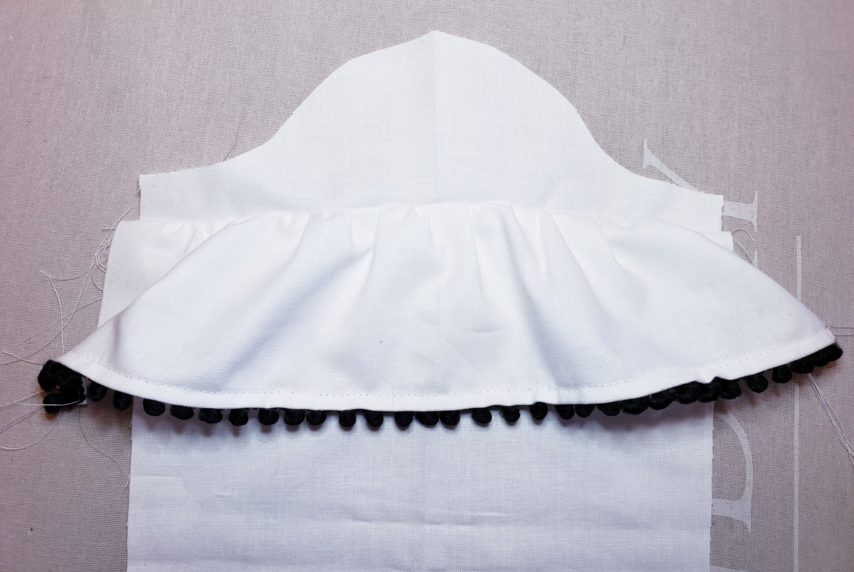
When you go to sew the side seams of your sleeve, make sure the bell portion is pushed down toward the hem of the sleeve. The raw edges of the bell should be aligned with the raw edges of your sleeve. The finished seam of the the sleeve/bell will look like this.
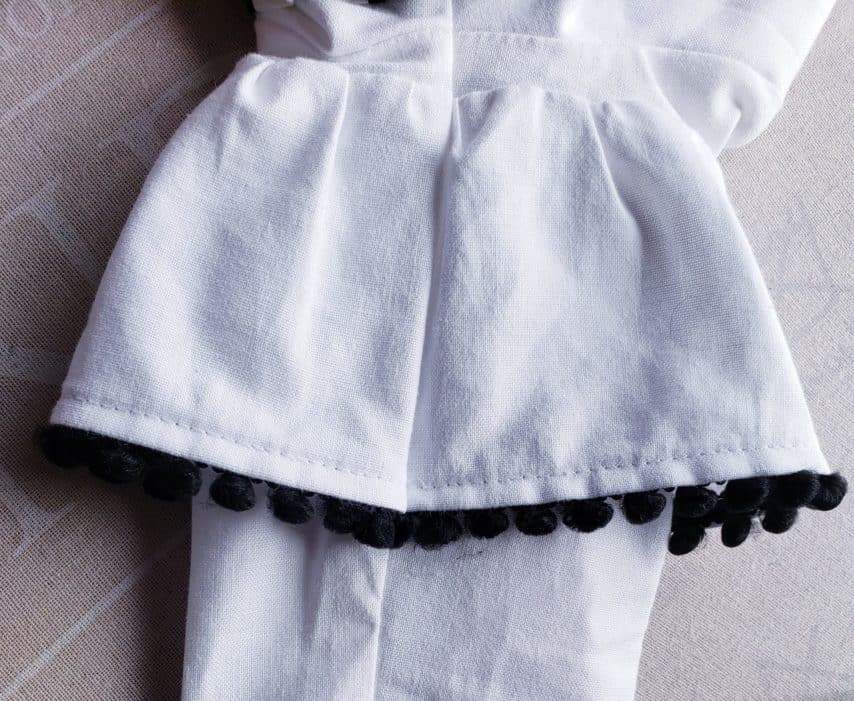
Finish your Felicity and Maisie mashup by adding the skirt following pattern instructions. I chose to add a double layered vintage skirt. For the top layer, I simply cut it 2″ shorter than the under skirt layer. That’s it!
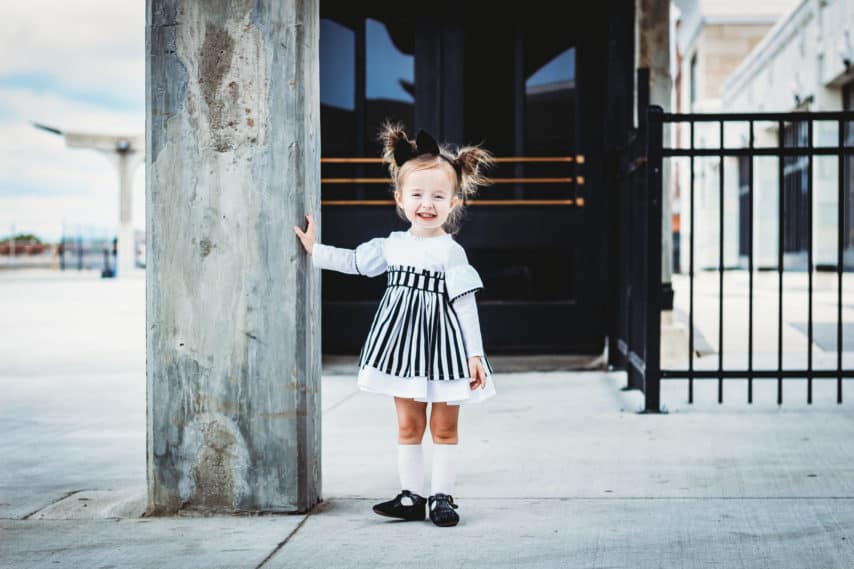
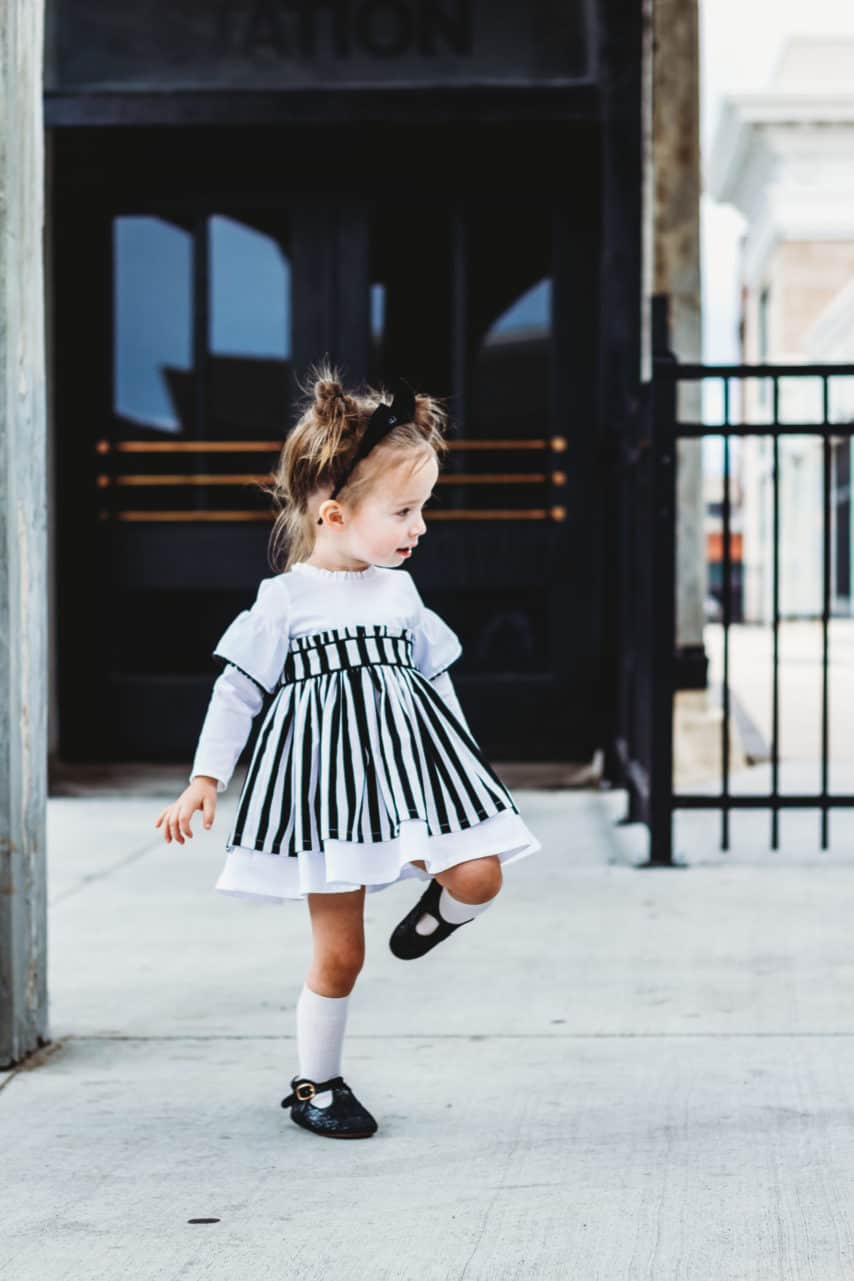
I hope your daughter loves your finished Felicity and Maisie mashup creation as much as Chacely does. She wouldn’t stop dancing and checking out her reflection in the Train Station doors.
Happy sewing,
Chauncey