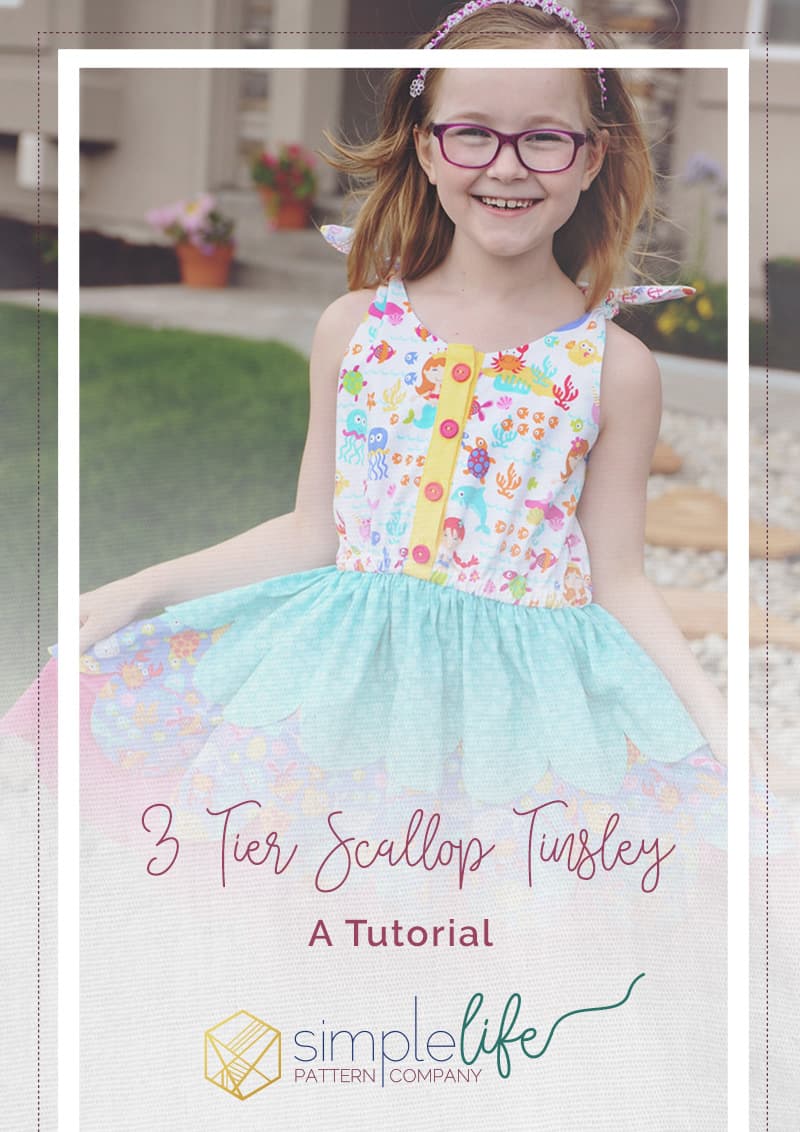
Tinsley 3-tiered Scalloped Dress Tutorial
Hello everyone!
My name is Holly and this is my very first blog post here at Simple Life Pattern Co. I am excited to be with you today to show you how to turn the Tinsley dress pattern from a single scallop hemline into a 3-tier scalloped skirt. The scallop hemline is so fun and playful. And, while the Tinsley dress is gorgeous as it is, I think the tiered scallop hemline can be used to highlight some really fun fabrics. You can create a version that has all tiers out of the same fabric, use different colored solids, do an ombre look or mix different prints to give it a unique look. This 3-tier skirt is so versatile and fun, so let’s get started!
To begin, you will need to purchase a copy of the SlpCo Tinsley pattern sizes 2-12. You will be following the Tinsley pattern exactly for the bodice construction in steps #1-13. Your dress bodice will be cut from the pattern pieces provided. Make sure that you are cutting and constructing your pattern pieces for the dress bodice version and not the top version. Also, cut out the scallop template for the size you are sewing as you will be using this in a later step.
You will NOT be cutting the skirt pieces from the skirt cutting chart since this skirt will consist of 3 separate tiers. I am providing those skirt tier measurements below. You will be cutting 6 skirt tier pieces in total. There are 3 tiers each with a front and back piece.
Also, I want to note that this 3-tier scallop skirt version does not allow for the pocket construction that is an option within the pattern. The pockets can only be included if you are constructing the original pattern.
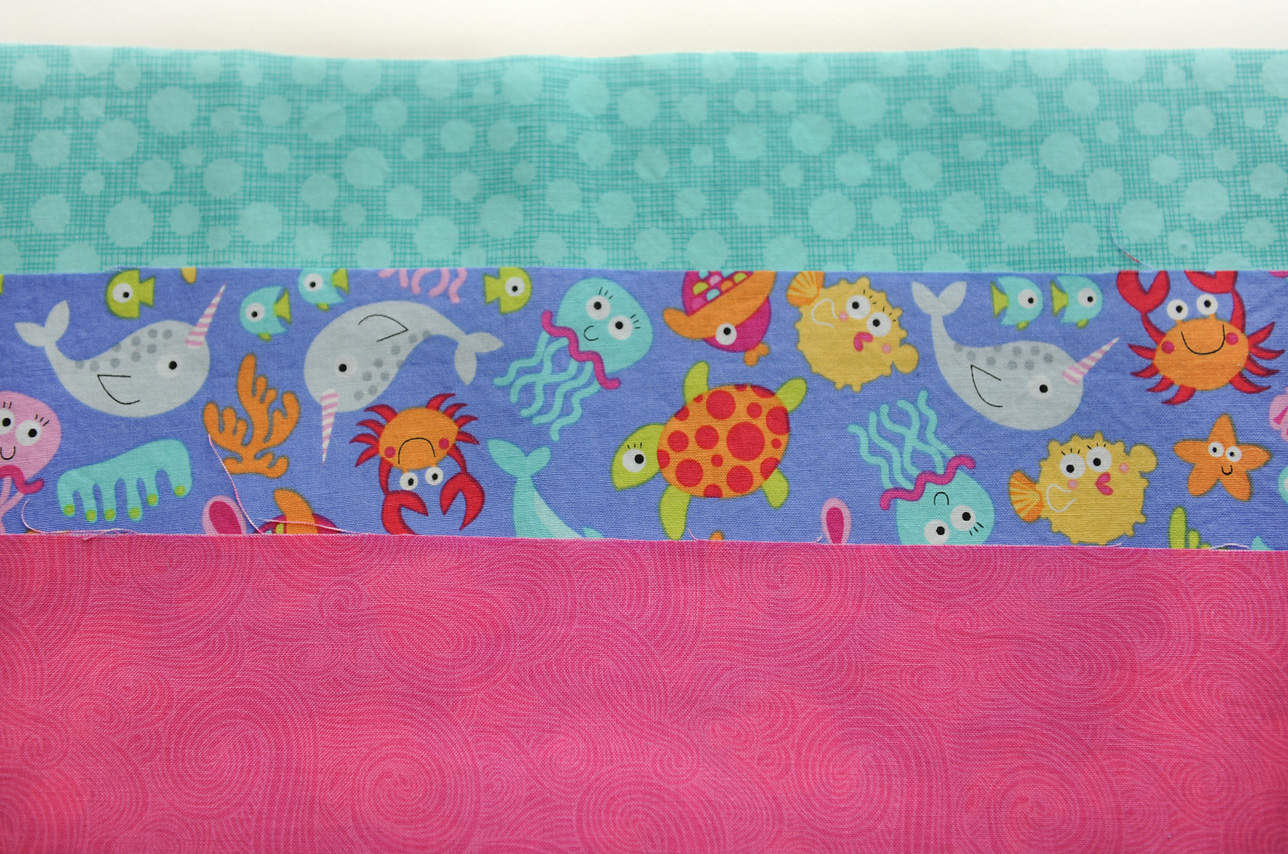
After you have chosen your 3 fabrics, you will need to cut a front and a back piece for each of the 3 tiers, cutting 6 skirt pieces in total.
SIZE SKIRT TIERS – (cut 6 L x W)
2t 9.25 x 34
3t 9.75 x 34
4 10.375 x 34
5 10.75 x 37
6 11.125 x 37
7 11.5 x 37
8 11.75 x 42
10 11.875 x 42
12 12.125 x 42
Now, lay the bottom front and back skirt tier pieces right sides together and sew/serge the side seams together. Repeat this for the middle and top skirt tiers. You now have 3 circular pieces.
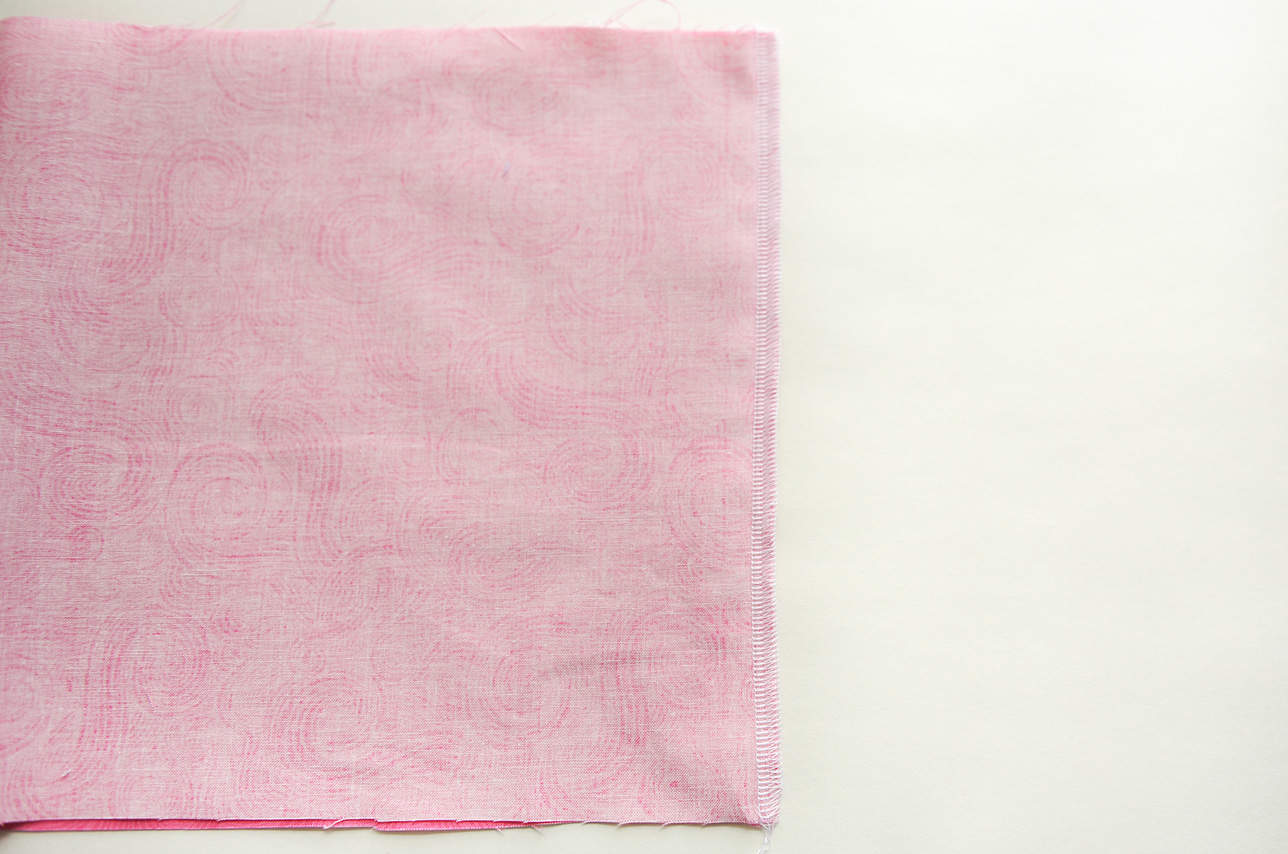
Next, you will need to serge/zig zag stitch the top and bottom of each of the 3 tier sections without removing any seam allowance. Simply, serge/zig zag stitch your seam flush against the cut piece of fabric to secure the edges and ensure they do not fray. Do not cut any fabric from the seam allowance. The top edge is stitched to secure the exposed edge inside of your skirt after you attach all 3 tiers together. The bottom edge is serged/zig zagged as per the pattern instructions to make the scallop edge.
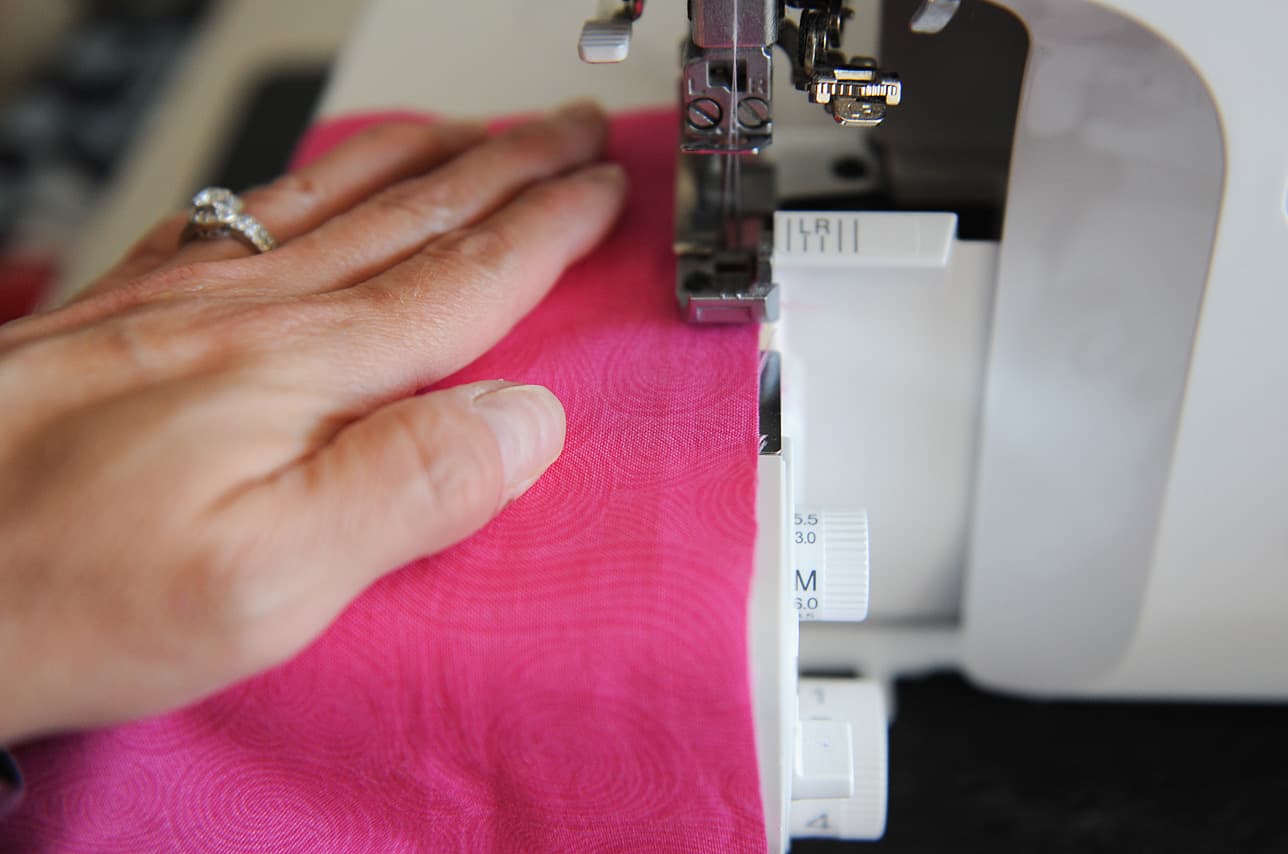
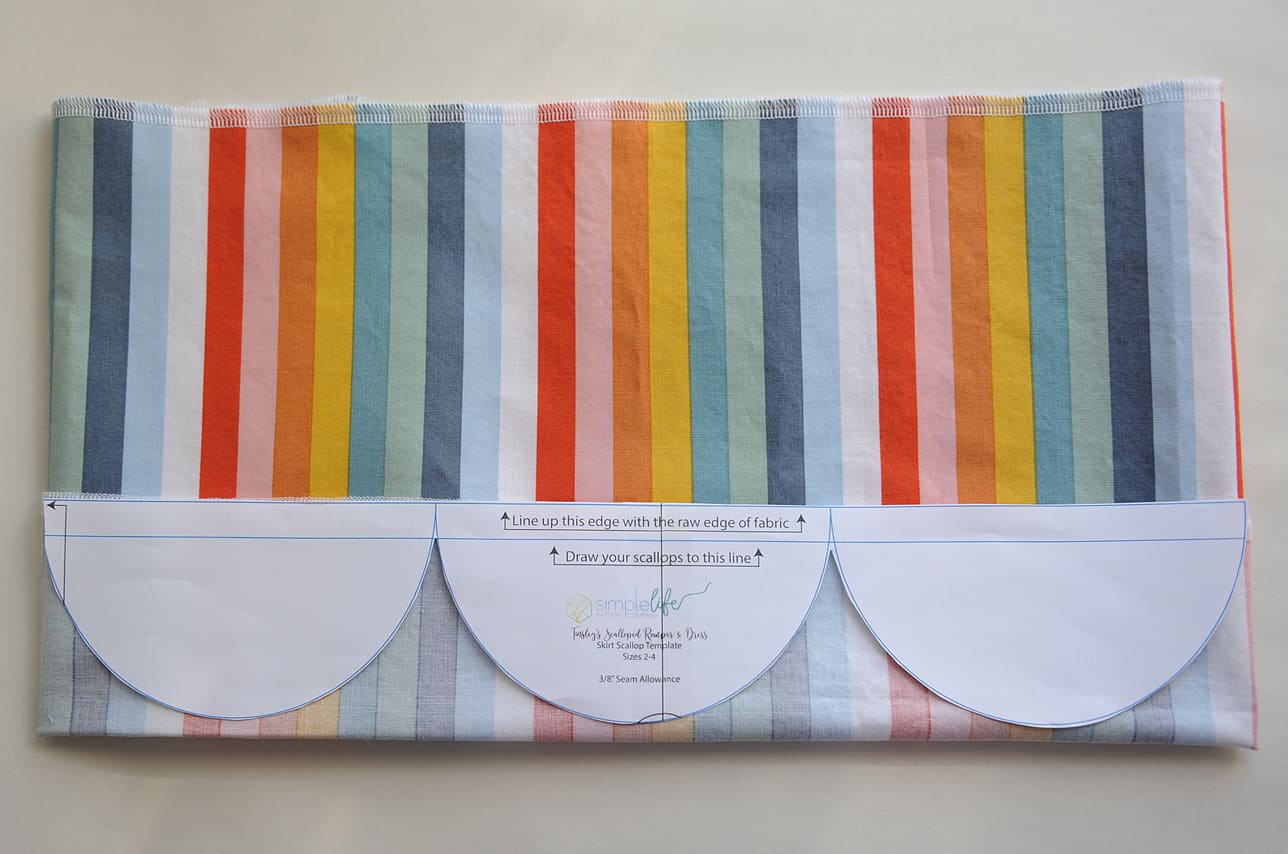
You will now continue with creating your scallops on each of the 3 tiers using the template given in the pattern for your designated size and following the pattern steps #23-31. This step will take some time because you will be creating all of your scallops for each of the 3 tiers. It is important to sew slowly and carefully with a smaller stitch length to create nice scallops that end up being consistently the same size since the tiers will be lined up on top of each other and you will want your scallops to line up correctly.

After completing each of the 3 tiers of scallops, it is time to attach the tiers together. You will loosely place your bottom tier section inside of the middle section with the middle tier scallops lying on top of the bottom tier. Repeat this to place the middle tier section inside of the top tier section. You will be lining up the serged seam on the wrong side of your scallop directly beneath the serged top seam of the layer below. 
Before pinning, you will need to take a ruler to ensure the length of your skirt measures correctly and your 3 tiers are relatively an equal distance apart. To do this, find the cutting chart in the pattern for the SIMPLE gathered skirt and make sure your skirt is the same length from the top edge of the top tier down to the longest bottom point of a scallop on your bottom tier. The reason for using the simple skirt length measurement is because the bottom scallop has already been created and is now 3 inches shorter than the scalloped skirt cutting chart measurement. (For example, a size 2t SIMPLE skirt from the pattern cut chart is 11 inches in length. This should be the approximate length of the skirt with all 3 tiers attached from the top edge of the top tier to the bottom edge of a bottom tier scallop.)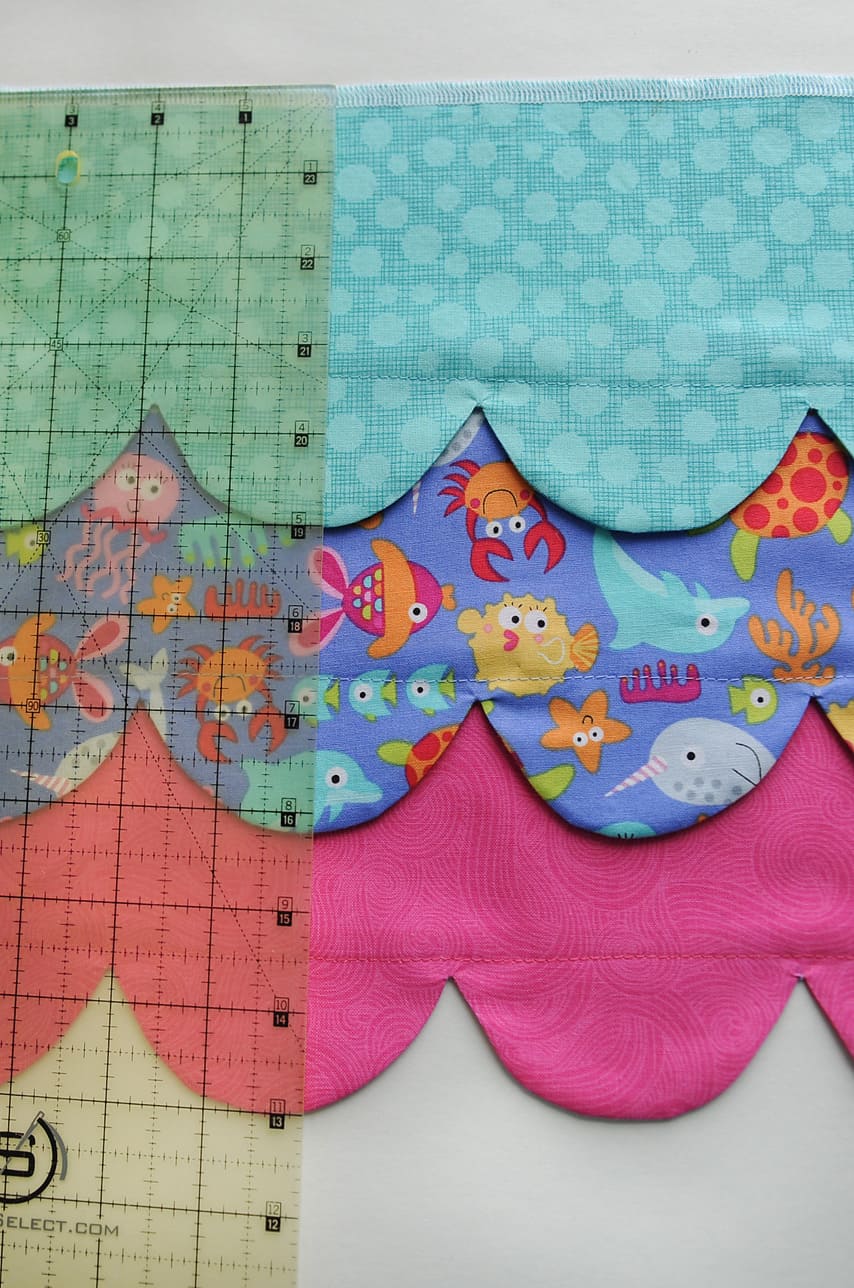
Adjust your tiers to ensure you have this length correct and that each tier is generally the same distance apart. Then, pin these tiers together and sew to attach just under your serged/zig zag seam of the underneath layer. It is helpful to use lots of pins to ensure your tiers stay lined up on top of each other. Additionally, a helpful tip is to use some 1/4″ double sided tape to keep your layers together as you sew. Go slowly at this step to ensure a straight stitch and to catch both layers. You will be placing this stitch near where you stitched your scallop hem and you can use this stitch line as a guide to stitch your tiers together. 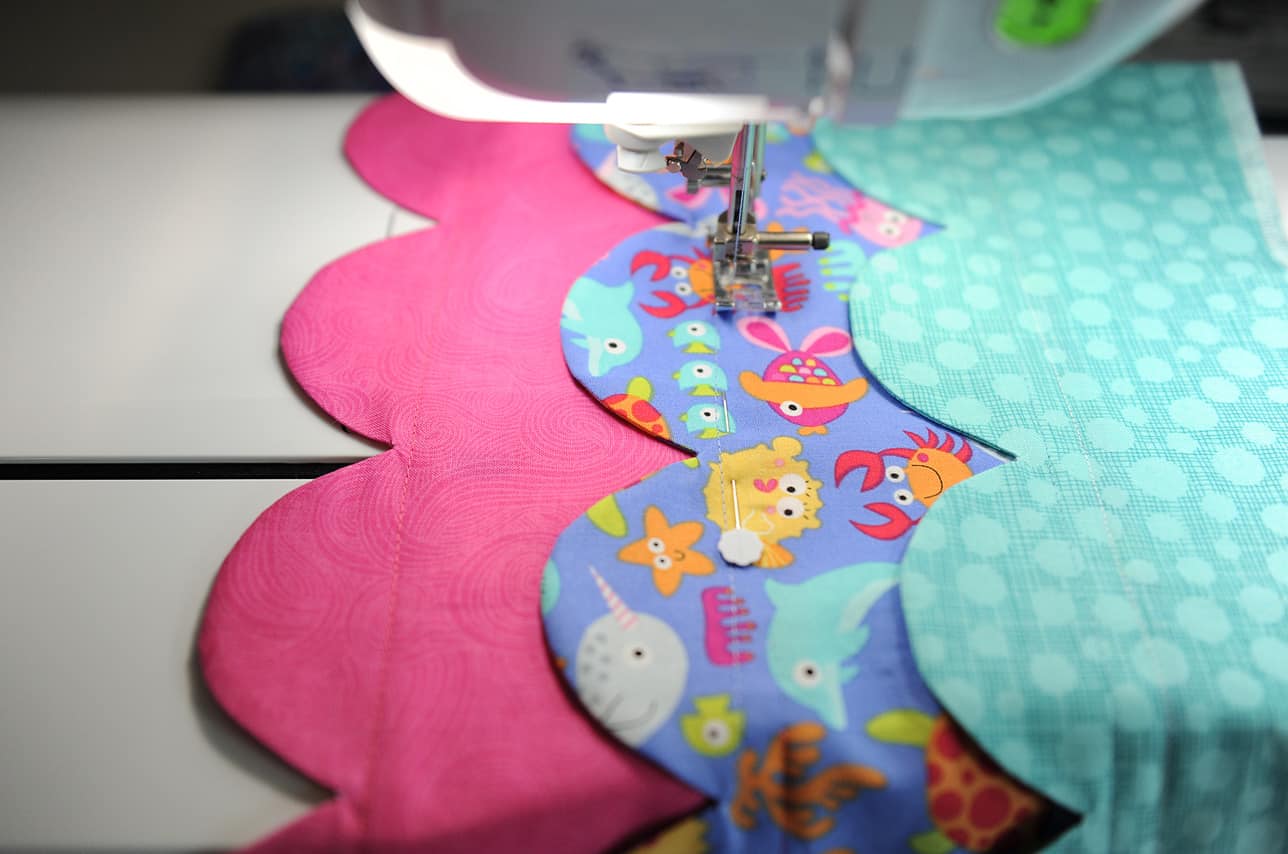
After you have attached all 3 scallop tiers together, your skirt should look similar to this. 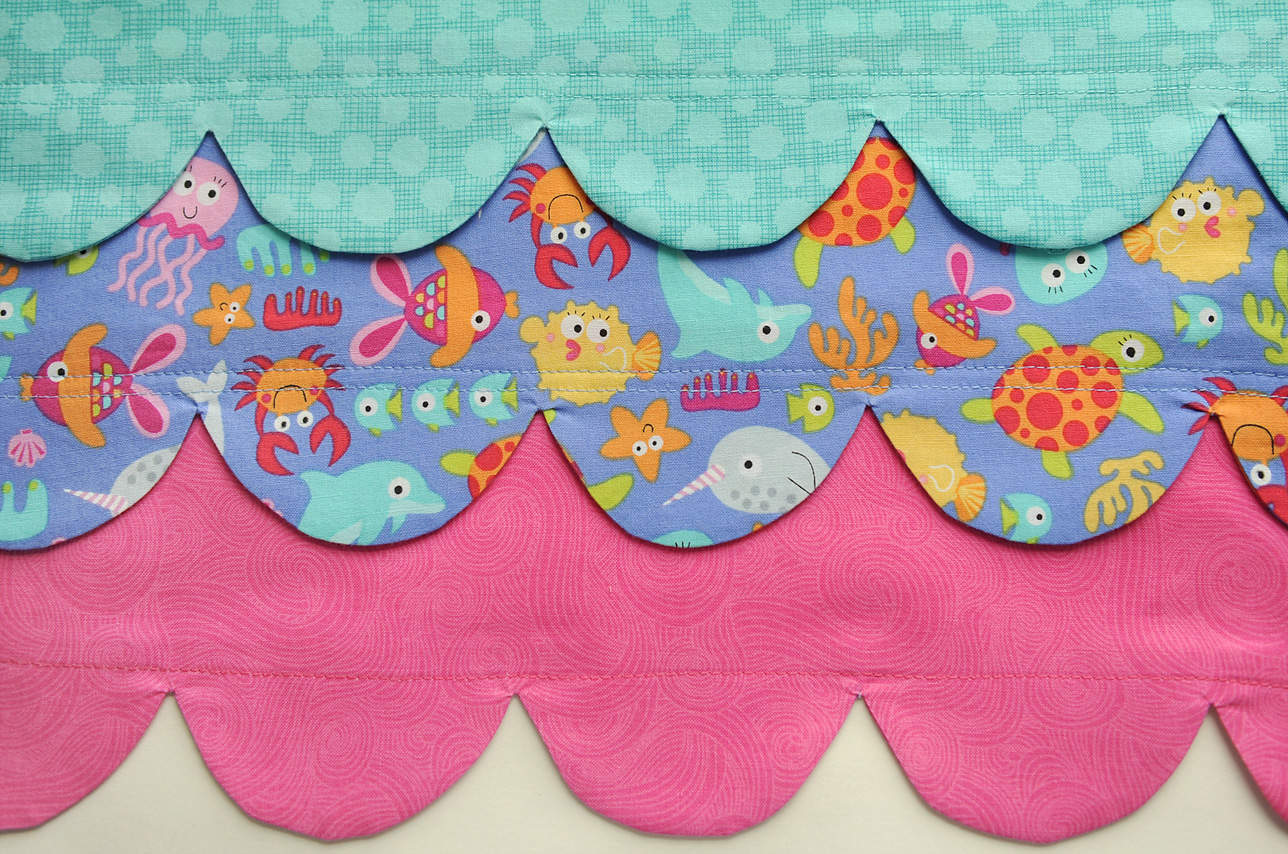
Now, continue in the pattern instructions at step 32 and complete the final steps to gather your skirt, attach your bodice and make the elastic waist casing.
You have now created the 3-tier scallop dress Tinsley pattern! 
I hope you have enjoyed this process and have a beautiful dress that is unique, fun and beautiful. Thank you so much for sewing along, and I would love to see your creations posted to the Simple Life Patterns Fan Group Facebook page!