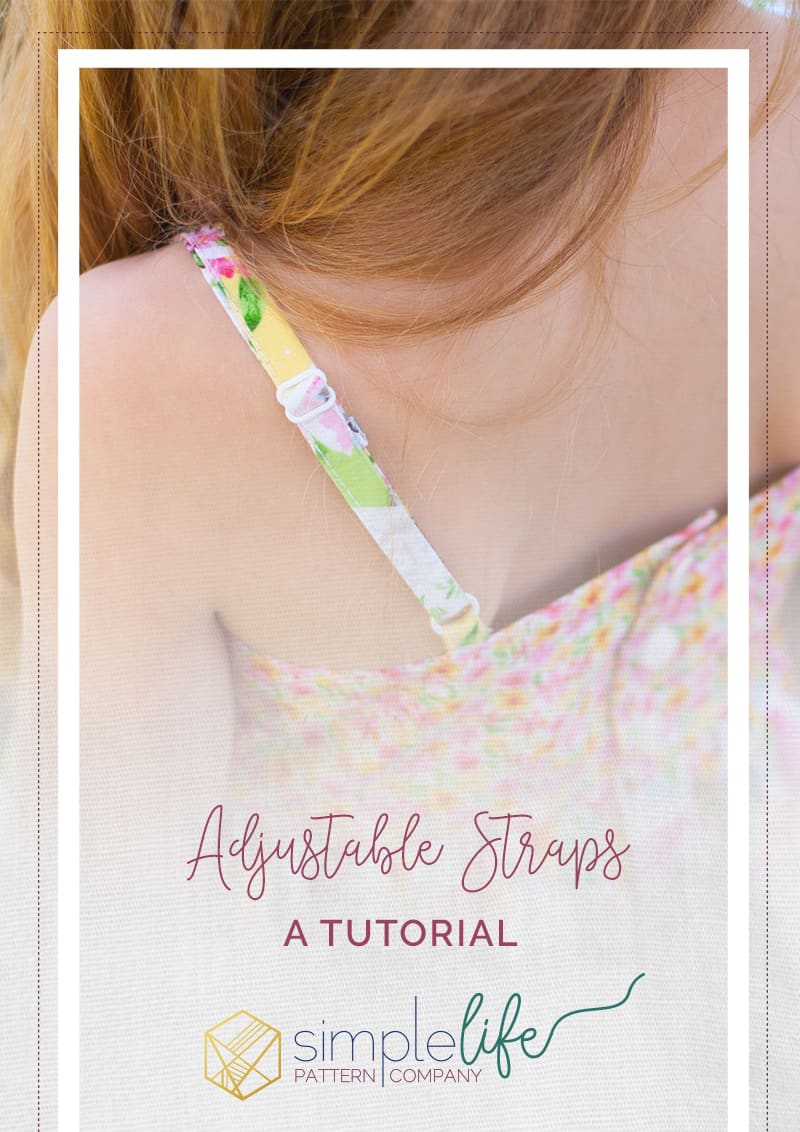
How to add adjustable straps
It’s Lacey Lee again with another fun tutorial.
Ya’ll, Spring has sprung, and I am so here for it! My favorite things to sew are cute warm weather dresses. There is something about all the bright colors, flowing fabrics, sun kissed rosy cheeks and sweet little toes peaking out behind those sandals that gets me! I have been hoarding this Hope Yoder mix of fabrics waiting for the perfect sundress, and Opal’s Wrap Dress is just that! My daughter isn’t always a fan of the shoulder ties though, so I decided to try my hand at an adjustable strap. It worked out perfectly, so I thought I would share how to do it with you all.
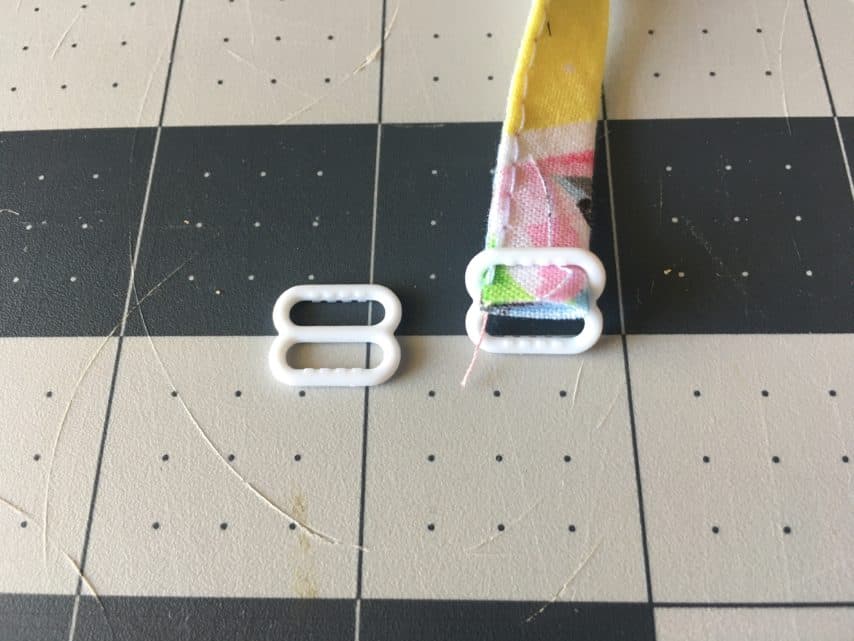
First, let’s talk hardware. All your need is to pick up 2 sets of bra sliders and rings. I found mine at Joann, but you can easily source them from Walmart and Amazon as well. Make sure to double check that they are the correct width for you finished strap size, and you’ll be good to go.
Now let’s get started! Go ahead and cut out all your pattern pieces EXCEPT the shoulder straps. We’ll need to calculate the new measurements. I did this by taking the Molly pattern pieces, and laying Opal on top. Line them up at the bottom of the armscye (or underarm), as shown in the picture below.
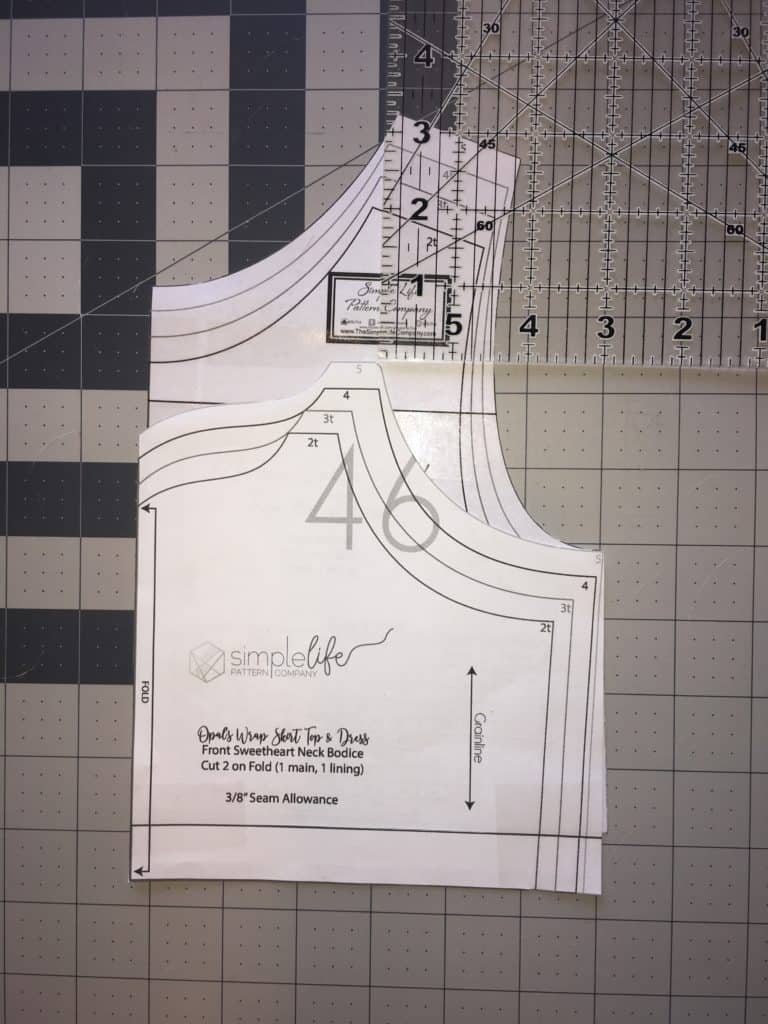
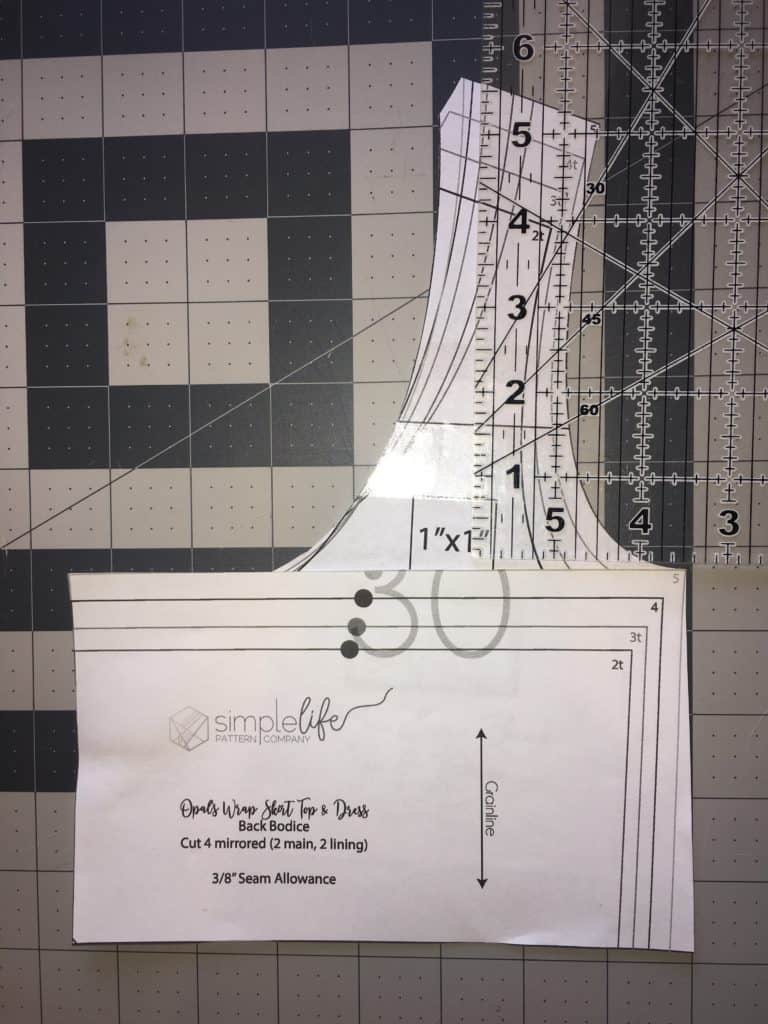
Then, measure the difference from the bodice to the shoulder on each piece. This doesn’t have to be 100% accurate, just get a general idea. We’ll then add 3” for “adjustability”, and another 2” to make the lower loops on the back bodice. Add all of these together to get to the final length of the strap you need for each side. It all sounds a little complicated, but it really isn’t when you break it down. Below is the equation for a size 5:
3” front difference + 5.5” back difference + 3” adjustability + 2” back loop = 13.5” (cut 2 this length)
Follow steps 8 and 9 in order to make your straps using the length from the equation above.
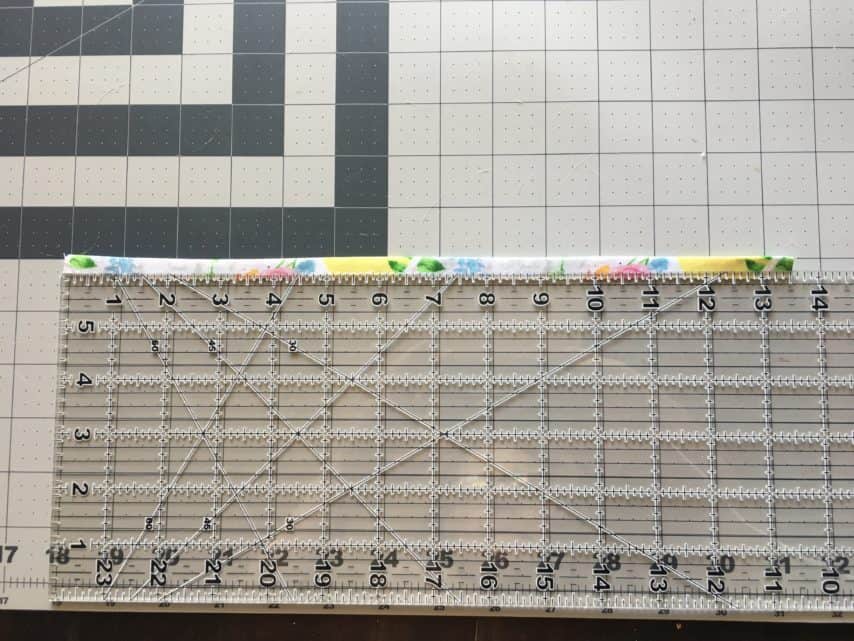
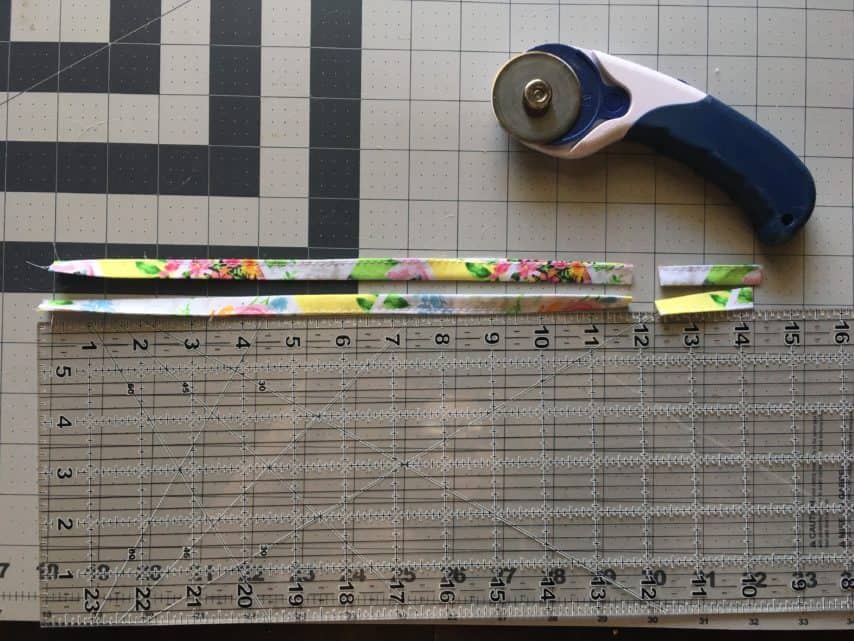
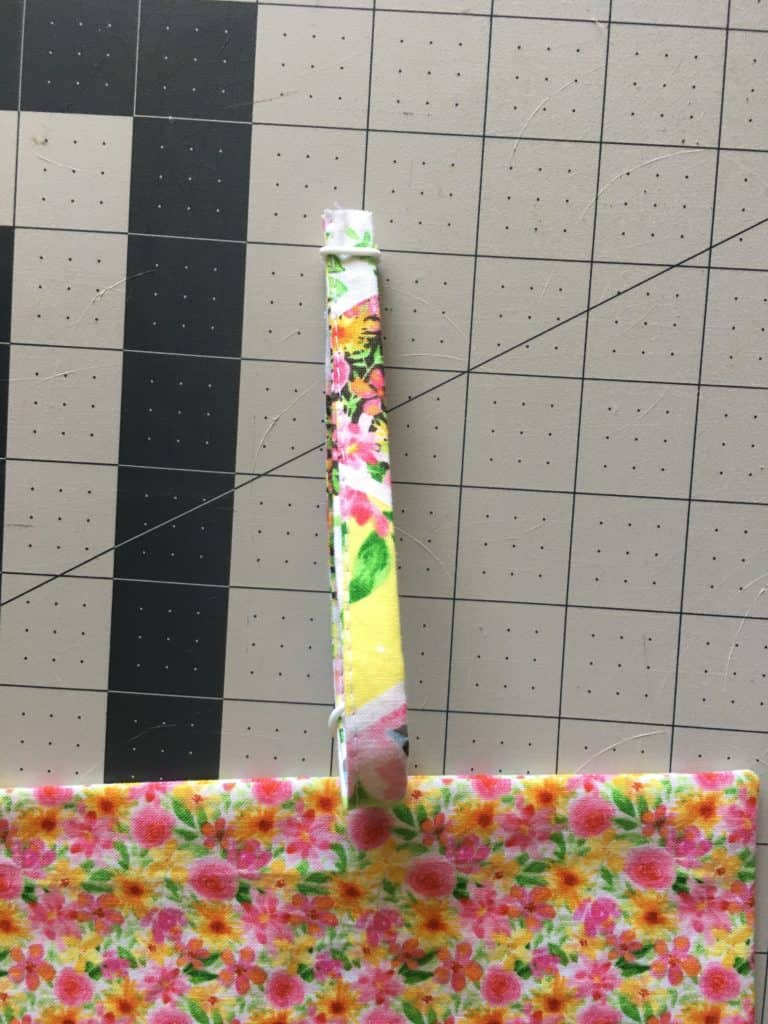
Once you have your straps sewn, cut 2” off each one. These will become the back loops.
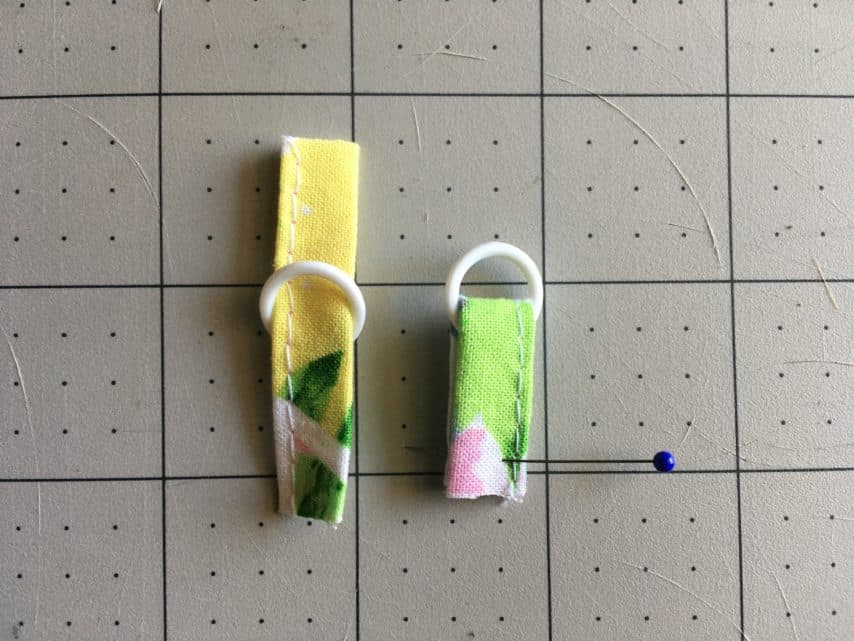
Take each 2” section, and feed a ring through them. Fold in half, and then skip to step 12 in the pattern and attach it to the back bodice the same way.

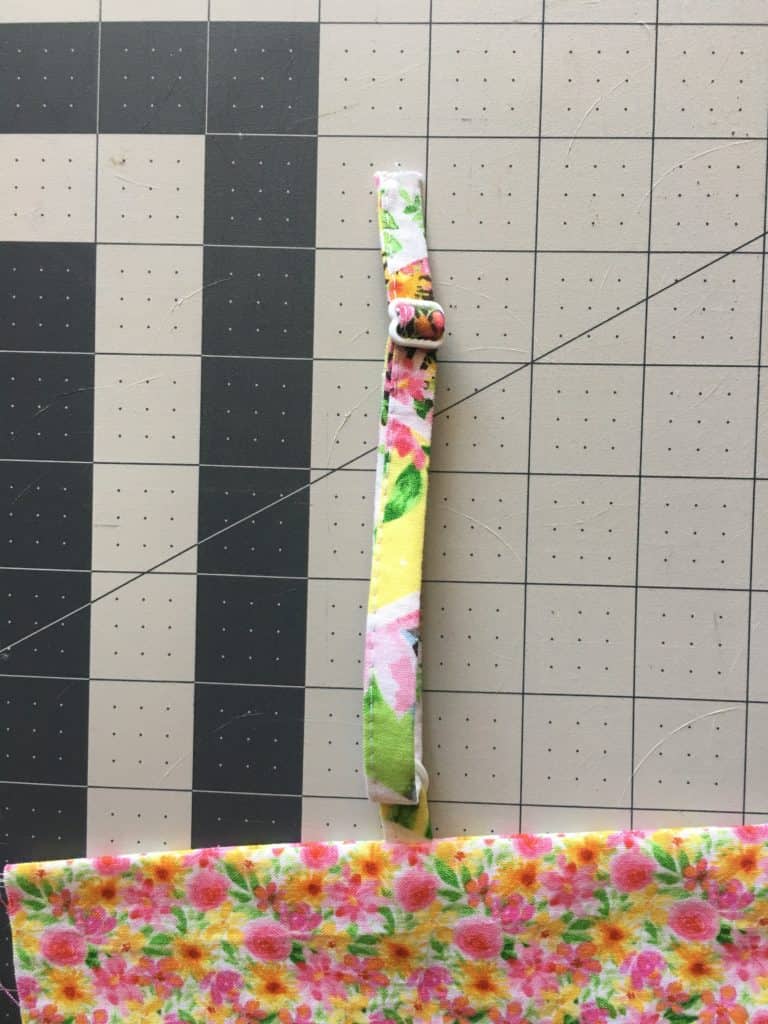
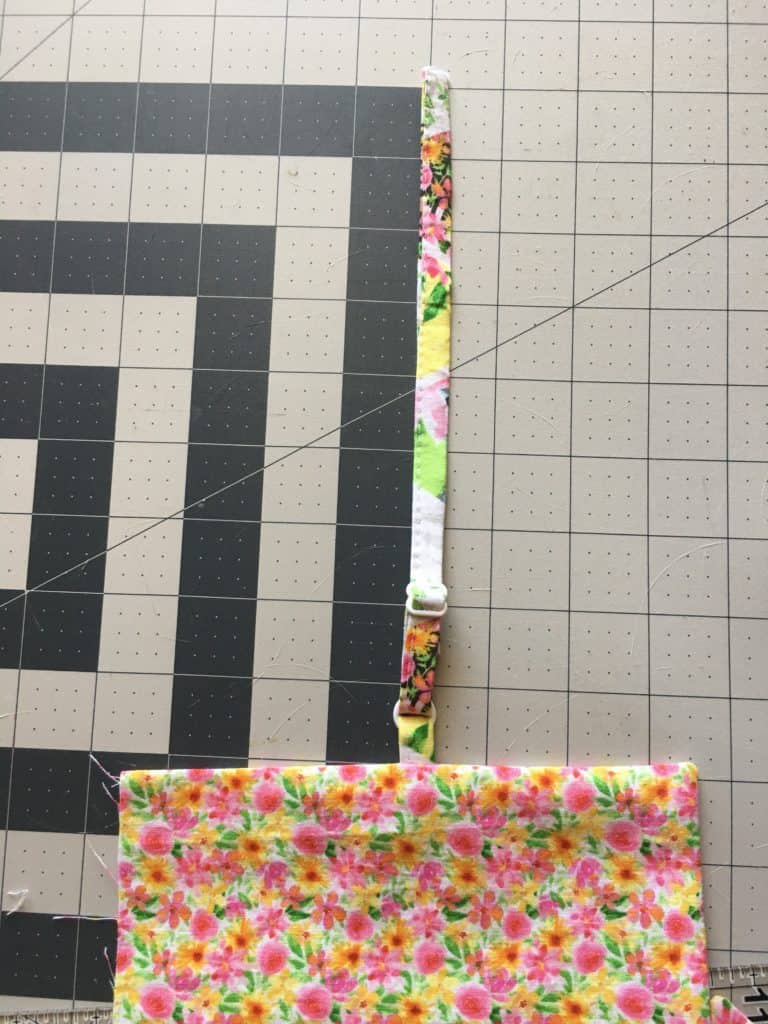
Next, we are going to take the longer portion of the straps and feed them through the slide just like the pictures below.
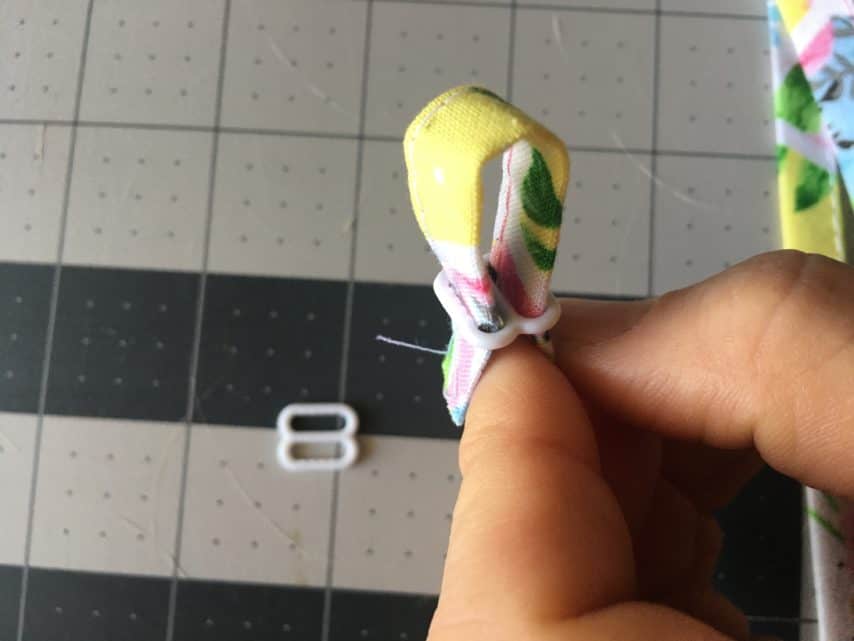
Fold up the edge 1/4”, then fold over the slide 3/4” and sew along the folded edge.
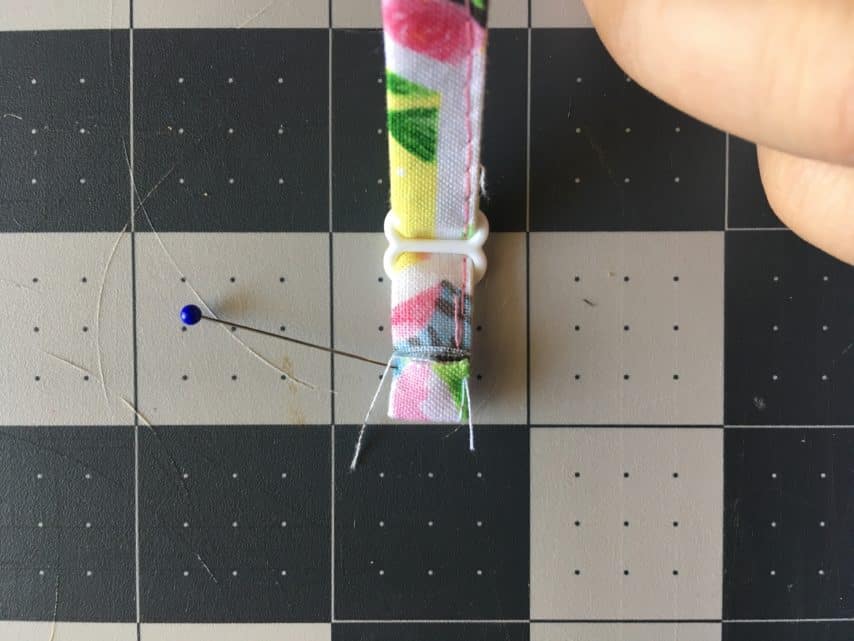
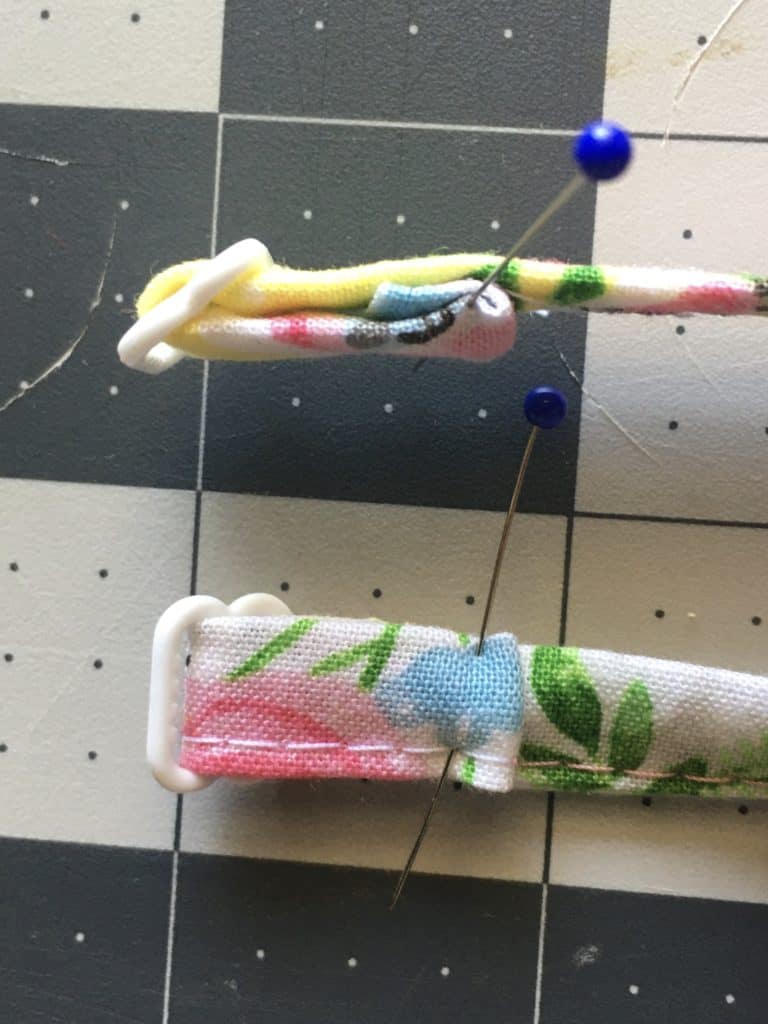
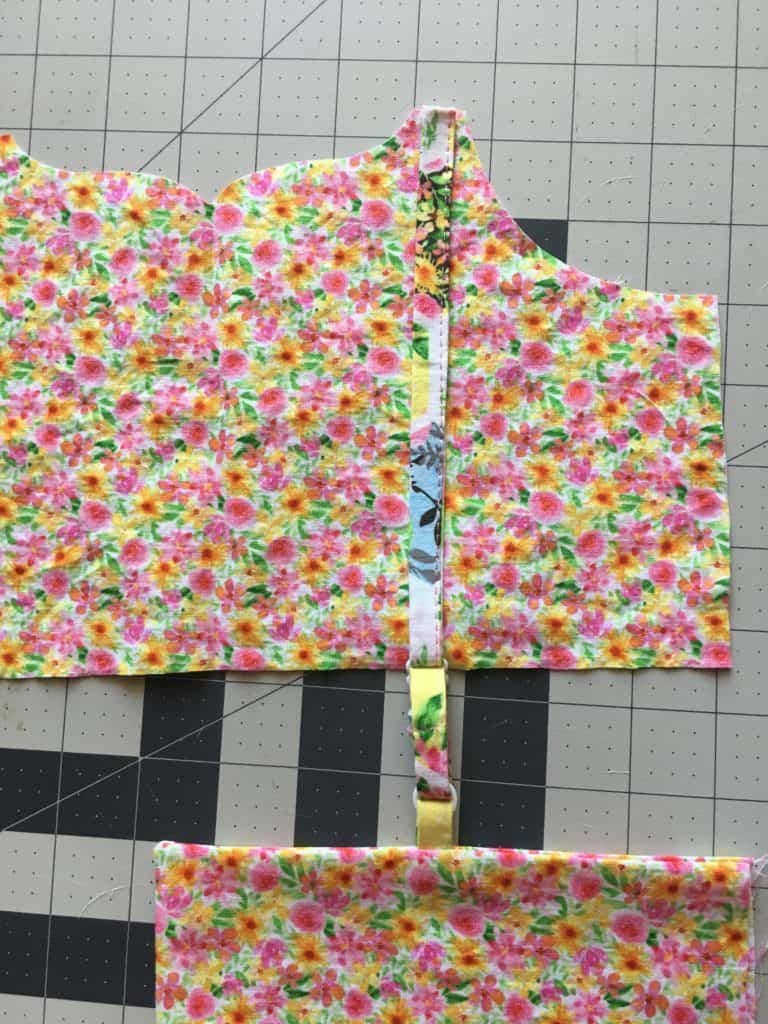
Lay the back bodice right side facing up, and feed the raw edge of the strap through the back of the bottom loop.
Bring it up, and under the first half of the slide, then back down and though the second half.
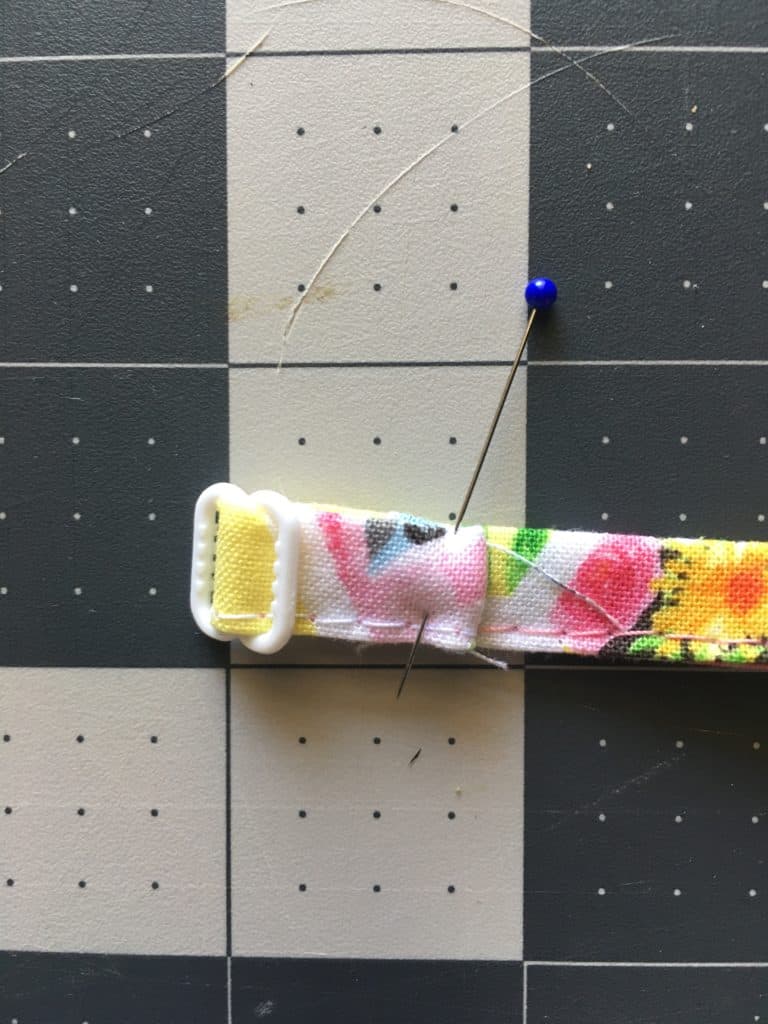
You should now be able to adjust the slide and strap freely. At this point, I like to move the slide down towards the loop in order to keep it out of the way when I finish attaching the strap to the front bodice.
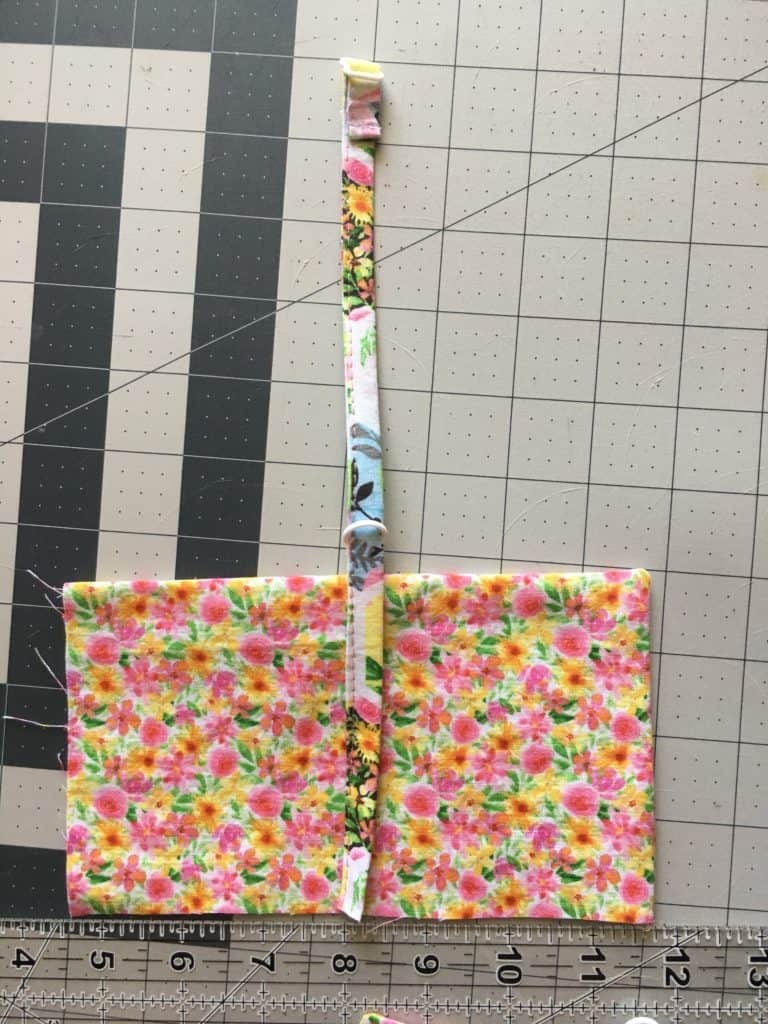
At this point, we are going to go back to step 10 and attached the front straps, making sure that the right sides are together. That means the visible part of the slide and right side of the back bodice will be facing the right side of you front bodice.
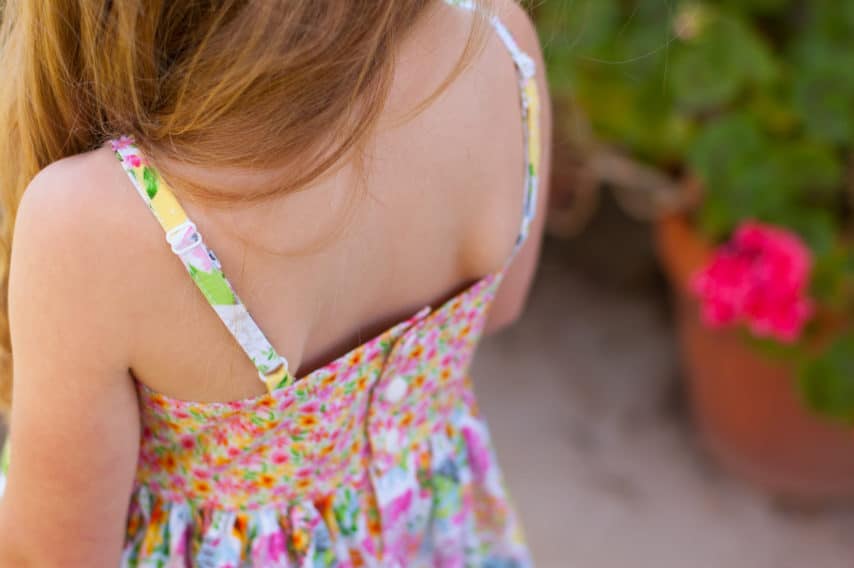
That’s it! Just finish the pattern according to the instructions, and you will have completed your adjustable strap Opal!
I can’t wait to see all your beautiful creations! Happy sewing!
Happy Sewing,
Lacey Lee