Lydia Sew-Along Day 5
We have reached the last day of the Lydia sew-along. How did you all do with the neck and arm binding? Easy peasy, right? Well, today we are taking the skills we learned yesterday and using them to finish our Lydia leotards. Let’s get started on our leg binding.

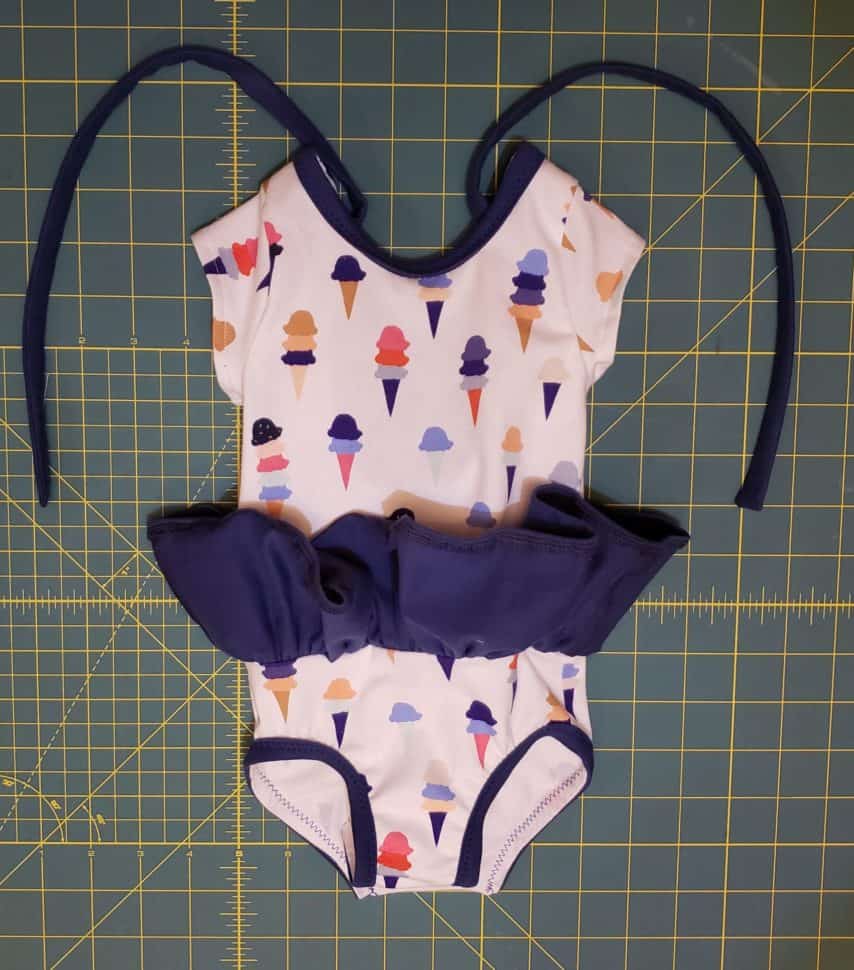
Leg Binding
If you made the closed crotch version, this is where you will finish your leotard. First, sew the short sides of your leg binding piece together with right sides facing. Press seam open. Iron your binding in half with wrong sides together, aligning the raw edges. Find the center of your binding and mark with a pin. Next, flip your leotard inside out. Align the binding seam with the leotard side seam and pin in place. Continue pinning and slightly stretching the binding around the leg hole. Sew in place with a 3/8″ seam allowance.
Flip the binding to the front, right side of your leotard. This will sandwich the seam allowance between the leotard and binding. Clip the binding in place. Finally, topstitch the binding to the leotard 1/8″ from the edge. Repeat with the other leg. You are DONE! Yay!
Leg Binding with Snap Crotch
Begin by folding your binding in half lengthwise with wrong sides together. Find the center and mark with a pin. Flip your leotard inside out. Align the short raw edges of the binding with the crotch edge of your leotard. Clip in place. Align the center of the binding with the binding placement mark from your pattern piece. Continue slightly stretching and clipping your binding to the leg opening. Sew the binding in place using a 3/8″ seam allowance.

Flip the binding to the front, right side of your leotard. Clip in place making sure to sandwich the seam allowance between the leotard and binding. Topstitch in place 1/8″ from the edge. Repeat for the other leg opening.
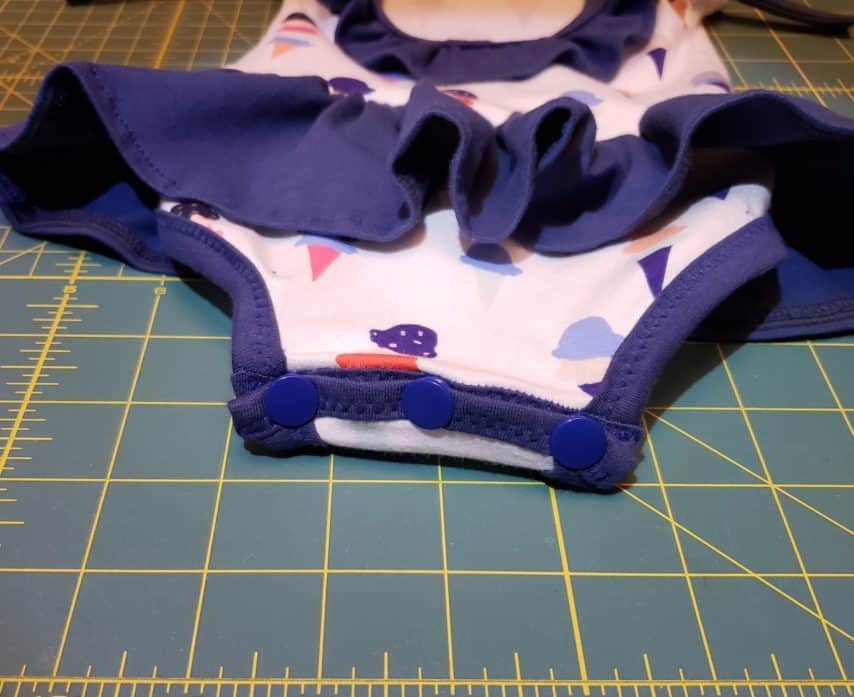
Crotch Snap Placket
First, fold your crotch placket in half with wrong sides together and press to create a crease. Open up the placket and fold the 2 long sides in toward the center crease and press. Again, open the placket and place the long edge on the right side of the leotard crotch edge. Make sure you have a least a 1/2″ overhang on each side. Stitch in place along the crease you made. Trim off any excess of the placket edge until there is only 1/2″ overhang on each side.
Flip the placket up and fold each side in toward the wrong side of the leotard. Next, fold the crotch placket up toward the inside of the Lydia leotard and clip in place. Sew a rectangle around the placket 1/8″ from the edges. You will notice I used a wide zigzap stitch instead. Repeat these steps for the other crotch edge. Finally, place 2 to 3 snaps along the crotch placket following manufacturer directions. Now you are done! Time to celebrate.
Day 5 Progress
After all of your hard work on this project, don’t forget to snap a final photo for a chance at a $30 shop credit. For the photo I want to see a styled flatlay or modeled photo. You have until Sunday night at 9 pm cst to catch up and submit all of your daily progress photos into the Lydia Sew-Along Album. At that time I will draw all of the daily winners. Thank you so much for joining me for this Lydia Sew-Along. I hope to see you back here next month when we sew Norah and Shelby.


Thank You
I would like to send a special shoutout and thank you to my friends at Art Gallery Fabrics. They graciously provided all of the fabrics I used for this sew-along. I hope you will check out these amazing fabric collections: Kushukuru by Jessica Swift, Art District Fusion by Dana Willard, and AGF [knits] Solids.
Happy sewing,
Chauncey