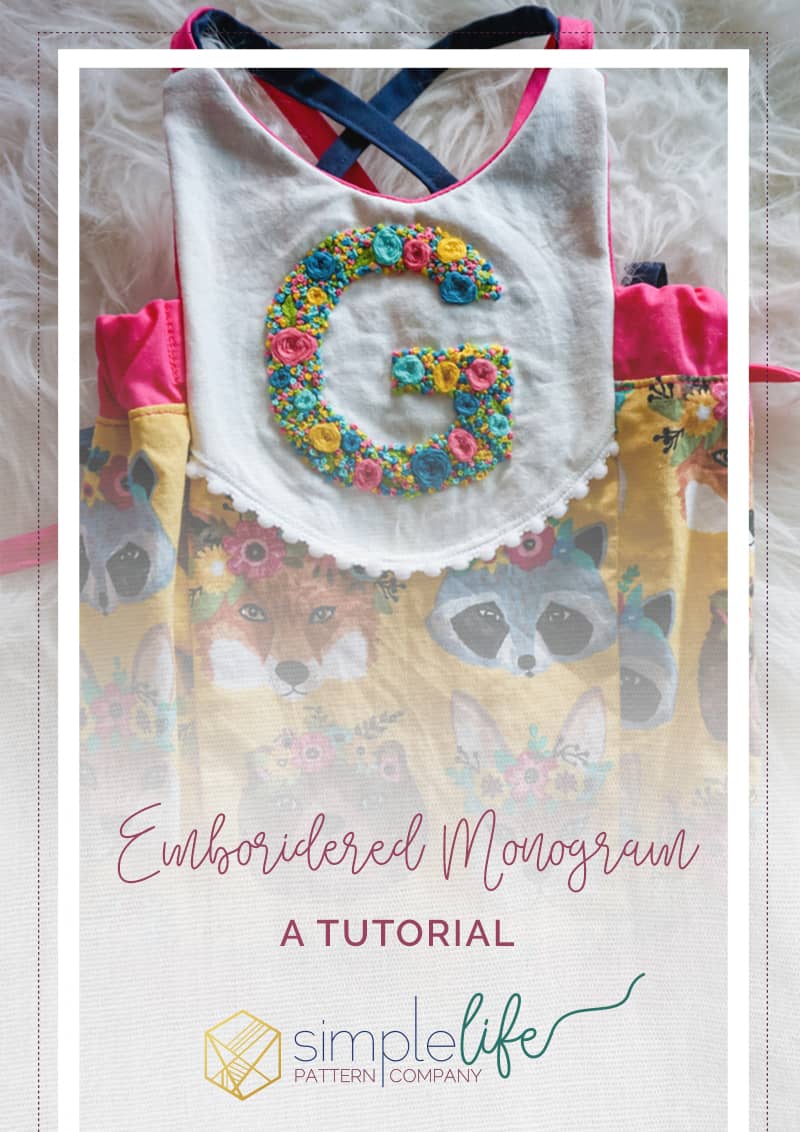
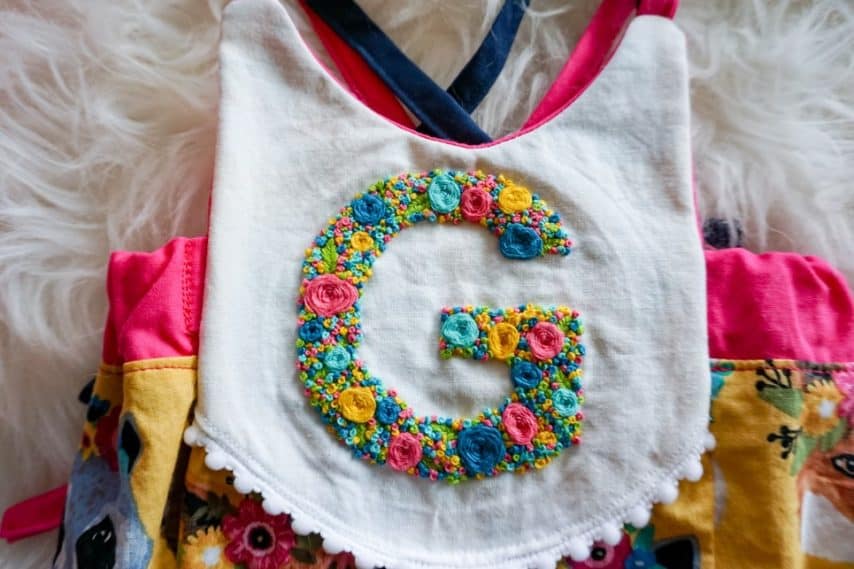
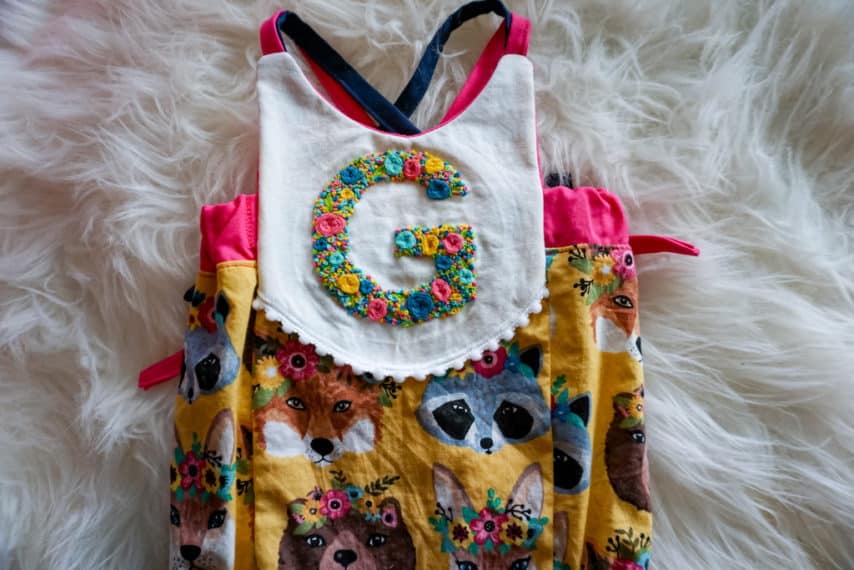
Monogram hand embroidery
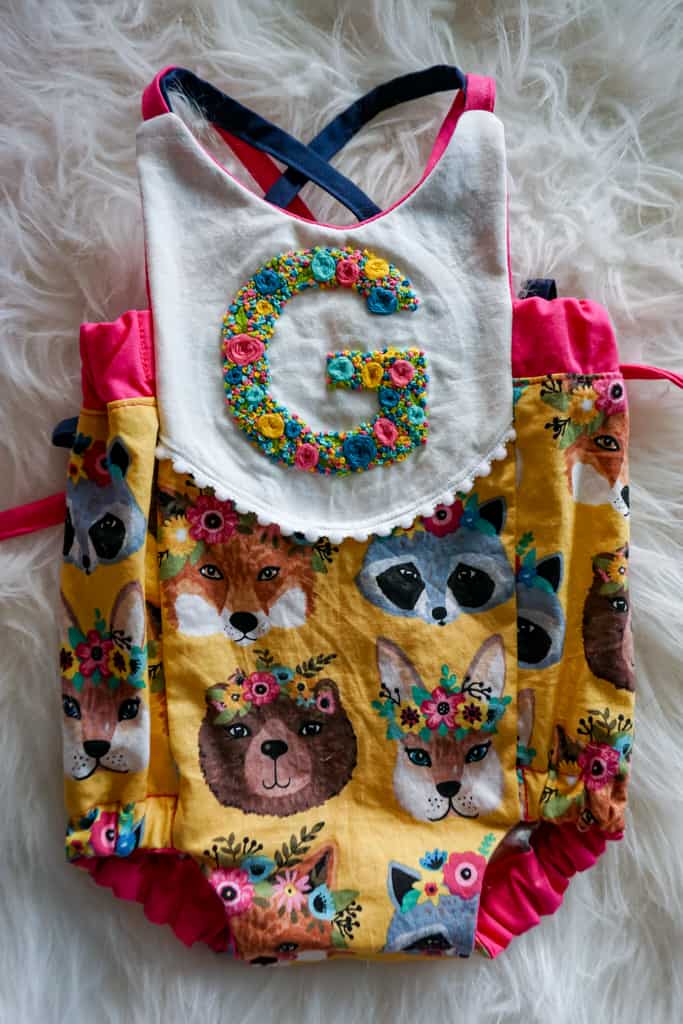
Hi everyone! It’s Becca here with a fun hand embroidery monogram tutorial so you can personalize all the adorable little outfits!
I just had my second baby girl last month and before she was born knew I wanted to do something to take my mama made outfits to the next level now that I am sewing for two. Though I will admit I think I overestimated how much free time I would have to sew with a newborn!
Hand embroidery is a fun and relatively easy way you can add a little personalization to your makes! For this tutorial I will be showing you three stitches that I like to use to make a floral monogram. The three stitches are the woven wheel, fish bone leaves, and French knots.
Here is what you will need for this tutorial:
Embroidery hoop
Embroidery needle
Scissors
Fabric pen or water-soluble marker
Cotton fabric you want to embroider in
Six-strand embroidery floss (in as many colors as you would like to use)
Optional: fusible interfacing
Let’s get started!
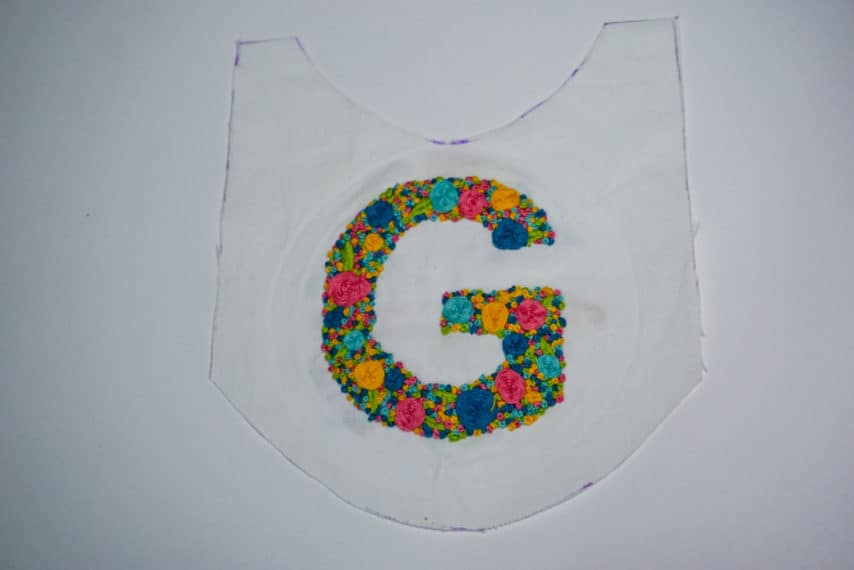
I chose to use the Reagan romper for my monogrammed outfit. The bib part is perfect for adding a monogram or even a number for celebrating a birthday.
To get started I recommend tracing out the pattern piece you are going to monogram on to the fabric you will be using, but not cutting it out. Rather, cut a square around the whole pattern piece so that you have more fabric to work with in your hoop. You will also want to trace the outline of the letter you want to use onto your fabric. For this tutorial is used a simple block letter in Arial font.
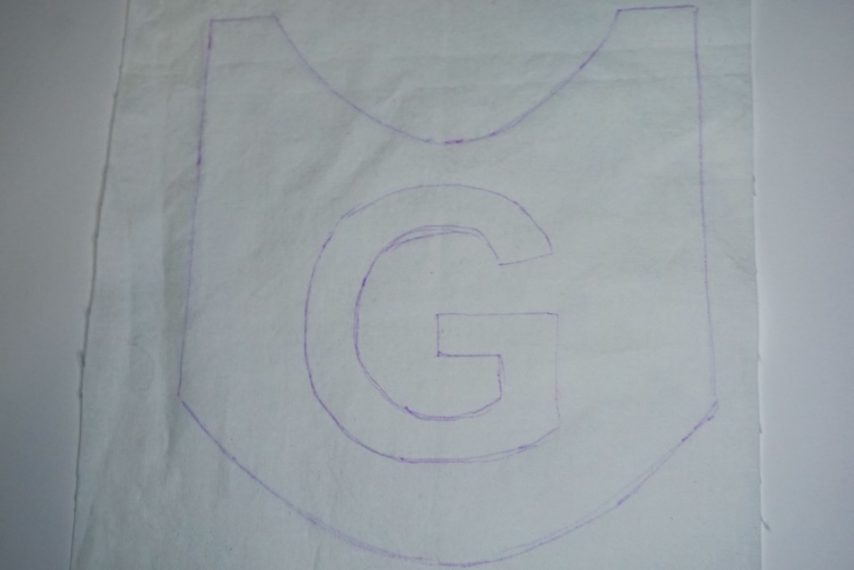
The next step is optional, you can improvise where you want to put your stitches or draw them out ahead of time. If you are drawing them ahead of time, I suggest drawing where you will want your woven wheel stitches first, then drawing the placement of the leaves. You do not have to draw the French knots as these are simple used to fill in empty space. I decided to not plan where my stitches would all go because I get too in my head trying to find perfect placement and it does not look as nice as if I just randomly stitch the woven wheels and leaves.
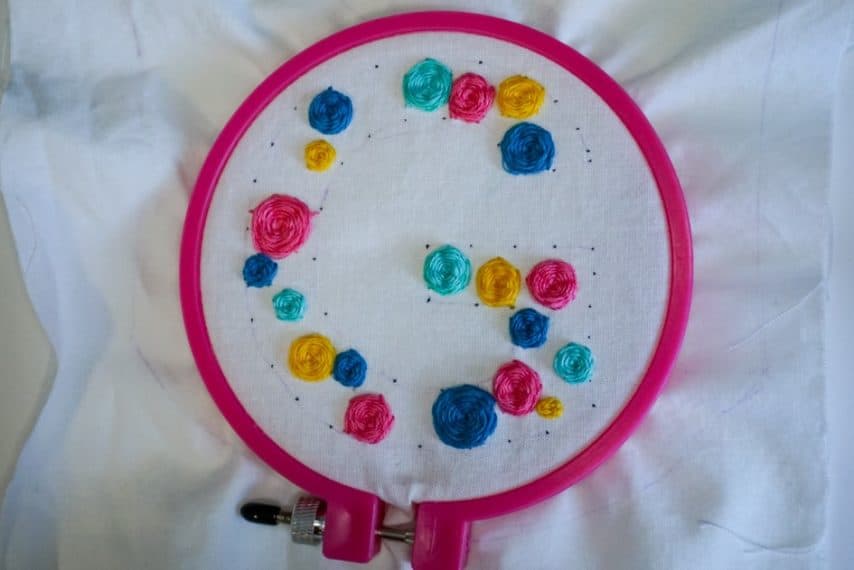
I recommend starting with your woven wheels. You can use as many or few woven wheels as you would like in your letter. The more woven wheels and leaves you stitch, the less French knots you will need to fill the empty space.
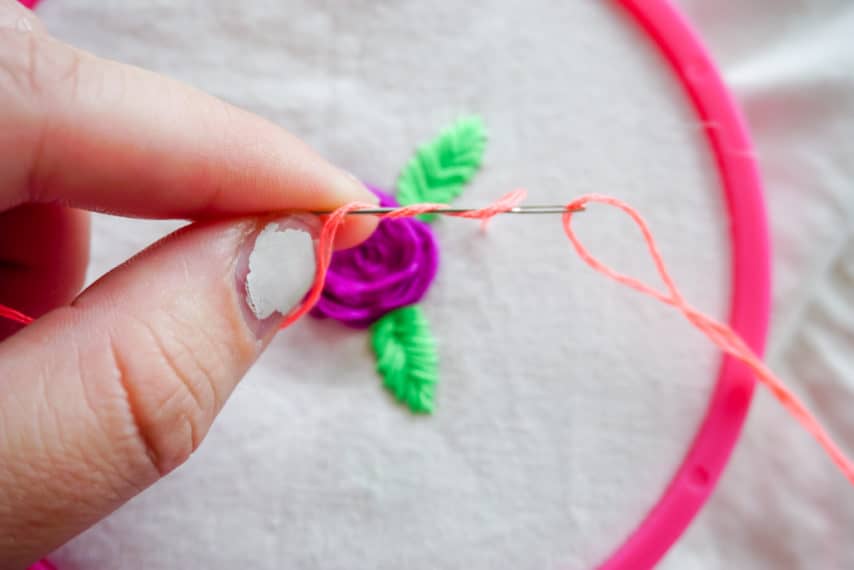
When doing hand embroidery, I like to use 3 strands of floss. You will take your 6-strand embroidery floss, and cut a piece, about 18 inches in length. You will split the floss strands, so you have 2 pieces to embroider with, each made up of 3 strands. Thread your 3-strand piece of embroidery floss through your needle, and you are ready to start!
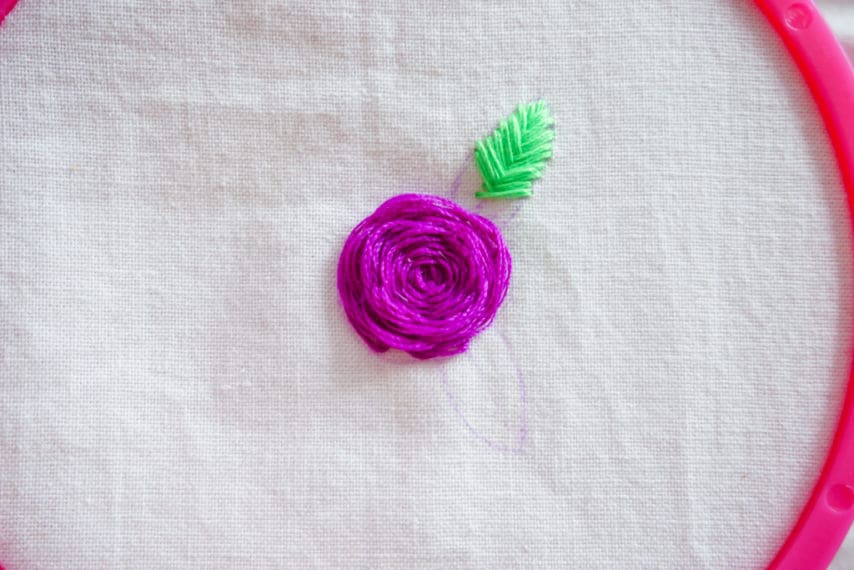
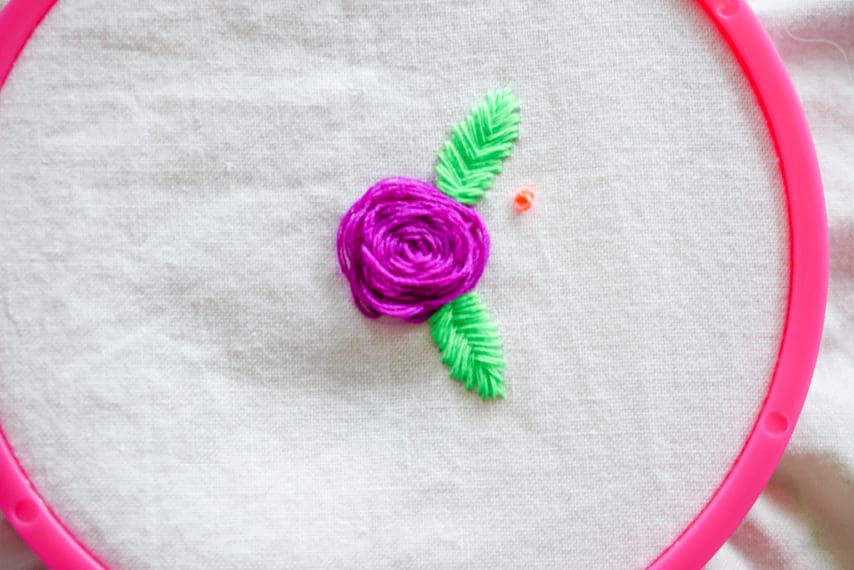
The woven wheel stitch is made up of two parts, the spokes, and the weaving around them, which is what makes the flower appearance. The spokes are created by making straight stitches from a center point to edges of a circle. You must have an odd number of spokes for weaving.
Starting at the center point, push your needle up through the fabric and make a straight stitch to the edge of the circle. Repeat until you have 5 evenly placed spokes. Do not fasten or cut your embroidery floss as you will now start the weaving process.
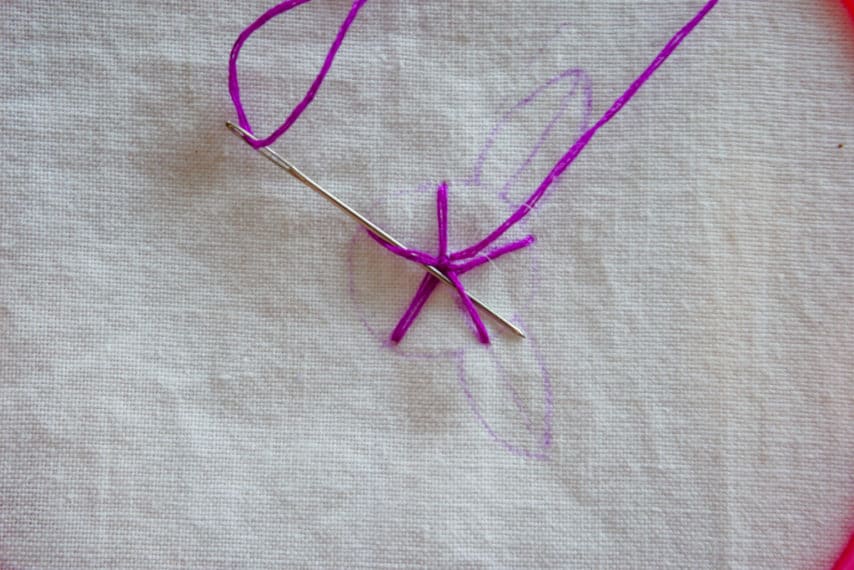
Then pushing your needle up again from the center point again, begin to weave your embroidery floss through the spokes. You will not be going through the fabric for this part of the pattern. You will continue weaving going over, under, over, under, through all the spokes, starting at the center point and working your way to the outside of the flower in a spiral pattern.
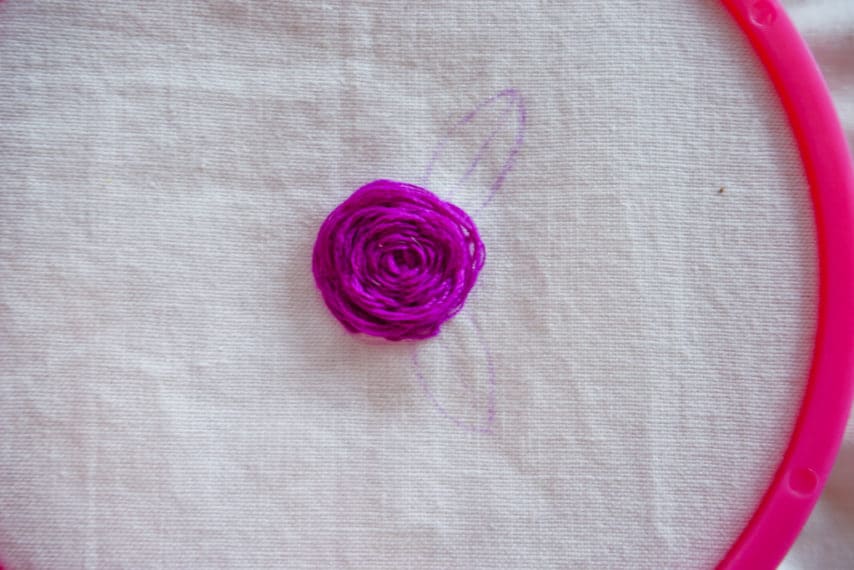
Once you have filled your spiral all the way to the edge of the spokes/circle. Take your needle and push through the fabric so that your floss tail and needle are on the underside of the fabric and fasten off. I like to use a knot to secure my floss, knotting the start and end tail together.
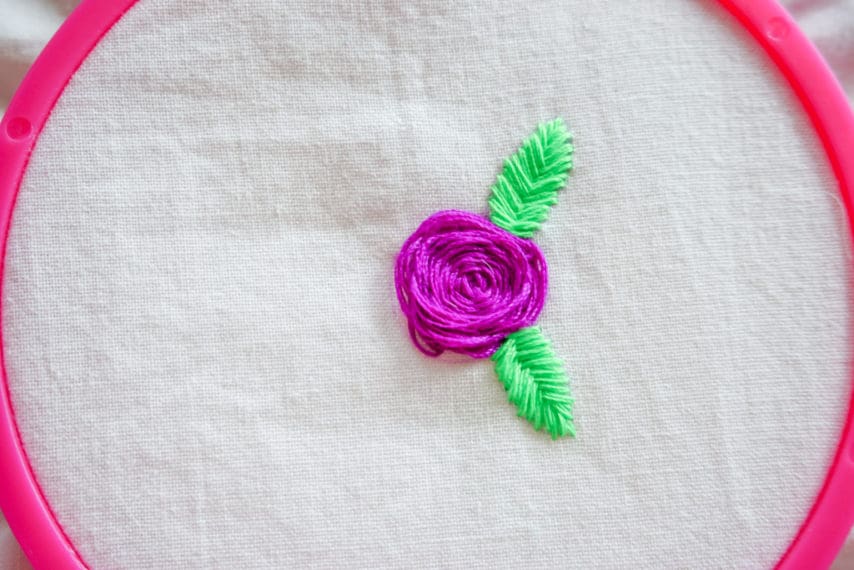
Repeat the above steps until you are happy with the number of woven wheel flowers your piece had.

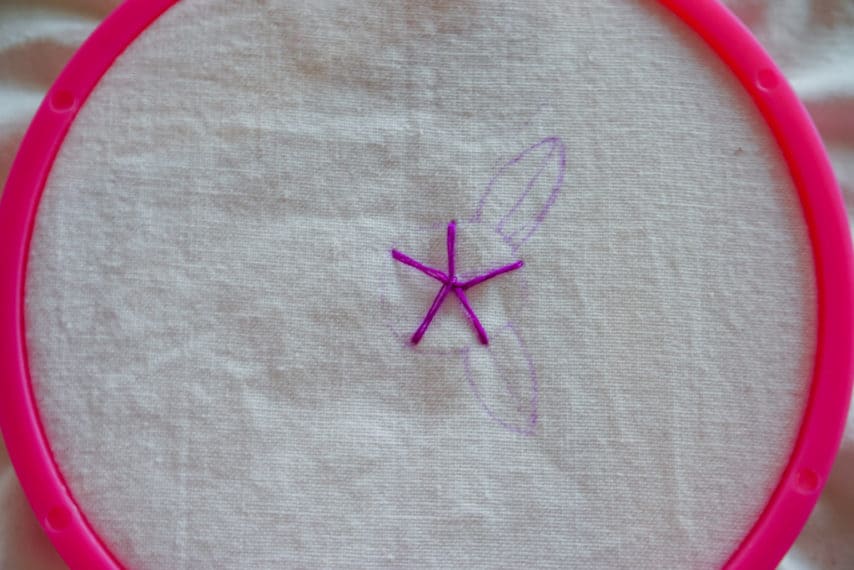
Next, we will learn the fishbone stitch for making the leaves.
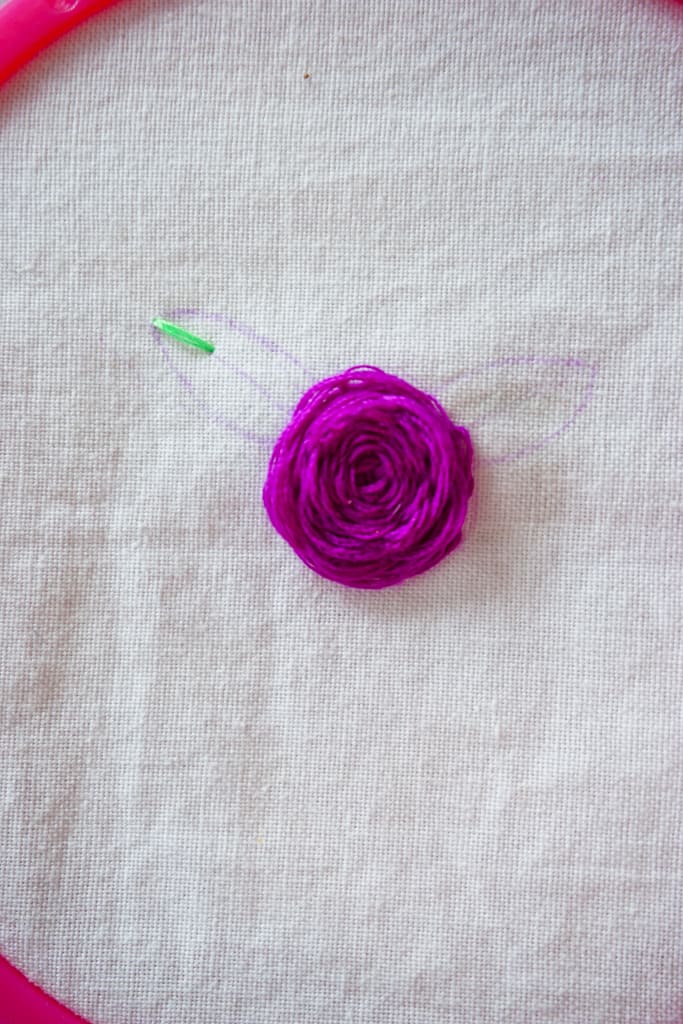
First draw the size and shape of the leaf you want to create on your fabric.
Using 3 strands of embroidery floss again start at the tip of your leaf. Coming up from the bottom and making a straight stitch down the middle of your drawn leaf.
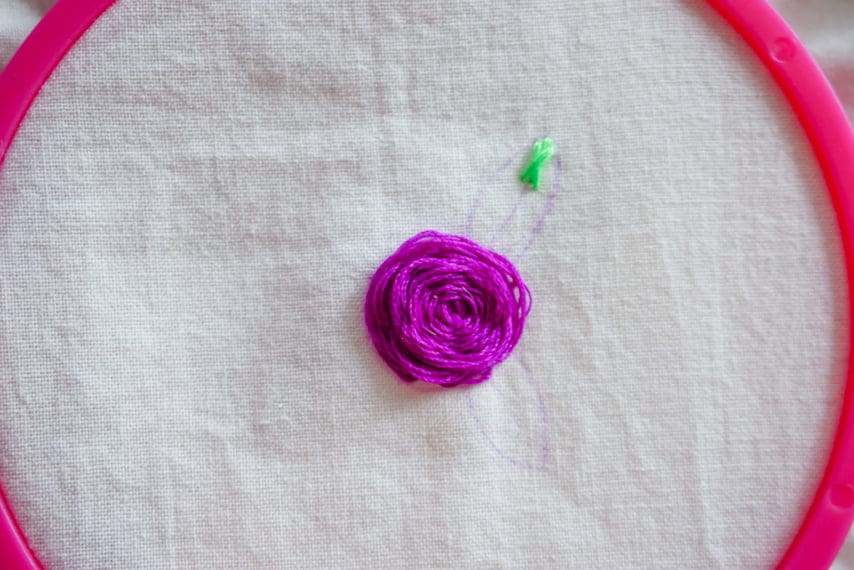
Next you will bring the needle back up through the fabric again, just to the right of your first stitch at the tip.
You will want to make a slight diagonal stitch, ending just to the left and slightly below your initial straight stitch.
Repeat this step, this time starting just to the left of the first stitch at the tip. Your diagonal stitch should end just to the right and slightly below the first straight stitch this time.
Repeat this pattern following the leaf outline you drew, all the way to the bottom.
Fasten off the thread.
Place 1-2 leaves per flower you made in the last step throughout the letter.
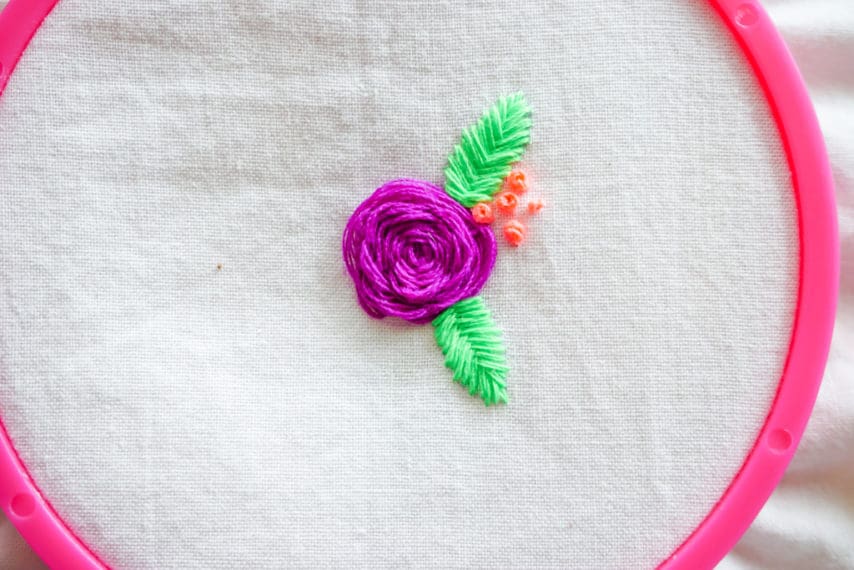
Finally, we will learn the French knot. This is used to fill in your blank space in the letter you are making.
Again using 3 pieces of the thread, start by bringing your thread up through the fabric.
Place your needle in front of the thread and wrap the thread around the needle 2-3 times. 2 times will make a smaller knot, 3 times will make a larger knot.
Keeping tension tight on your thread around the needle, insert the tip of the needle right next to where you brought the thread up through the fabric. Make sure not to put the thread in the exact spot where you brought your thread up through the fabric.
Keep holding tension on the thread as you pull the needle and thread tight out the back side if your fabric.

Be sure not to pull too tight or your knot will pull right through the fabric.
I like to make several French knots before securing the threads.
Continue placing French knots until you are happy with how full your letter is.
Now you are finished with embroidering your monogram.
At this point I like to cut and iron on a piece of fusible interfacing that will cover the back of my monogram to hold all those thread ends in place and give added stability to this area of the garment you are making. However, this step is optional.
Now you can finish cutting the pattern out and sew!
Be sure to share your completed hand embroidery monograms in the Facebook group so we can all see!
-Becca Katherine