Hand Embroidered Applique
Hello SLPCO friends! This is Tamar, and I’m excited to share my special occasion make with you today! Special occasion dresses are so much fun to make. One thing that really gives you the “Wow” factor that you’re looking for with your special occasion makes is hand embellishments. Today I am going to talk about hand embroidered appliques.
The first step is deciding on a dress pattern and embroidery design that compliment one another. I chose to use Betty’s Ultimate Flounce Circle Skirt Dress. Since I wanted my embellishments to take center stage, I used the simple bodice and the simple gathered skirt. I also added a ruffle around the neckline and lined the skirt, so I could sew three gathered tiers of tulle to the skirt lining.
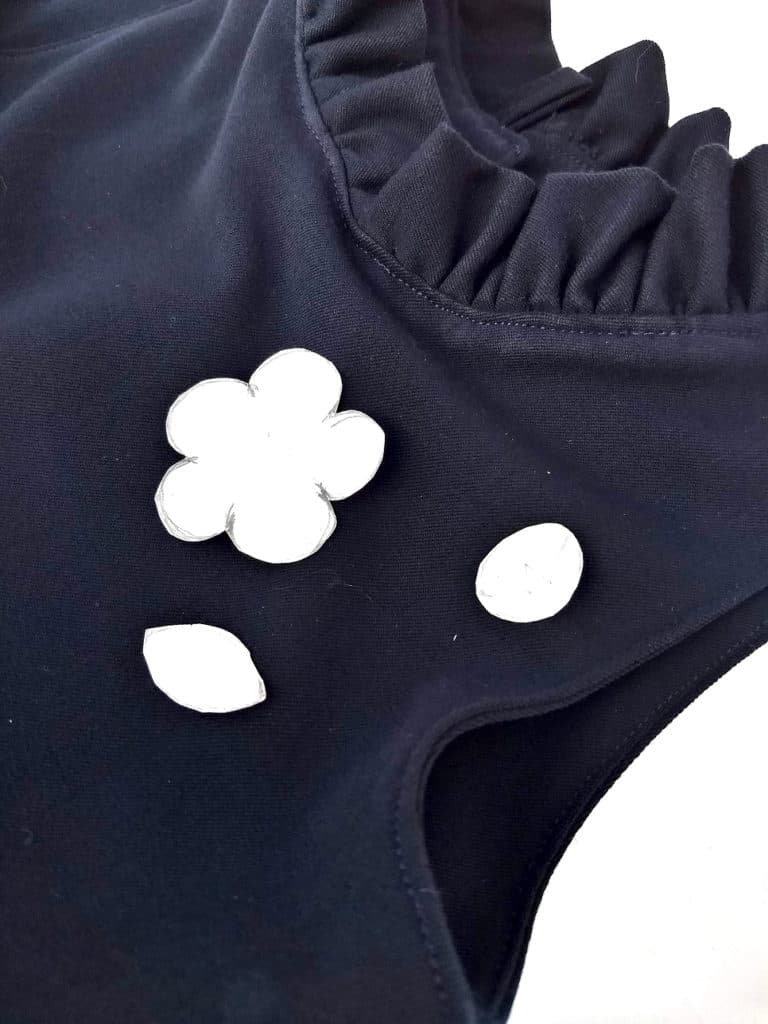
Next, sketch, print, or trace your embroidery design on paper. Cut out the pieces that you want to make into appliques.
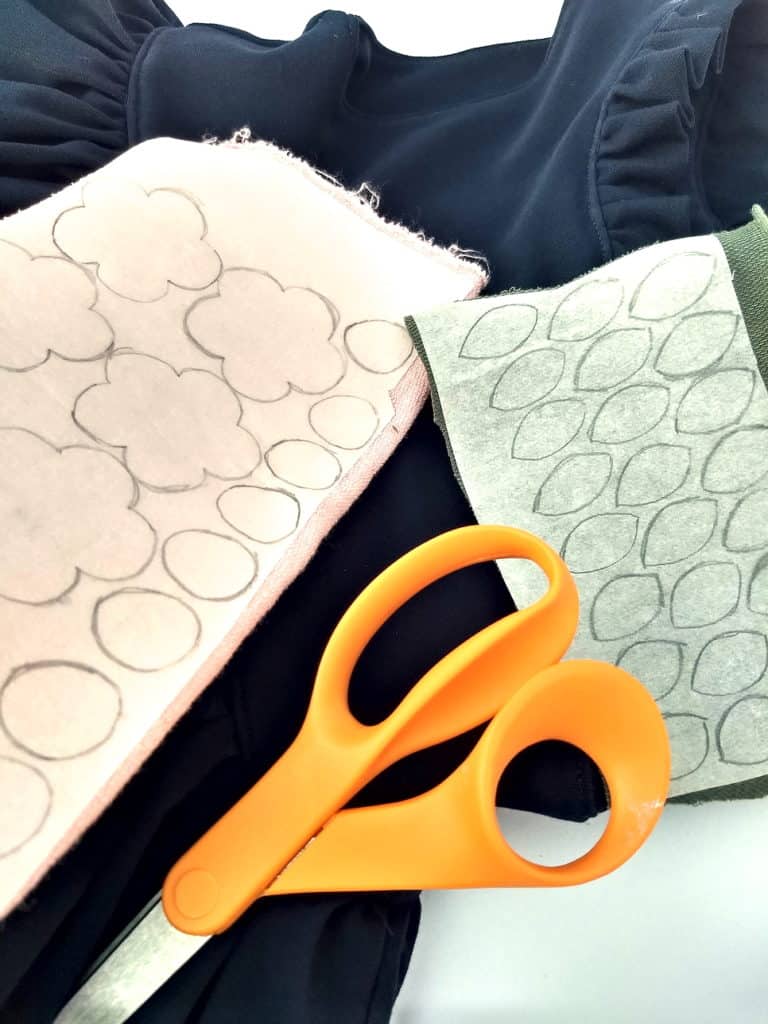
Choose the fabric for your appliques. I chose to use a lightweight stretch french terry. I chose this fabric because the thickness would give a little added texture and the knit fabric would not fray. You can use any fabric. Just be aware that cotton wovens might fray slightly after repeated washings since we will not be completely enclosing the edges.
Iron the rough side of some wonder under fusible web to the wrong side of your fabric. Then trace your pattern pieces on the fusible web.
Using a water soluble pencil or pen, draw your embroidery design on your dress fabric, or trace your design onto your fabric using water soluble tracing paper.
Cut out your applique pieces; peel off the paper backing from the fusible web; and iron your applique pieces to your fabric.
Now we are going to sew your applique pieces to your fabric using the blanket stitch. Start by bringing your needle up from the back at the edge of your shape.
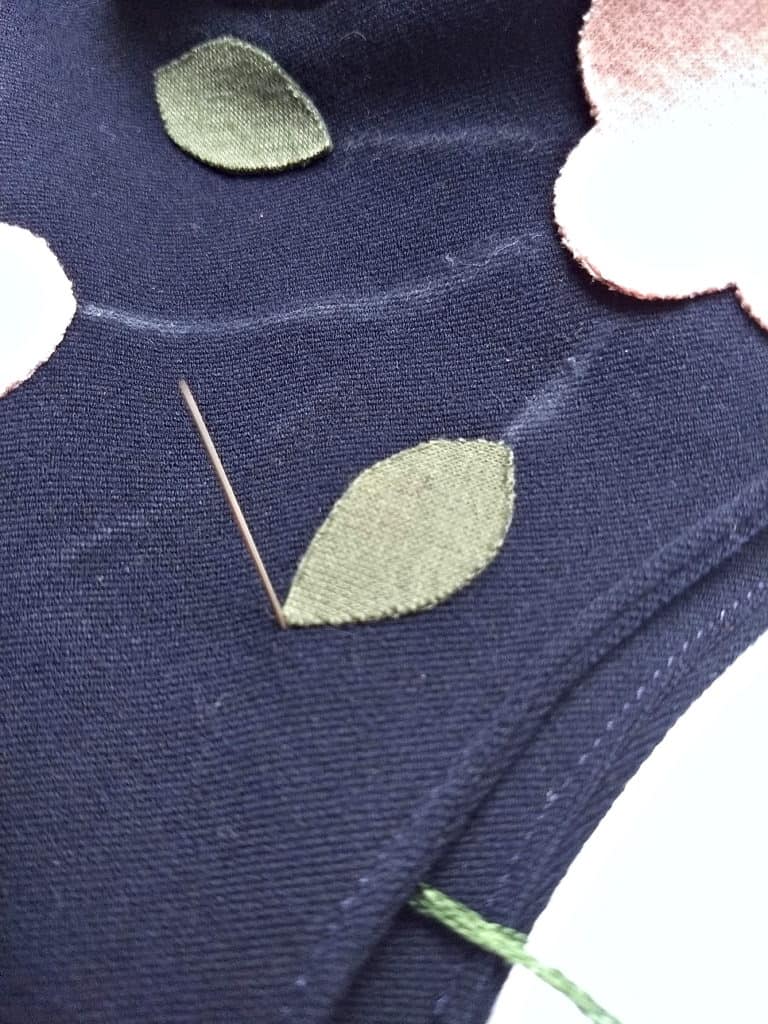
Move over and up one stitch length. Send your needle down through this point. Do not pull this stitch tight.
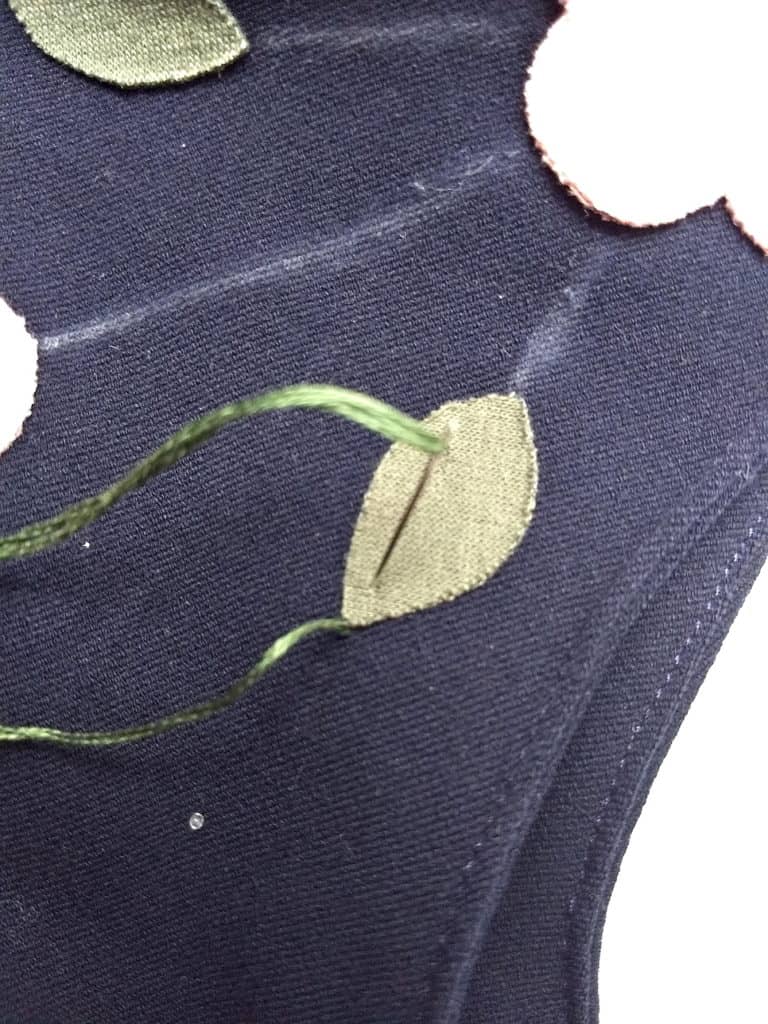
Come up from the back one stitch length below your last stitch, bringing the needle up through the loop created by the last stitch. Pull this stitch tight.
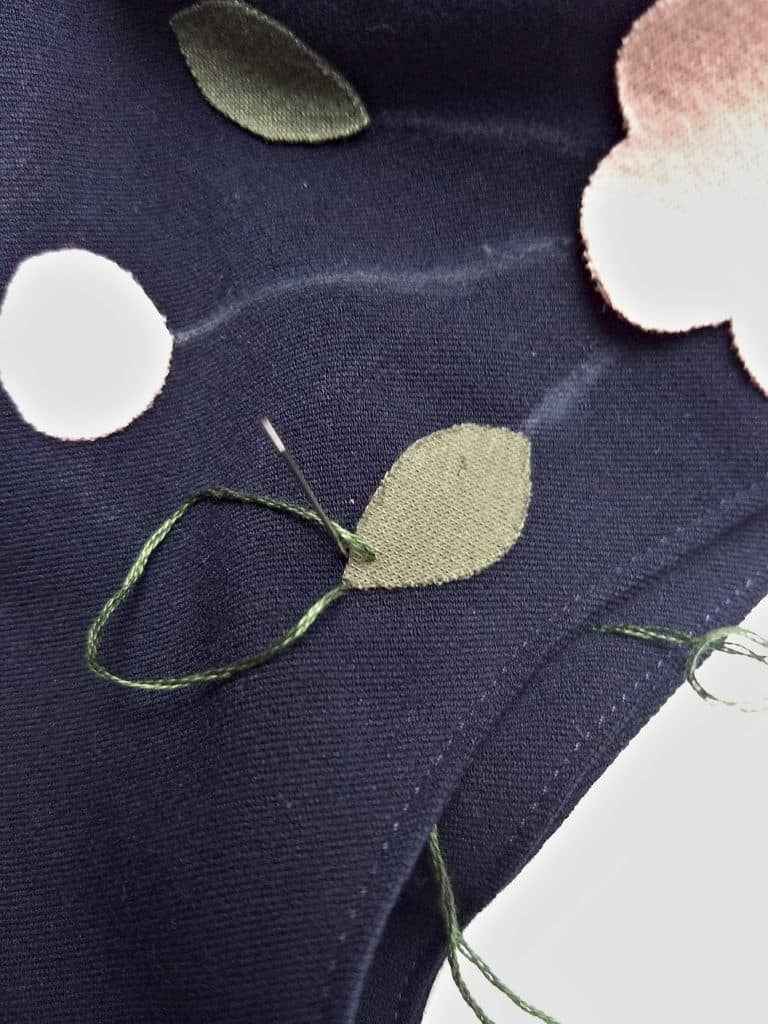
Continue doing the blanket stitch all the way around your shape. Send the needle back down at the end and knot at the back of your fabric.
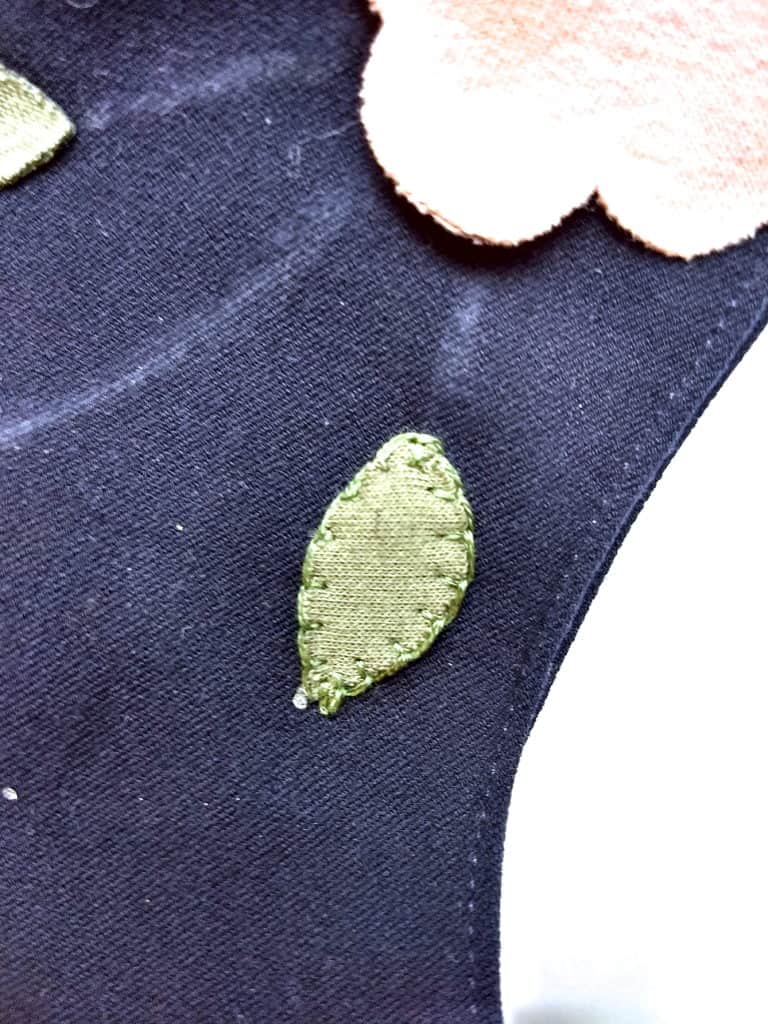
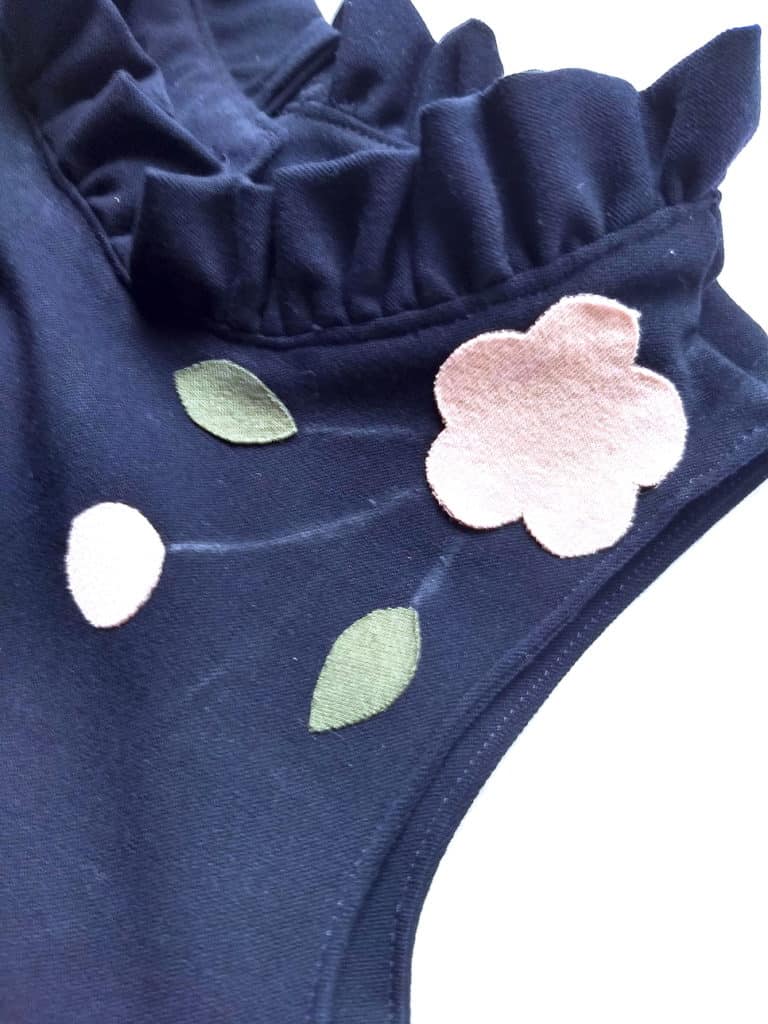
Finish the remainder of your design with your favorite embroidery stitches. I used the split stitch for my stems and the satin stitch for my buds. Finally, tack any extra embellishments such as flowers to your design.
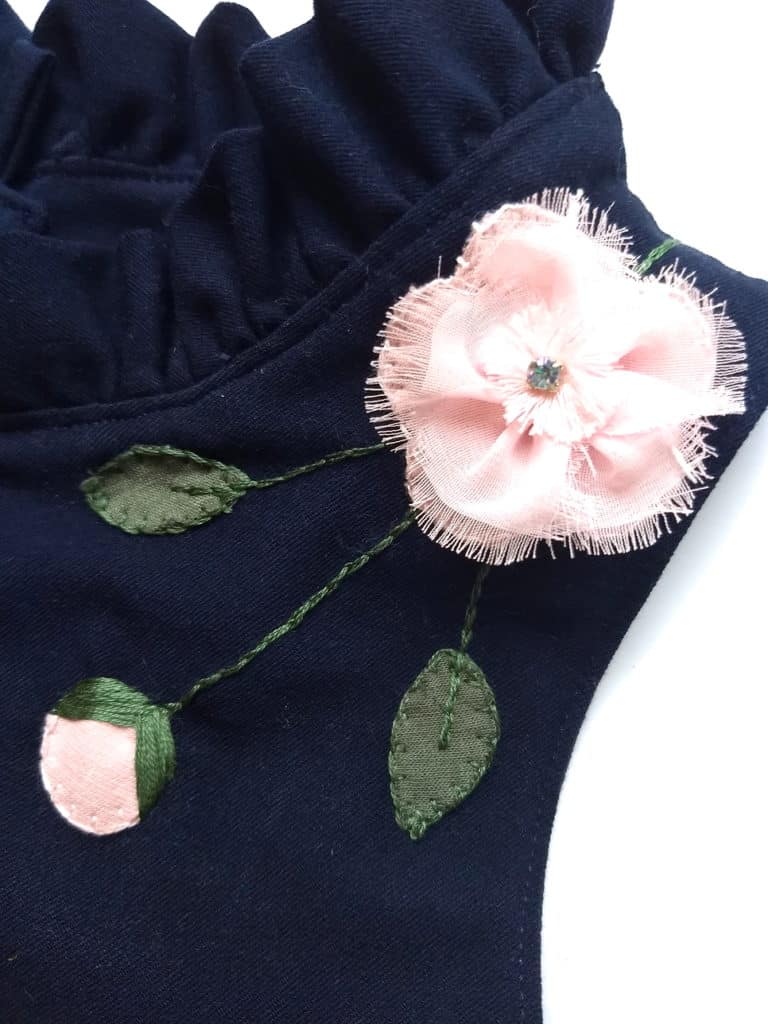
Enjoy the finished results!
Note: In most cases, I like to embroider before I sew the dress together. It is easier to embroider on flat fabric, and you can hide the backside of the embroidery between your main fabric and lining. However, for this dress, I wanted the embroidery design to flow with the dress. So, I chose to embroider after the dress was constructed. If you choose to do this, just make sure you knot your threads well to prevent them from coming undone in the wash.
-Tamar Pfeiffer