
How to combine Trixie and Sapphire – A Tutorial

Sometimes you have a pattern and you are thinking: hmmm, it would be great to use the neckline from that other pattern. Or, what mostly happens here…My children are having specific requests. ☺
Well, That’s what happened here as well. My oldest daughter loves dresses and cuffs, so she can easily wrap her sleeves up while she is playing. My youngest daughter is exactly the opposite, she prefers leggings with a sweater/ tunic, preference: as less seams as possible.
That got me thinking, why not combine Trixie and the Sapphire? With that way my oldest daughter is getting her dress, sleeves with cuffs and a lovely neckline, while my youngest daughter is getting her tunic with a seamless neckline. All the seams are finished and hidden at the collar.
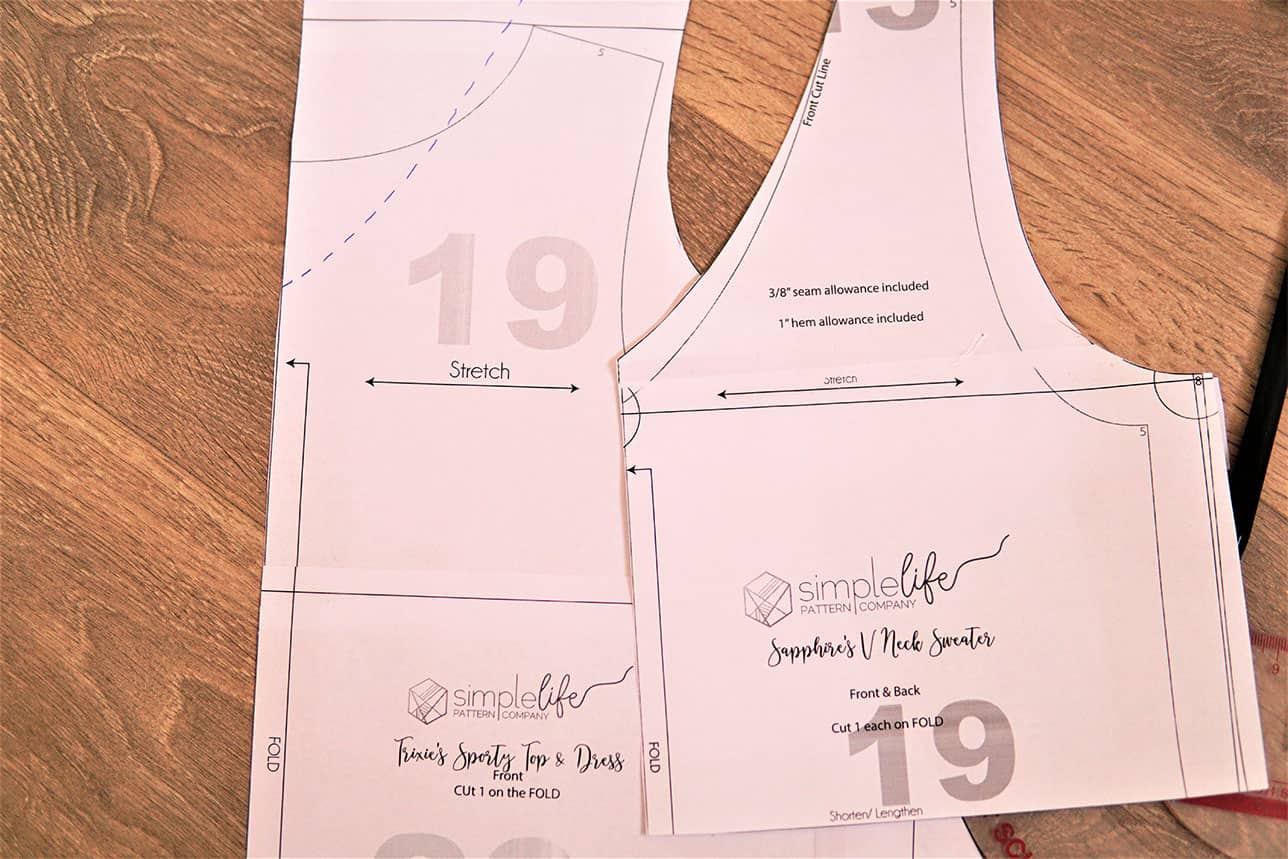
Well, in theory you can mash every pattern with each other. What you should keep in mind is that every pattern is different and have a different design. When we look at both patterns: Trixie and Sapphire, you’ll see when laying the pattern pieces on each other that the necklines, the shoulder lines and the length of the sleeves are all different.
So we are going to transfer those differences to the other pattern.
Off we go!
We are starting with the Trixie dress with a Sapphire neckline and adding cuffs to the sleeves.
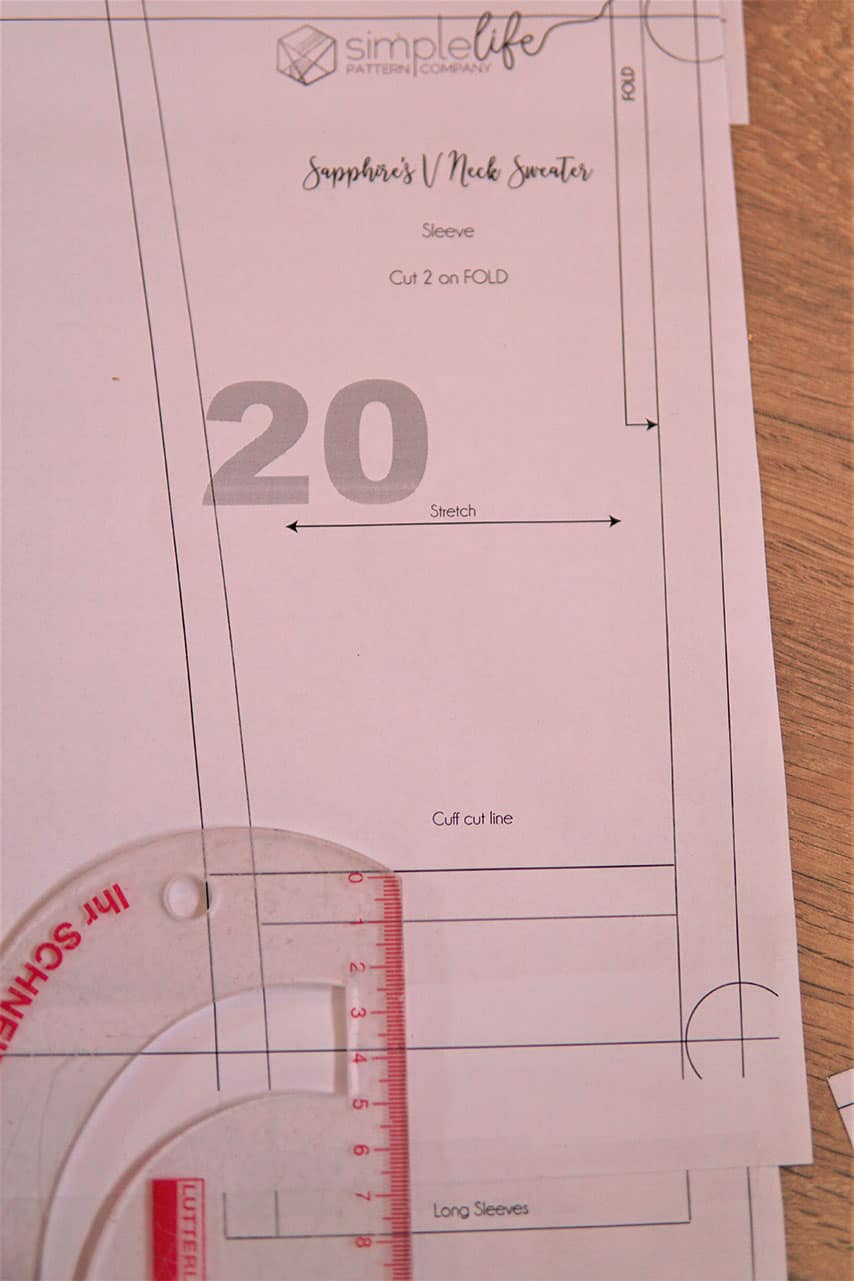
Take the sleeve pattern piece from the Sapphire, measure how much difference there is between the cuff cut line and the long sleeve. Transfer that measurement to the sleeves from the Trixie and here is your new cut line. You can now add the cuffs from the Sapphire to your sleeves.
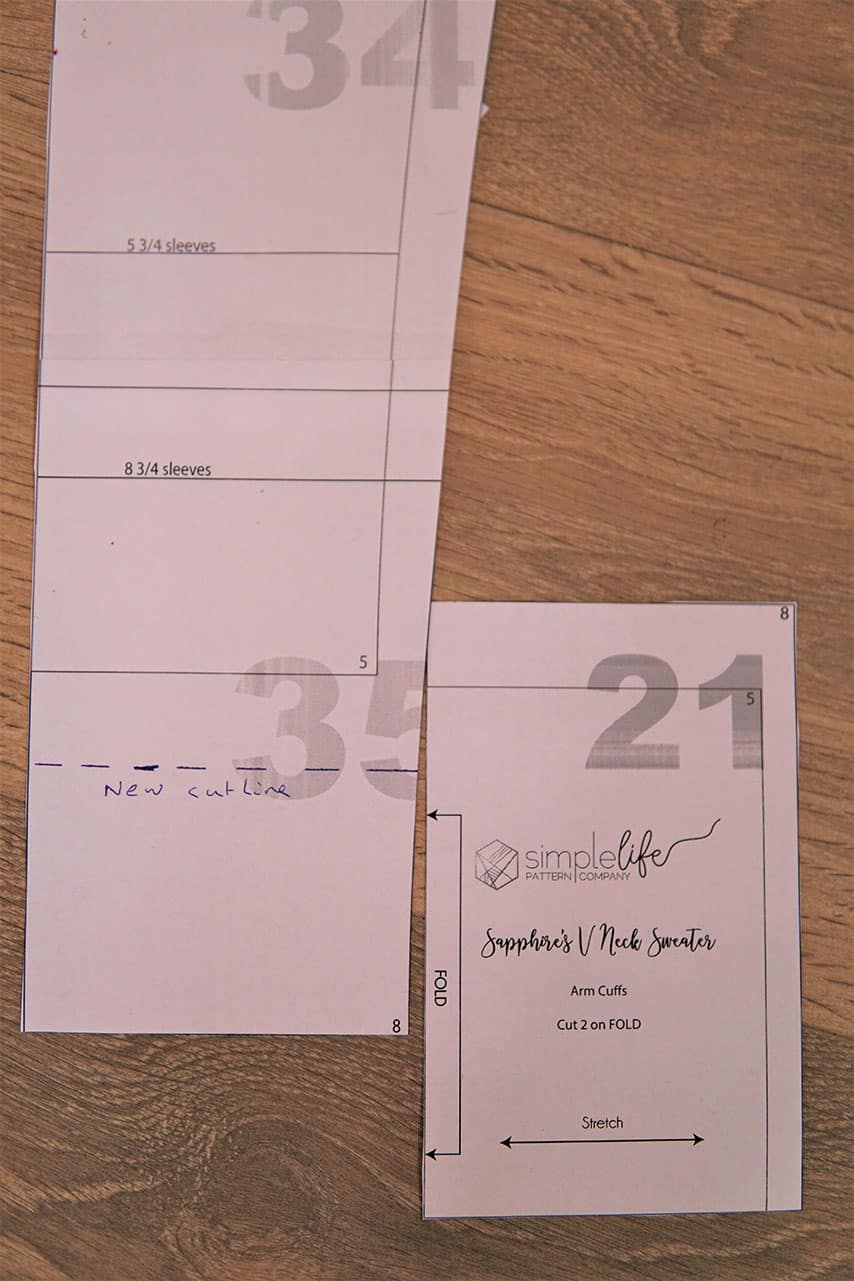
This is how your new pattern piece should look
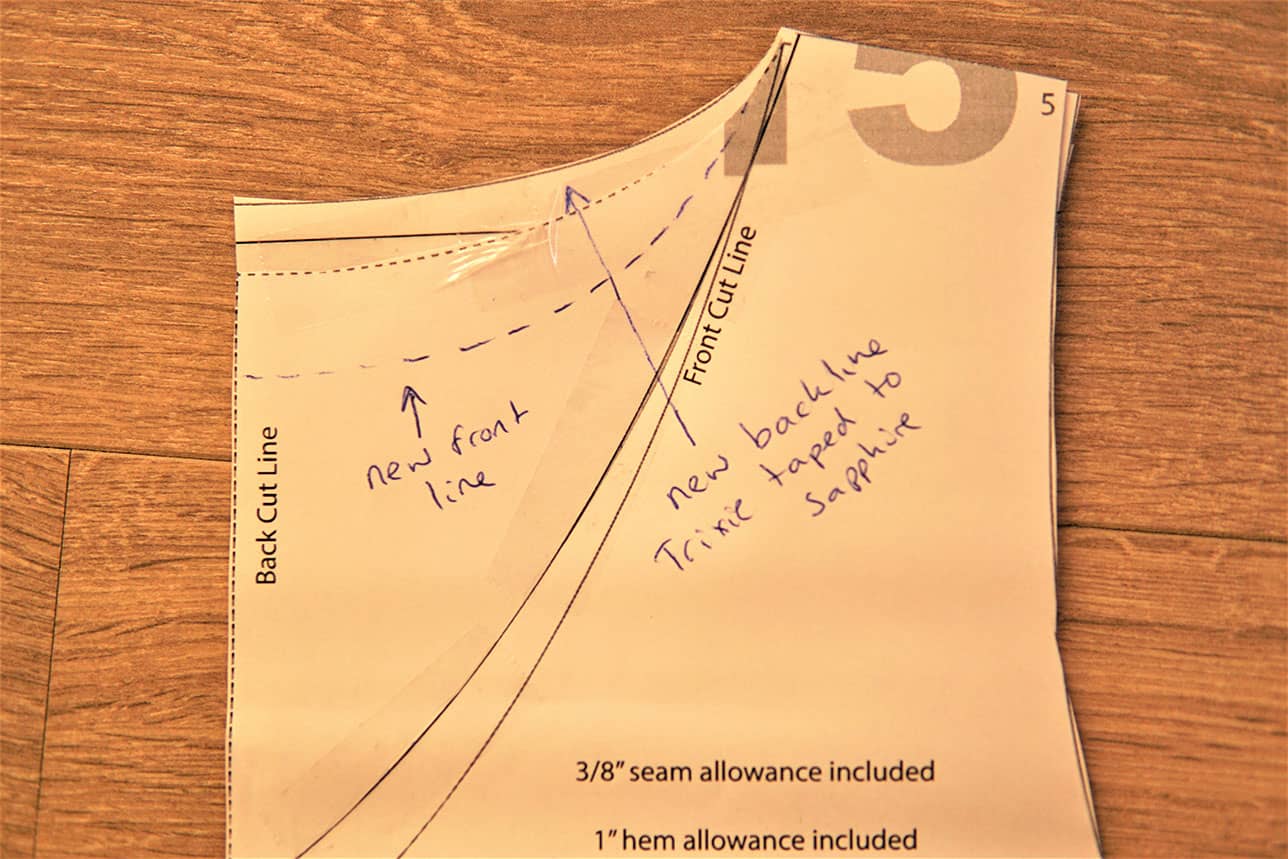
Lay the back pattern piece from the Sapphire on the back pattern piece from the Trixie. You are only going to change the back neckline. Draw a line on the Trixie back pattern piece by following the back neckline from the Saphhire.

Here you see both back pattern pieces with on the pattern piece, the new cutline at the Trixie.
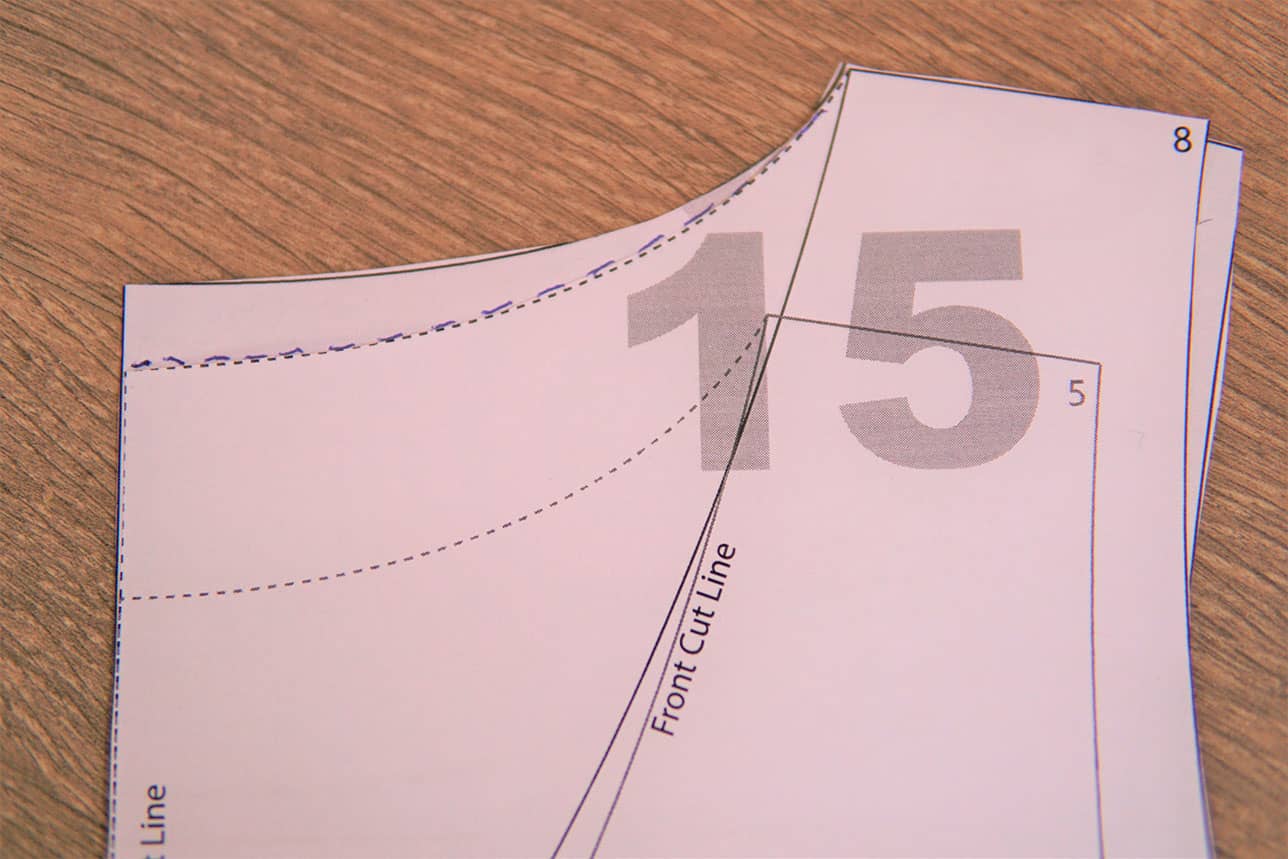
Do the same with the front neckline. Lay the pattern piece from the Sapphire on to the Trixie front pattern piece. Draw by following the neckline from the Sapphire the new neckline on to the pattern piece from the Trixie.
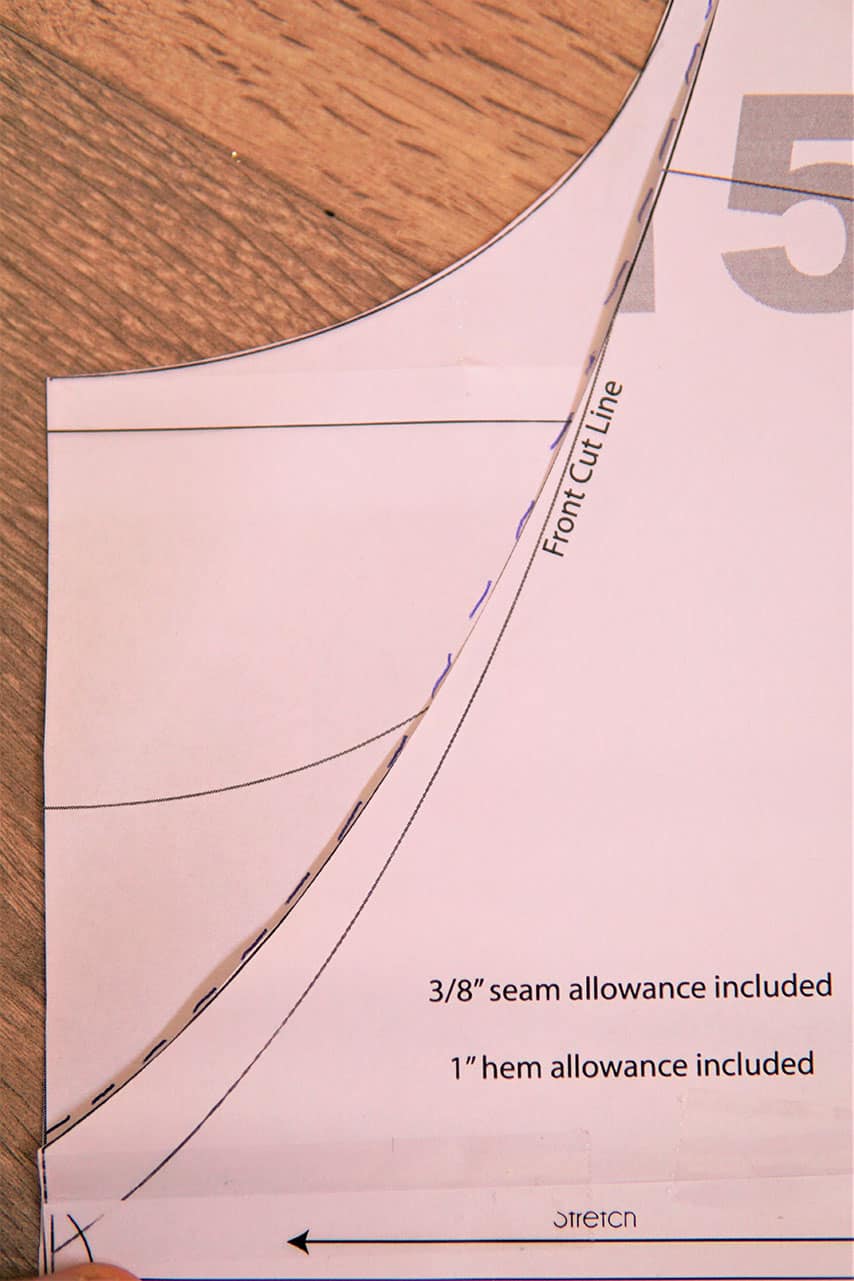
Here you see both necklines with the new neckline you just drew on the left.

Cut out your new necklines and now you can use the neckband from the Sapphire with your new front and back pattern pieces from the Trixie.
You should now have:
- Your new front pattern piece (Trixie)
- Your new back pattern piece (Trixie)
- Your new, shortened sleeve pattern piece (Trixie)
- Cuff pattern piece ( Sapphire)
- Neckband pattern piece (Sapphire)
- Pockets (optional, Trixie)
You can continue by following the instructions from the Sapphire how to add the neckband and cuffs and follow the instructions from the Trixie how to sew the dress.
For making the Sapphire with the Trixie collar, you are following step 3 – 7, by laying the front neckline and the back neckline on to the pattern piece from the Sapphire. Transfer both necklines to the Sapphire and follow the instructions from the Trixie how to sew the collar. The instructions from the Sapphire you are using a for finishing the top or tunic.
Well, that was manageable, right? And my daughters? They are more then happy!
– Marieke