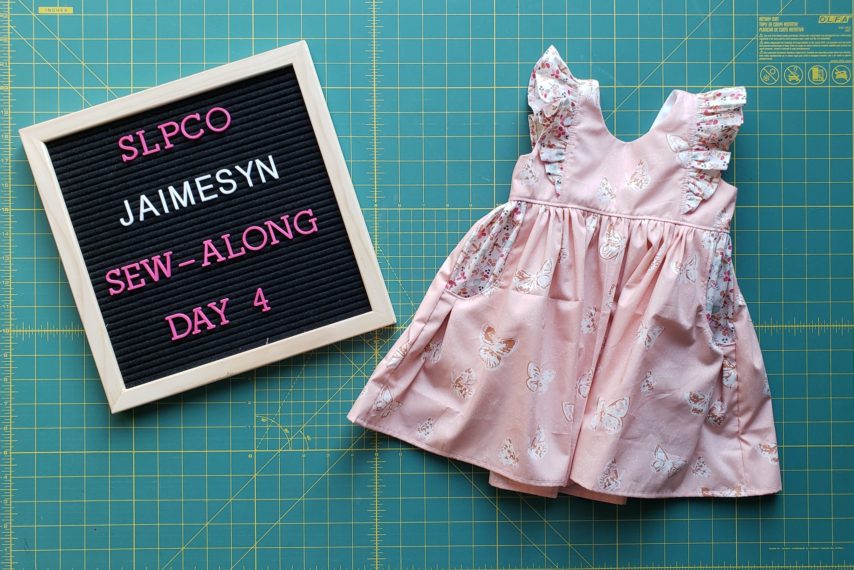
Jaimesyn Sew Along – Day 4
Welcome back to day 4 of the Jaimesyn sew-along. It looks like every did really well adding pockets yesterday. They all look fantastic! Today we will add buttonholes to the back of our bodices and sew the skirt to the bodice.
Buttonholes
For closure on your bodice you have two options: buttons or snaps. I personally prefer snaps because they are much faster and easier with a 3 year old tiny tornado. You will add the buttonholes to the back left side bodice piece. Depending on the size you made, you will need to add between 1 and 5 buttons. For the v-back version I typically only use 1 button for a size 9/12 months.
Starting from the bottom of your bodice measure up 1″ from the bottom. This will be your bottom buttonhole. Measure down 3/4″ from the top of the bodice for your top buttonhole placement. All buttonholes will start 1/2″ in from the back bodice edge. You can use a buttonhole gauge to quickly distribute the other buttonhole markings onto your bodice. Finally, sew horizontal buttonholes according to your machine manual. Use a seam ripper to slice open the inside of your buttonhole. Make sure not to cut through any stitches. For best results use FrayCheck on your buttonholes to prevent any fraying.
Placket
Before we can add the skirt to the bodice, we need to add a placket to the back skirt piece. Begin by finding the center of your back skirt piece. Starting along the top raw edge, cut a 2″ slit down the center back. Lay your placket strip so that the wrong side is facing up. Fold the long edge up 1/2″ so wrong sides are touching and press.
Match the long raw edge of your placket strip to the slit on your skirt so that right sides are touching. Pin it down to the point on the slit. Flip the strip so the raw edge is going up the other side of the slit. Pin your strip up the slit. Starting at the top of the slit, sew a 1/8″ seam allowance down the slit. When you get to the v point, make sure that your fabric doesn’t bunch up. Continue sewing up the other side of the slit. Clip the V-point on the slit, making sure not to clip through any stiching.
Press the seam towards the strip. Take your folded edge of the placket strip and fold it over the seam. Make sure the strip is covering the stitching. Sew 1/8″ from the edge to secure the placket and encase the seams. With your placket laying vertical, fold the left side up. Your placket will now be covered by the skirt. Clip off any excess and baste the left side of the placket to the skirt.
Attaching The Skirt
Sew two rows of gathering stiches along the top raw edge of your skirt. I like to sew one row at 1/8″ and the second at 1/4″ from the top raw edge. Start sewing at one side of the placket going around to the other side.
Flip your skirt inside out. Next, slip the bodice inside the skirt so that right sides of your bodice are facing the right sides of your skirt. Match the back edge of the bodice to the placket and pin. Next, match the side seams of the skirt to the side seams of the bodice and pin. I also like to pin the front center of my skirt to the front center of my bodice. Pull the gathering threads and adjust the gathers so they are evenly distributed around the bodice. Sew/serge your skirt in place.
Finish your dress/tunic by topstitching the bodice 1/8″ up from the skirt seam. I like to start at the back edge of the bodice and sew across the back, around to the front, across the other back, and then up the side of the bodice, around the neckline, and then back down the other side of the bodice to my starting point.
Finishing The Dress
If you chose to add buttons, you will sew them to the right back bodice. They will be sewn 1/2″ from the back bodice edge. You can also embellish your pockets with a button or bow at the pleat.
Day 4 Progress
Most of you will have a finished dress today! Yay! Be sure to upload your daily progress photo into the sew-along album for a chance to win free shop credit. Tomorrow I will focus on the optional pleated hemline and photographing the dress. I’ll see you all back here tomorrow!
Happy Sewing,
Chauncey