Lydia Sew-Along Day 1
Welcome friends! I am so excited for this month’s Lydia sew-along. This pattern is a must have in your collection. Lydia is perfect for dance or gymnastic leotards, swimsuits, twirl dresses, or comfy everyday wear. For day one of the sew-along we are going to select the options we will sew, select and prepare our fabrics, and print out the pattern pieces. So, how about we get started?
Pattern Options
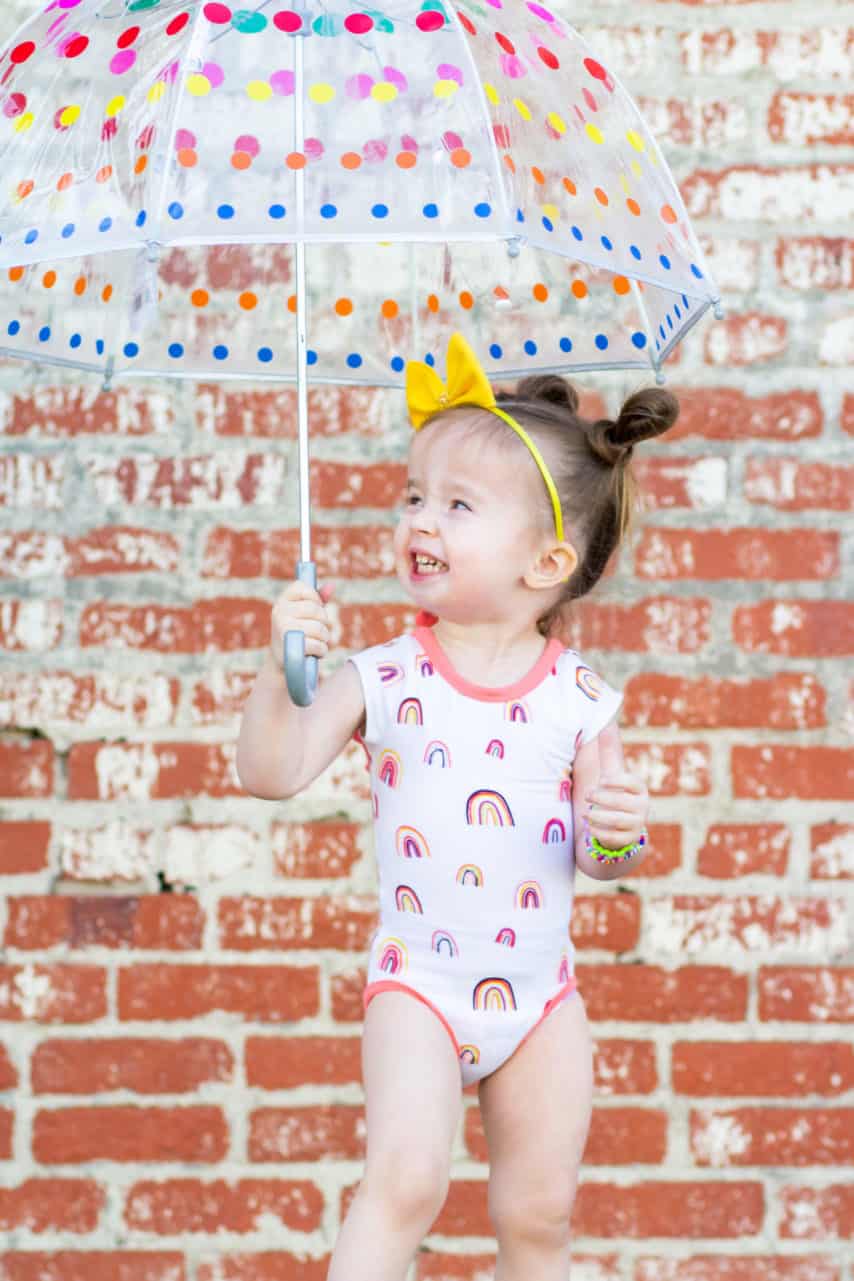
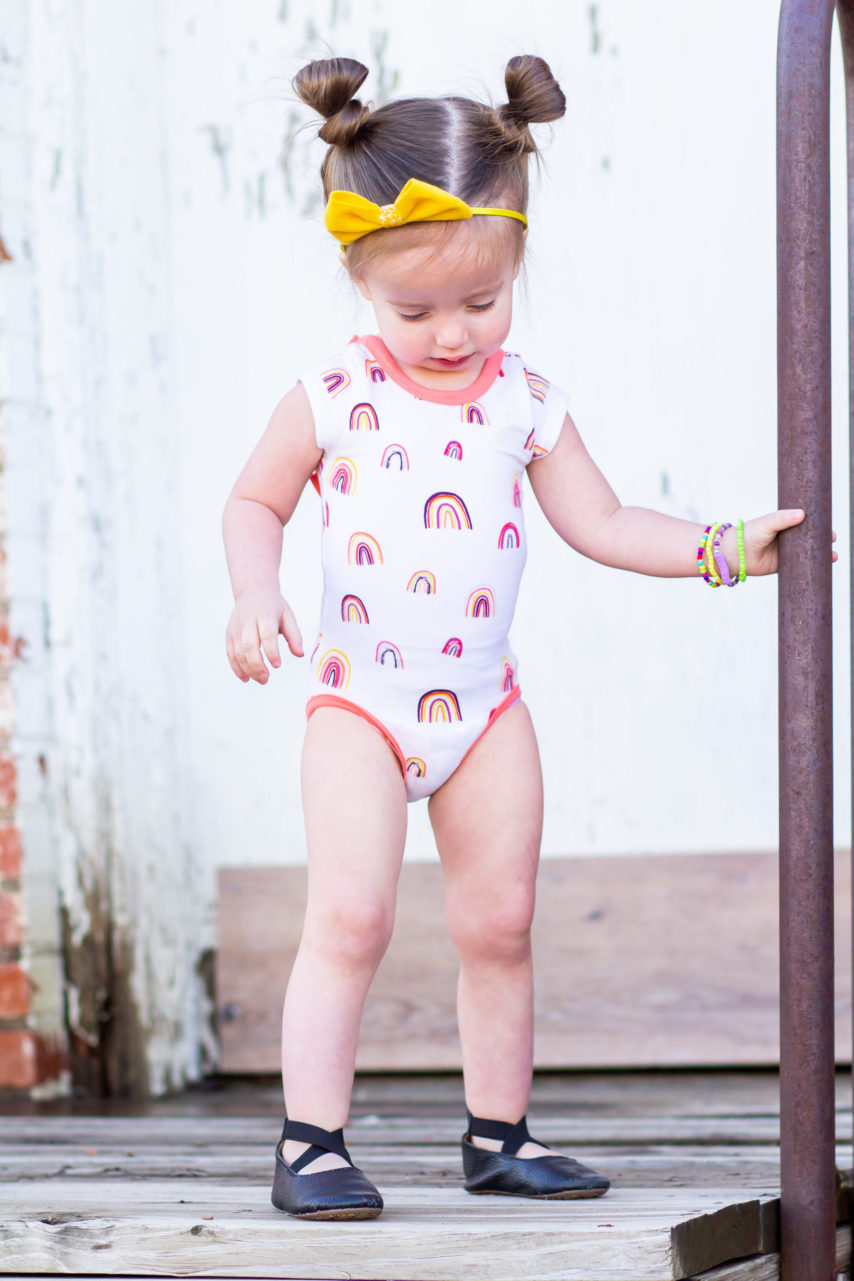
One of my favorite things about SLPco patterns is all of the options they provide. First we will look at the bodice options. The back bodice of Lydia comes with the option of a modest or scoop back. I have only ever sewn the scoop back because Chacely is so hot natured and the extra exposure helps keep her cool. You can also choose to add ties to the back bodice opening or omit them. However, if you are sewing for a little babe and choose to sew the scoop back version, I highly recommend adding the back ties. The ties function to keep the garment from sliding off their squirming little body. The back bodice also has an optional ruffle. I absolutely love the ruffle and the girly drama it adds. The last bodice option are the sleeves. Decide whether to sew sleeveless, short, 3/4, or long sleeves.
Finally, pick how you want to finish the bottom of your Lydia creation. You can choose to make a one-piece leo, skirted leo, or use the circle skirt add-on for a dress version. I’m really dying to try some of the skirts from the newly released patterns and hope they are released in baby sizes soon. I think the Lydia bodice would be adorable with the Hampton high-low-high skirt, Ella asymmetrical skirt, or Blaire high-low skirt.
Fabric
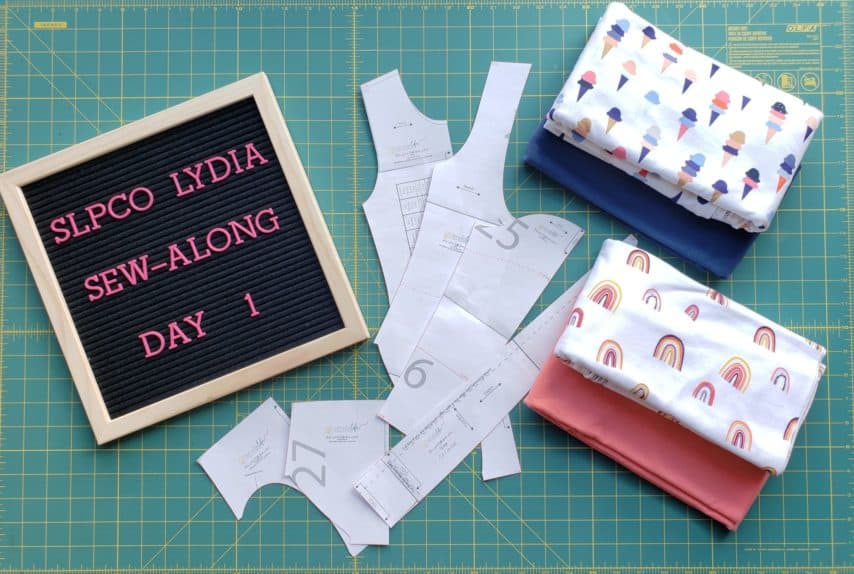
Lydia is a knit based pattern. You can use a cotton based knit fabric or swim knit fabric. If using a cotton based knit fabric make sure that it has a 4-way stretch. I prefer using knit fabric that is 95% cotton, 5% spandex. Knits of this variety have good recovery and are easy to work with. Art Gallery Fabrics has some of the nicest knit fabrics on the market. They are buttery soft with excellent stretch and recovery. All fabrics that I’ve used for this sew-along are from AGF.
If you are sewing with swim fabric, choose one that has at least 50-60% stretch. The fabric base can be either polyester/lycra or nylon/spandex blends. The swim fabric I purchased last year to make a Lydia swimsuit came from Spoonflower. I purchased the sport lycra base and found it to have plenty of stretch, the colors did not fade in chlorine, and the fabric had a nice moisture-wicking finish.

Before cutting into your fabric make sure you wash it. Fabrics tend shrink during the first wash and can alter the fit of your finished garment. I like to use free and clear detergeant for the first wash in cold water. I also toss in a Color Catcher in case there are any color bleeds. My fabrics never go in the dryer; I prefer to lay them flat to dry. Do not hang knit fabrics to dry as it can warp the fabric.
Supplies
I cannot stress enough the importance of using a new needle when sewing with knits. Knit fabrics tend to be bulkier than woven fabrics. I use a Brother machine that I purchased from Walmart and if I do not use a new needle then my machine will skip stitches due to the bulk. For this sew-along I used Schmetz Jersey/Ball Point needles.
A nice iron is a must have sewing tool. Some knit fabrics have a tendency to roll once cut. You can use spray starch and an iron to keep your fabrics flat while you work with them. You will also need an iron if you choose to hem your back bodice ruffle and to press your fabric pieces.
When you get to the steps of adding binding, Clover Wonder Clips will be your best friend. I love to use these clips because as I’m stretching the binding, if I find that one section is more slack than another, I can quickly and easily remove and re-position the clips. Clover also makes a Hot Ruler/Hot Hemmer that can be great for ironing the hem of your ruffle. You will see it used in my video for day 2 when I show you how to easily hem the back bodice ruffle.
Pattern Pieces
Before you choose the size you will sew, please measure your model. Do not guess. This can make all the difference in the final fit of your garment. Once you have your measurements, then choose the correct size based on the size chart in the pattern instructions.
SLPco patterns have layers that allow you to print only the pattern size you need. If you need help using the layer features, Gail has a wonderful tutorial that will walk you through using them. After you have all of your pattern pieces printed, check your 1-inch square to make sure your pieces printed to the correct scale. Tape your pattern pieces together using the grid on the outer edges of the paper. I posted a video last month during the Isla sew-along with a quick way to tape your patterns together. You can find this video by searching my name in the Facebook fan group.
Day 1 Progress
For day one, snap a photo of your pattern pieces and fabric and share it in the fan group Lydia Sew-Along album for a chance to win one of the daily shop credit prizes! I’ll see you back here tomorrow when we’ll cut into our fabric and get started on the back bodice ruffle.
Happy sewing,
Chauncey